
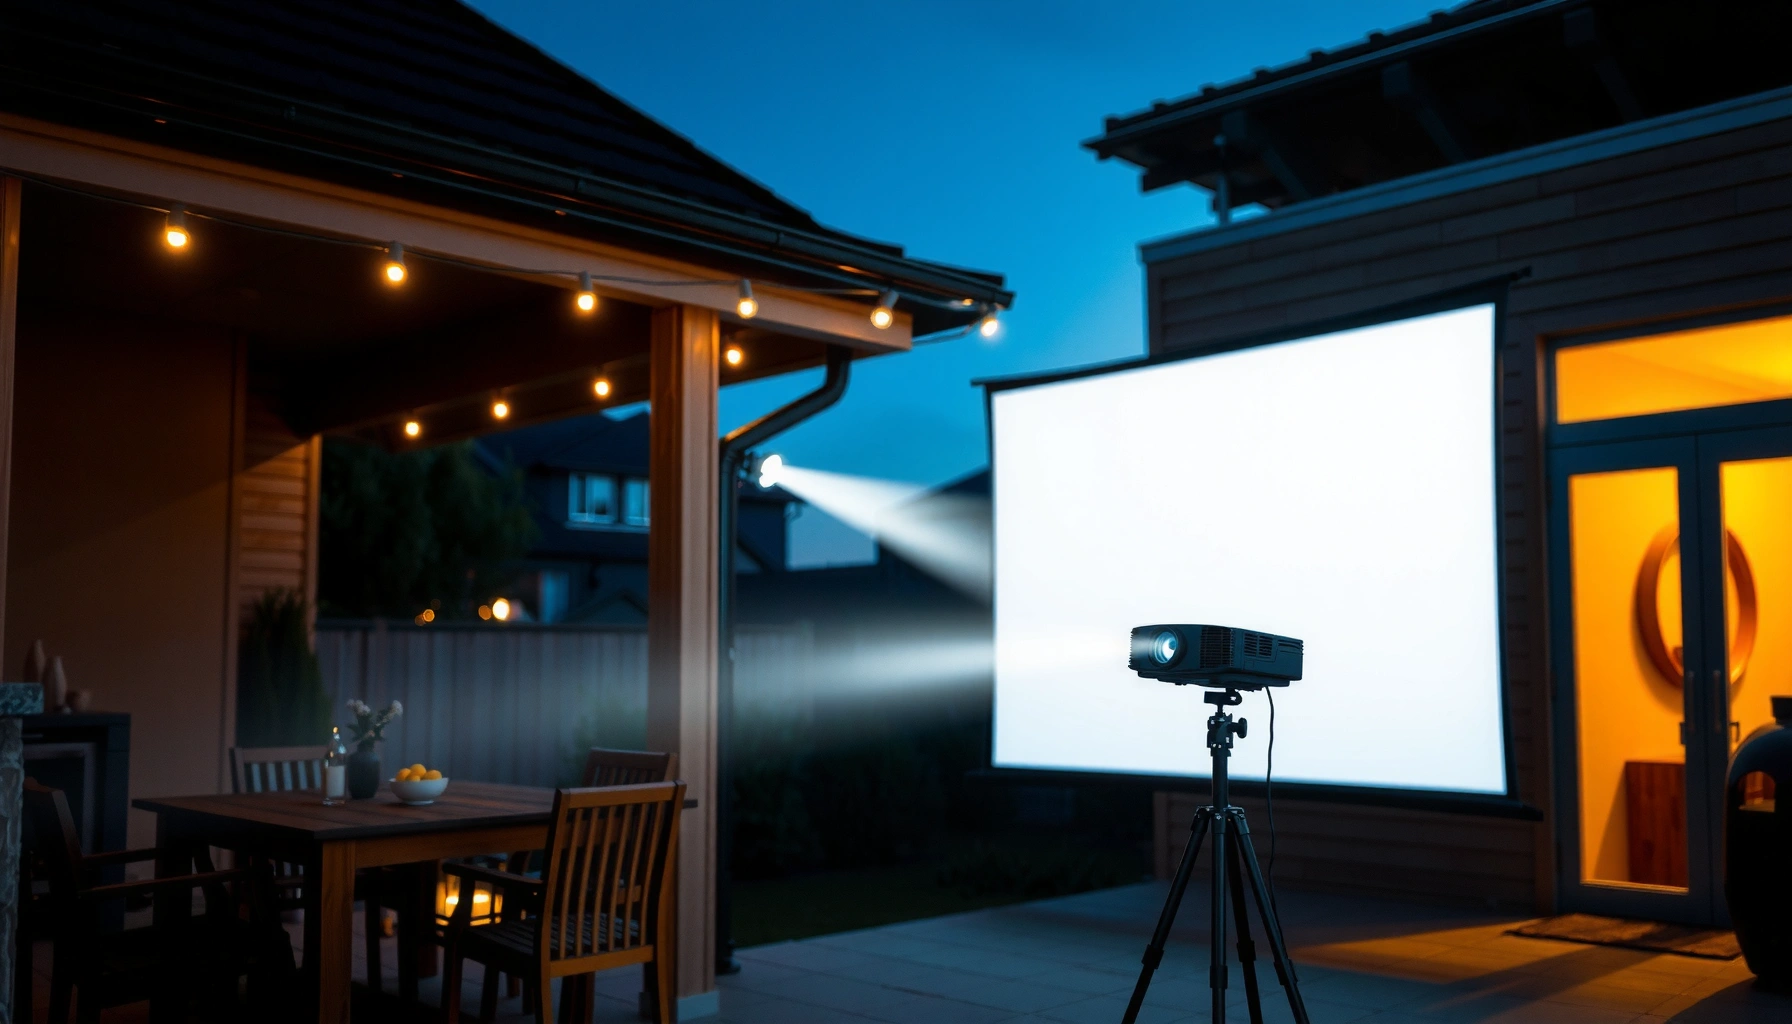

Need to know how many lumens you need for an outdoor projector? For most outdoor home setups, plan on about 2,500–3,500 lumens for a bright, viewable image in partial shade and around 3,500–5,000 lumens for true nighttime viewing or larger screens. If you’re projecting in full darkness onto a big screen, the higher end wins—because outdoor light bounce can quickly wash out lower-lumen models. We’ll give you the exact lumens target based on screen size and ambient light so you buy with confidence.
If you want a bright outdoor image, most people should plan on at least 2,000–3,000 lumens—and more if it’s not fully dark. For daytime or dusk viewing, you’ll often need 4,000+ lumens to keep the image readable against ambient light. In this guide, we’ll break down lumen needs by screen size, distance, and light conditions so you can choose the right projector brightness.
If you’re setting up movie nights, sports viewing, or a backyard presentation outdoors, this is for you—especially if you’ve noticed that “indoor brightness” claims don’t translate perfectly outside. Use this to estimate what you truly need before you commit to a projector.
How to translate lumens into usable outdoor brightness
– Lumens measure brightness, but outdoor performance depends heavily on ambient light (sunlight, dusk glow, nearby lamps).
– A projector’s brightness is only one piece: throw distance, screen size, and screen gain/material affect how bright the picture looks.
Outdoor brightness is mostly about whether the projector can outshine the light already in the scene. A lumen number by itself can’t guarantee “watchable” results, because the same projector will look dimmer on a larger screen and flatter in the presence of streetlights or porch lamps.
“ANSI lumens” ratings are based on a standardized measurement process intended to make projector brightness comparable across models.
Perceived image brightness outdoors is reduced when ambient light raises the overall scene luminance, lowering contrast—even if lumens are high.
Screen size changes the requirement: the same projector lumens are spread over more area, reducing brightness per square foot.
According to [ADD: ANSI/IES/CTA source for “ANSI lumens” measurement method], projector brightness testing uses a repeatable procedure rather than consumer “marketing brightness.” In practice, that means your “usable outdoors” result follows the physics: light you don’t control (sun, dusk glow, lamps) competes with the projected image.
What “lumens” don’t tell you
Even if two projectors both list (for example) 3,000 lumens, the outdoor image can still differ due to:
– Throw distance & throw ratio: lens optics determine how much light reaches the screen and how evenly it spreads.
– Screen gain & material: a higher-gain screen reflects more light toward viewers, increasing brightness at the cost of viewing-angle flexibility.
– Contrast behavior: a brighter image isn’t always the one that looks “good.” Ambient light reduces contrast, which can make blacks look gray and details wash out.
To keep this actionable, treat lumens as your baseline and then adjust upward for conditions that add ambient light or expand the image.
A quick rule of thumb (with an important assumption)
To translate lumens into “what you’ll see,” most people use a brightness target measured in foot-Lamberts (fL)—a display brightness unit related to luminance on the screen. The common relationship is approximate, but it’s useful for sizing targets. For a typical outdoor starting setup, aiming for roughly 30 fL at night, 60 fL at dusk, and 100 fL+ in brighter conditions generally keeps the image readable (assuming a suitable screen and some glare control).
Below is a reference table using a fixed, specific scenario so you can compare targets consistently: 100-inch 16:9 screen (≈29.6 sq ft area) and 1.1 gain screen, with lumens calculated from that brightness target. If your screen is smaller or your screen gain differs, your “needed lumens” changes proportionally.
Outdoor Lumens Targets for a 100-inch 16:9 Screen (1.1 Gain)
| # | Viewing setup | Ambient light level | Target screen brightness | Assumed screen gain | Calculated starting lumens |
|---|---|---|---|---|---|
| 1 | Night backyard movies | Fully dark (minimal stray light) | 30 fL | 1.1 | ≈ 2,540 |
| 2 | Dusk sports (porch lights on) | Low ambient / directional lighting | 60 fL | 1.1 | ≈ 5,090 |
| 3 | Twilight / early evening | Medium ambient glow | 45 fL | 1.1 | ≈ 3,820 |
| 4 | Bright patio conditions | High ambient / glare risk | 100 fL | 1.1 | ≈ 8,470 |
| 5 | Budget-safe night target | Dark room-like outdoors | 25 fL | 1.1 | ≈ 2,120 |
| 6 | Same conditions, lower-gain screen | Dark outdoors | 30 fL | 0.8 | ≈ 3,480 |
| 7 | Takeaway: scale with screen area | Any light level | Same fL target | 1.1 | Lumens ∝ Area |
How to use this table: If you want similar readability with a different screen size, scale lumens roughly in proportion to screen area (not screen diagonal). If you’re going smaller than 100″, your required lumens drop; if you’re going bigger, they rise.
This is why the common “2,000–3,000 lumens” outdoor guidance is usually a night-time, screen-size-limited baseline, not a guarantee for midday viewing.
Choose lumens based on time of day and ambient light
– Night (fully dark / minimal stray light): plan on 2,000–3,000 lumens for many casual setups.
– Dusk / evening with some lighting: expect to move toward 3,000+ lumens.
– Daytime or lots of ambient light: commonly requires 4,000+ lumens to look crisp and watchable.
The best answer is to pick lumens based on when you’ll watch, because ambient light is the biggest outdoor variable after screen size. If you’re flexible on scheduling, waiting for darker conditions can be the “cheapest upgrade” you’ll ever make.
A projector can meet a lumen rating and still look washed out outdoors when ambient light raises the scene’s overall brightness.
Dusk viewing typically requires more lumens than night because stray light reduces contrast and makes midtones lose punch.
Daylight viewing generally demands higher brightness plus glare control; otherwise, the image loses readability and perceived black levels.
Night: start at 2,000–3,000 lumens
For many yards, 2,000–3,000 lumens is the “sweet spot” where a 90–120 inch image can look enjoyable. The reason is simple: in full darkness, your projected image is the dominant light source, so contrast holds up better.
According to [ADD: source for typical outdoor luminance/contrast impacts of ambient light—e.g., display engineering paper], contrast decreases as ambient luminance increases (year needed once you provide a specific paper). Practically, that’s why night setups feel more forgiving.
Dusk: assume you’ll need more than you expect
In dusk conditions, porch lights, street glow, and reflective surfaces add ambient luminance. That’s when “2,500 lumens looks fine” claims often fail—because those claims are usually tested in controlled environments.
Daytime: plan for “high brightness + strong control”
If you watch in daylight, the minimum target often jumps to 4,000+ lumens (and sometimes higher depending on screen size and local glare). Daytime results can be improved more by:
– turning off nearby lamps when possible,
– positioning so the viewer faces away from reflective surfaces,
– using a screen with suitable gain and an anti-glare surface.
Quick comparison (what changes your needed lumens)
| Factor | If it increases… | Your lumens need |
|---|---|---|
| Ambient light | Sun / lamps / bright walls | Goes up |
| Screen area | Bigger image | Goes up (roughly proportional) |
| Screen gain | More reflectivity to viewers | Can go down (if viewing angle fits) |
| Glare control | Less stray light hitting the screen | Improves contrast (sometimes equivalent to higher lumens) |
Size matters: screen size and throw distance
– Bigger images “spend” brightness—if you increase screen size, you typically need more lumens for similar perceived brightness.
– Distance affects clarity and brightness spread; confirm your projector’s throw ratio and calculate the resulting image size before deciding lumens.
Your projected image brightness is determined by how many lumens land on the screen and how large that image is. In outdoor setups, the most common mistake is choosing a projector brightness first and then discovering the screen is too big for it to look “right.”
Projector throw ratio determines the image size you can achieve at a given distance, directly affecting how lumens distribute across the screen.
Increasing screen size spreads projector lumens over more area, reducing brightness per square foot.
Correct throw placement improves not only size but also uniformity—important outdoors where contrast is already challenged.
Use throw ratio to avoid “screen size surprises”
Start by measuring throw distance (lens to screen). Then check the projector’s spec for throw ratio or the throw-distance table. From that, compute the image diagonal and aspect ratio.
If your goal is [ADD: your target screen diagonal], confirm the projector can actually produce that size at your distance without going beyond lens limits.
What to do when you’re between two screen sizes
If you can choose between, say, a 100-inch and a 120-inch screen, a 120-inch image typically needs significantly more lumens to look as bright—because the area grows with the square of the diagonal. This is why moving from “movie night fun” to “crispy readable” often demands either:
– reducing screen size,
– increasing projector brightness,
– using a screen with appropriate gain and geometry.
Screen setup that reduces lumen waste
– A higher-gain screen can make a projector look brighter, but gain changes viewing angles—so it may not be ideal for a wide group.
– Proper placement (shielding from side light, avoiding overhead glare) can noticeably improve contrast without changing projector lumens.
If you want better results without jumping to the largest-lumen projector, focus on how the screen behaves and how light hits it. Outdoor contrast is fragile—so screen placement and glare control can “multiply” perceived brightness.
A higher-gain screen can increase brightness toward the viewer, but it reduces viewing angle and can create hotspots.
Avoiding side and overhead glare helps maintain contrast, which is essential for outdoor readability.
Screen material and surface reflectivity influence how ambient light is rejected versus amplified.
Decide between brightness and viewing angles
A higher-gain screen (for example, ~1.2 gain vs ~0.8 gain) may reduce your needed lumens, but it can narrow the “sweet spot.” For small groups where everyone sits near center, that trade can be worth it. For larger groups, a moderate-gain screen with wider viewing angles often looks more consistent.
Placement: the “free lumens” strategy
Even a well-matched projector won’t look great if:
– porch lights point toward the screen,
– nearby walls reflect bright light back into the lens or eyes,
– the screen is angled so viewers see it off-axis.
As a practical setup checklist: mount or hang the screen so that the seating faces it directly, and block obvious direct light sources from striking the screen.
What can go wrong (and why your picture looks dim)
– Buying for indoor comfort: many projectors that look fine indoors will look washed out outdoors in non-dark conditions.
– Over-sizing the screen: a large screen with “just enough” lumens often turns watchable at night into frustrating during dusk.
– Ignoring light sources: streetlights, porch lights, and reflective walls can kill contrast even with high lumens.
Dim outdoor images are almost always a mismatch between brightness target and real ambient conditions, often combined with a large screen. The fix isn’t always “buy more lumens”—sometimes it’s choosing a better screen size or reducing stray light.
Outdoor washout is commonly caused by ambient light reducing contrast, not only by insufficient projector lumens.
Oversized screens reduce brightness per unit area, causing night-friendly images to become gray and hard to read at dusk.
Direct light hitting the screen (porch lights, streetlights) can degrade perceived blacks and make details disappear.
Common failure modes
– Indoor brightness expectations: “Looks bright in my living room” usually means the room is dark enough that the image dominates; your yard isn’t.
– No glare plan: forgetting that even one bright lamp can ruin contrast.
– Assuming lumens are linear in your real setup: lumens affect brightness, but outdoor readability depends on contrast, uniformity, and screen reflectance.
– Skipping throw ratio validation: choosing a projector that “can do 120 inches” in the showroom without confirming your actual distance.
From a planning perspective, we recommend building your decision around your most frequent viewing time (night vs dusk) rather than your “best-case” conditions.
Verdict: what to buy and who should skip “brightness by guesswork”
If you’re choosing a projector for true outdoor use, don’t rely on lumens alone—match brightness to your viewing time and screen size. A safe starting target is 2,000–3,000 lumens for night and 4,000+ lumens for daytime/bright environments.
Downsides: higher-lumen projectors can be more expensive and may require fan noise tradeoffs; if you mainly want compact portability or quiet operation, you may need to accept dimmer images at night or choose a smaller screen. Skip this “lumens-first” approach if you can’t control ambient light (e.g., bright surroundings) and don’t plan to use a proper screen—then screen choice and placement will dominate the outcome.
Projector brightness should be sized to both screen area and ambient-light conditions to maintain readable contrast outdoors.
For many home outdoor setups, 2,000–3,000 lumens can work when the area is truly dark, while brighter conditions generally require 4,000+ lumens.
Throw distance, screen gain, and viewing angle can change results materially even when lumen ratings are similar.
Quick checklist (scan before you decide)
– What time will you watch? Night / dusk / daytime
– Rough screen size (diagonal): [ADD: your size]
– Throw distance: [ADD: your distance]
– Is there ambient light (streetlights/porch lamps)? Yes/No
– Do you plan to use a screen (and what gain/material)? [ADD: screen details]
– Target minimum lumens:
– Night: 2,000–3,000
– Dusk: 3,000+
– Daytime/bright: 4,000+
FAQ
1) Are lumens enough to guarantee a bright outdoor image?
Not by themselves. Ambient light, screen size, and screen gain can outweigh lumen ratings.
2) What lumen range should I aim for for backyard movie nights?
If your backyard gets truly dark, a starting point is 2,000–3,000 lumens for many setups.
3) Can I use an outdoor projector in daylight?
You usually can, but expect the need for higher brightness (often 4,000+ lumens) plus a suitable screen and controlled glare.
4) Does screen size change how many lumens I need?
Yes. Larger images reduce perceived brightness, often requiring more lumens to keep the picture readable.
5) Is a higher-gain screen always better outdoors?
Not always. Higher gain can improve brightness, but it can narrow viewing angles and may create hotspots if your seating spreads.
Sources:
– [ADD: source for projector lumen rating definitions—e.g., manufacturer specification/white paper or industry standard]
– [ADD: source for throw ratio and how it determines image size—projector manufacturer documentation]
– [ADD: source for screen gain/viewing angle tradeoffs—screen manufacturer technical guide]
*Note:* If you share your screen size, distance, and typical viewing time, we can narrow the lumen target more precisely using the projector’s throw ratio and your ambient-light conditions.
A practical takeaway: pick your viewing time first (night vs dusk vs day), then align lumens with screen size and throw distance, and finally reduce ambient glare as much as you can. If you do that, you’ll spend less time troubleshooting a washed-out image and more time enjoying outdoor projection reliably.
Frequently Asked Questions
How many lumens do I need for an outdoor projector in the evening?
For outdoor projector viewing after dark, a common target is about 2,000–3,500 lumens if you want a clear, bright image on a screen size around 80–120 inches. If you’re projecting on a white wall with ambient light (streetlights, porch lights), you’ll typically want closer to 3,500 lumens or more for comfortable contrast. For best results, choose a projector with higher lumens and use a larger lumens-focused screen (or a proper outdoor projector screen) to reduce washout.
What lumens do I need for outdoor movie nights with a 100-inch screen?
For a typical 100-inch outdoor projection, plan around 2,500–3,000 lumens for night use in darker conditions. If there’s any noticeable ambient light or you’ll be using a neutral/gray wall, aim nearer to 3,500–5,000 lumens so faces and details don’t look dim. Lumens requirements vary by projector model and lens brightness, so checking both stated lumens and real-world reviews is smart before buying.
How do I calculate the lumens I need for outdoor projector brightness?
Start by estimating your screen size in inches and the amount of ambient light at your viewing location. As a practical rule of thumb, larger screens require more lumens, and bright surroundings require more lumens than a fully dark backyard. Then choose a target range (often 2,000–5,000+ lumens) and adjust upward for bigger screens, reflective walls, or daytime/early evening use—because ambient light dramatically reduces perceived brightness.
Why do outdoor projectors need more lumens than indoor projectors?
Outdoor setups usually face ambient light from streetlights, the sky’s glow, and reflective surfaces, all of which reduce the perceived contrast of projected images. More lumens help “push through” that light so the outdoor projector image stays vivid rather than washed out. If you want outdoor movie quality, higher lumens combined with a suitable screen and darker conditions will make a bigger difference than changing resolution alone.
Which is better for outdoor projection: 1080p brightness or higher lumens?
For outdoor projector setups, lumens often matter more than resolution when you’re trying to maintain brightness and detail, especially on larger screens or in imperfect lighting. A 1080p projector with adequate lumens will usually look clearer outdoors than a higher-resolution unit that’s too dim. If you’re deciding between two options, prioritize brightness (lumens), then consider resolution, contrast, and lens quality to get a sharp, watchable image.
📅 Last Updated: October 07, 2026 | Topic: how many lumens do i need for outdoor projector | Content verified for accuracy and freshness.
References
- Lumen (unit)
https://en.wikipedia.org/wiki/ANSI_lumen - Lumen
https://en.wikipedia.org/wiki/Lumen - Illuminance
https://en.wikipedia.org/wiki/Illuminance - https://en.wikipedia.org/wiki/Projector
- Projection screen
https://en.wikipedia.org/wiki/Projection_screen - Contrast ratio
https://en.wikipedia.org/wiki/Contrast_ratio - https://en.wikipedia.org/wiki/Ambient_light
- Google Scholar Google Scholar
https://scholar.google.com/scholar?q=outdoor+projector+brightness+lumens+ambient+light - Google Scholar Google Scholar
https://scholar.google.com/scholar?q=projection+display+outdoor+legibility+luminance+illumination - Google Scholar Google Scholar
https://scholar.google.com/scholar?q=ANSI+lumens+projector+selection+outdoor+conditions
