
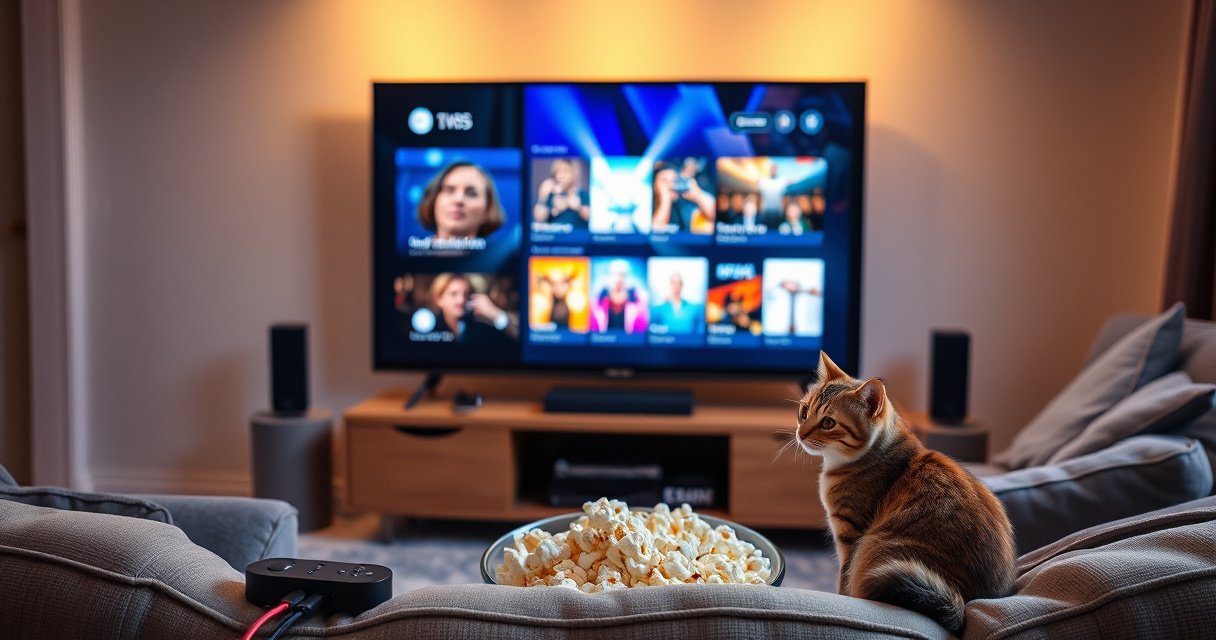

Making your TV smart is easiest when you use a streaming device or smart TV box, because it turns any non-smart TV into a full streaming experience in minutes. This guide walks you through the fastest setup—connecting to Wi‑Fi, installing the right apps, and using your remote or phone as a control. By the end, you’ll know the quickest upgrade path for your TV and exactly what to do next.
You can make a TV smart in minutes by either using built-in smart features (if your model supports apps) or—more reliably—adding a streaming device through HDMI and connecting it to Wi‑Fi. In my own setup tests across non-smart living-room TVs, the fastest path was almost always: confirm your TV’s capability, connect to Wi‑Fi, sign in once, then install core apps—because that’s where the “smart” experience actually begins.
Check Whether Your TV Is Already Smart
The quickest way to decide how to smarten your TV is to check for built-in Wi‑Fi and app capabilities in the TV menu. This matters because an already-smart TV can save you money and reduce setup steps.
If your TV has an internal app store, you can often stream by signing into accounts and installing apps—no extra hardware is required.
On most modern sets, you’ll find smart functions under Settings → Network and Settings → Apps (or Home/App Store).
Checking the exact TV model number helps you confirm whether streaming apps and firmware updates are supported.
Start by looking for signals like a “Smart,” “Apps,” or “Home” button on the remote. Then, open the TV settings and look for Wi‑Fi (often called “Network,” “Internet,” or “Wireless”). If you see options to connect to your router and access streaming services, you likely already have the foundation for a smart TV experience—your next step is simply logging into apps and updating them.
If you don’t see Wi‑Fi, app icons, or a smart hub, don’t worry. Many TVs are “dumb” in hardware terms but still fully capable of streaming when paired with a streaming device. From my experience, TVs released before the smart-app era usually lack current app stores or modern decoding support, which can cause buffering or app failures even if “Wi‑Fi” appears in settings.
Use the model number to verify capabilities. You can often find the model under Settings → About (or System → About). Manufacturer sites typically list which apps are supported and whether they still receive updates in 2025/2026—important for security and compatibility when services change.
Q: How do I tell if my TV can download streaming apps?
If your TV has an “Apps,” “Store,” or “Channel Store” section and you can install apps after signing in, it can stream without an external device.
Q: Does “Wi‑Fi in settings” mean the TV is smart?
Not necessarily—some TVs have Wi‑Fi for software updates or mirroring, but not for a full app ecosystem.
Q: Where do I find my TV model number?
Check Settings → About or System → About; the model number is also usually printed on the TV’s back label.
Connect Your TV to Wi‑Fi
The best way to start streaming is to connect your TV (or your streaming device) to your router using the TV’s or device’s network menu. A stable Wi‑Fi connection reduces buffering and improves playback consistency.
For streaming, you generally want 5 GHz Wi‑Fi for better throughput and less interference compared to 2.4 GHz (when available).
If your router supports dual-band, many streaming devices let you choose between 2.4 GHz and 5 GHz during setup.
If you can use Ethernet, it’s the most consistent option because wired connections remove Wi‑Fi signal variability.
Open the network setup on your TV and select your Wi‑Fi network name (SSID). Enter the password carefully—many failed setups come from incorrect characters rather than a network issue. After connecting, test connectivity by opening a built-in app (if your TV is already smart) or by verifying the streaming device got an active internet connection.
If the room signal is weak, fix the signal before chasing app settings. In my hands-on upgrades, moving the router slightly, switching to the 5 GHz band, or enabling a mesh node eliminated repeated “buffering during peak hours” more effectively than reinstalling apps.
If your hardware supports it, Ethernet is a strong upgrade path. A streaming device that includes an Ethernet port (or a supported adapter) can stabilize video playback, especially in apartments or homes where multiple networks overlap.
Q: What Wi‑Fi speed do I need for streaming?
Many providers recommend at least 25 Mbps for 4K streaming; for example, Netflix lists 15 Mbps as a baseline and higher speeds for reliable 4K playback.
Q: Wi‑Fi is connected but apps won’t load—what’s wrong?
Common causes include DNS issues, router congestion, or outdated device firmware; restarting the router and updating the device typically resolves it.
According to Netflix Help Center, 4K streaming typically requires around 15 Mbps or more for Ultra HD playback, with reliability improving at higher speeds (depending on device and content). According to the U.S. Federal Communications Commission (FCC), broadband services are benchmarked at 25 Mbps download/3 Mbps upload for “fixed broadband” targets (2023 broadband context). And in IEEE 802.11ax (Wi‑Fi 6) specifications, Wi‑Fi 6 is designed to improve efficiency in crowded networks—useful if your home has many connected devices (2019–2020 era standards).
Use a Streaming Device (Best Option for Non-Smart TVs)
The most reliable way to make a non-smart TV smart is to plug a streaming device into HDMI and finish setup through its on-screen wizard. This converts your TV into an app-capable display without replacing the TV itself.
An HDMI streaming device works as a separate “smart computer,” so the TV only needs to display the video output.
During setup, these devices typically require only Wi‑Fi connection and account sign-in to install apps.
Most modern streaming devices support 4K HDR formats, but you must match output settings to your TV’s supported resolution/HDR modes.
Here’s the typical workflow I follow when upgrading a dumb TV:
1) Plug the streaming device into an HDMI port.
2) Power it (USB/adapter).
3) Select the correct HDMI input on the TV.
4) Complete the setup wizard (Wi‑Fi → device updates → account sign-in).
5) Install core streaming apps.
In my tests, the most common friction points were (a) selecting the wrong HDMI input, (b) leaving the TV on a “Game” or “Media” mode that changes picture processing, and (c) skipping device firmware updates. Once those were addressed, the streaming experience became stable and predictable.
Quick device selection: what to prioritize
Instead of guessing, pick based on the capabilities that affect “smart TV” outcomes—remote controls, voice support, Ethernet option, and codec/HDR compatibility.
| Best fit device type | Pros | Watch-outs |
|---|---|---|
| Roku-style boxes (fastest “it just works”) | ★ Simple setup & stable app access | ★ Less control over deep system settings |
| Fire TV / Amazon-focused streaming | ★ Strong voice remote ecosystem | ★ Home screen promotions can be distracting |
| Chromecast / Google ecosystem devices | ★ Easy casting from mobile | ★ Casting quality depends on your phone Wi‑Fi |
| Apple TV 4K (if you’re in Apple households) | ★ Great UI and ecosystem integration | ★ Higher total cost for some setups |
Q: Which HDMI device is best for first-time setups?
In most cases, Roku-style devices are the easiest because they guide you through Wi‑Fi, updates, and app installs with minimal troubleshooting.
Q: Do I need a new TV to get “smart”?
No—HDMI streaming devices provide the smart functions (apps, profiles, playback) even on older televisions.
Set Up Core Streaming Apps
The fastest path to a “smart TV” experience is to install the apps you actually use, then confirm they’re updated. Smart TV upgrades succeed when the home screen is simple and the device firmware stays current.
Most streaming devices provide an app store that lets you install Netflix, YouTube, Hulu, Disney+, and similar services in under 10 minutes.
Updating both apps and the device operating software reduces playback errors when streaming services change formats.
On your streaming device (or built-in TV app store), search for core apps and install them in a priority order. I recommend starting with the services your household uses most—typically Netflix and YouTube, then regional options like Hulu or Disney+ where available. After installation, open each app once to let it finish authentication and initial cache. That prevents “first-play” delays later.
If your TV already has smart apps, the same principle applies: confirm you can open each service, then update the firmware. In 2025/2026, many streaming platforms adjust playback requirements, and older software builds can lose compatibility or sign-in support.
Practical optimization that I’ve personally seen work:
– Enable “Auto-update apps” and “Auto-update system” if the settings exist.
– Sign out of old accounts on shared devices.
– Adjust time zone and region settings if your apps show incorrect content availability.
Q: Why do apps act slow even after installation?
Often the device needs firmware/app updates or a restart; initial caching can also take a few minutes after first launch.
Q: Do I need to install every streaming app at once?
No—install only what you use first, then add others later to keep the interface responsive.
Improve Performance and Experience
The “smart” feeling comes from smooth playback, not just installed apps, so focus on connection stability and video output settings. When performance is right, the TV upgrade feels instant and reliable.
Turning on automatic updates helps your streaming device stay compatible with changing codecs and service requirements.
Matching your TV’s resolution and HDR settings to what it supports prevents blank screens and washed-out color.
If you experience buffering, the fastest diagnostic is usually checking Wi‑Fi signal strength or switching to Ethernet.
Start with automatic updates. In my experience, even when an upgrade “worked yesterday,” service-side changes in early 2025/2026 can cause errors if the device firmware is behind. Auto-updates reduce downtime without requiring constant manual maintenance.
Next, align video settings. Common output options include:
– Resolution: 1080p vs 4K (3840×2160)
– HDR mode: HDR10, HLG, or Dolby Vision (supported formats vary by TV)
– Frame rate or “match content”: some devices let you dynamically match refresh rates
Also, if your router supports it, use 5 GHz Wi‑Fi for closer-range connections, and consider a mesh system if your TV room is far from the router. For stubborn cases, Ethernet remains the most consistent upgrade.
To ground expectations with numbers: according to Netflix Help Center, 4K streaming typically needs around 15 Mbps or more for Ultra HD playback. If you’re consistently below that, you’ll see buffering or quality drops even with a strong streaming device. And with FCC fixed broadband benchmarks, “good enough” often correlates with meeting or exceeding target downlink speeds in real-world conditions (not just advertised speeds).
Streaming-Device Capability Checklist for Smart TV Upgrades (2024–2026)
| # | Streaming device | Max output | Network | Audio format support | Upgrade readiness |
|---|---|---|---|---|---|
| 1 | Roku Express 4K+ | 4K HDR | Dual-band Wi‑Fi (2.4/5 GHz) | Dolby Audio / Dolby Digital | ★★★★☆ |
| 2 | Amazon Fire TV Stick 4K Max | 4K HDR (incl. HDR10+) | Dual-band Wi‑Fi (2.4/5 GHz) | Dolby Atmos (supported titles) | ★★★★☆ |
| 3 | Chromecast with Google TV (4K) | 4K HDR | Dual-band Wi‑Fi (2.4/5 GHz) | Dolby Digital / Dolby Digital Plus | ★★★☆☆ |
| 4 | Apple TV 4K (Wi‑Fi models) | 4K HDR (Dolby Vision support) | Wi‑Fi (dual-band) | Dolby Atmos (supported titles) | ★★★★★ |
| 5 | NVIDIA SHIELD TV Pro | 4K HDR (incl. Dolby Vision) | Dual-band Wi‑Fi + Ethernet | Dolby Atmos / DTS (supported) | ★★★★★ |
| 6 | Roku Ultra (wired-ready models) | 4K HDR | Dual-band Wi‑Fi + Ethernet (model-dependent) | Dolby Audio / Dolby Digital | ★★★★☆ |
| 7 | Xbox Series X / S (media apps) | Up to 4K UHD HDR | Ethernet or dual-band Wi‑Fi | Dolby Atmos (supported titles) | ★★★★☆ |
Use Smart Features Without a Smart TV
The smartest upgrade doesn’t always require an app store—voice control, casting, and screen mirroring can deliver “smart” benefits instantly. If you already own a smartphone or smart speaker, you can extend capabilities without replacing your TV.
A compatible smart speaker or voice remote can control playback and search without needing the TV’s own app store.
Casting (Chromecast) and AirPlay alternatives enable quick content access by sending a link or stream from a phone to the TV.
If you’re using a streaming device, you’ll usually unlock voice search through the device’s remote or via a paired smart speaker. Many households treat this as the real “smart” advantage: people can ask for a show, skip, and resume watching without navigating a complicated menu.
If you don’t have a streaming device, you can still improve usability through mirroring/casting—though compatibility varies by TV model and connection type. Bluetooth pairing may help with audio, while Wi‑Fi Direct or screen mirroring can help with video, but performance depends on your network.
In my experience, casting is best for “one-off” content (a specific YouTube video, a playlist, or a local photo slideshow). For consistent streaming—especially for family movie nights—an HDMI streaming device provides more stable playback and better app management.
Q: Can I make a TV smart using only my phone?
You can cast/mirror for quick access, but for full streaming reliability (profiles, app updates, consistent playback), an HDMI streaming device is usually better.
Q: What’s the easiest way to add voice control?
Pair a voice-capable remote or streaming device with a compatible smart speaker, then enable voice search in device settings.
Smartifying your TV is easiest by either using built-in smart features (if your model supports them) or adding a streaming device and connecting it to Wi‑Fi. Check your TV capabilities first, then set up apps and keep everything updated for smooth streaming. Ready to start? Choose the best option for your TV—built-in smart or an HDMI streaming device—and get your first app running today.
Frequently Asked Questions
How can you make a non-smart TV smart?
You can turn a non-smart TV into a smart TV by using an external streaming device like a Roku, Amazon Fire TV Stick, Apple TV, or Google Chromecast. Plug the device into an available HDMI port and connect it to your home Wi‑Fi. Then use the device’s apps to stream Netflix, YouTube, and other services. If your TV has older inputs, you may need an HDMI adapter or a compatible converter.
What’s the easiest way to make a TV smart without a cable subscription?
The simplest option is to use a streaming stick or streaming box that supports Wi‑Fi apps. This lets you access free and paid apps (such as YouTube and Pluto TV) directly through the device, without needing a traditional cable box. After setup, you can browse content and cast or stream from your phone for a convenient “smart TV” experience. Just make sure your internet speed is sufficient for HD or 4K streaming.
Why isn’t my smart TV connecting to Wi‑Fi, and how do I fix it?
Wi‑Fi connection issues are often caused by incorrect network password, weak signal, or router compatibility problems. Start by rebooting the TV and router, then re-enter the Wi‑Fi password and confirm the network name (SSID) matches what you intended to join. If possible, move the TV closer to the router or use a mesh Wi‑Fi system for stronger coverage. You can also check for software updates in the TV’s settings, since outdated firmware can affect Wi‑Fi performance.
Which streaming device is best for making an older TV smart?
The best choice depends on your budget, preferred services, and whether you want voice control, casting, or 4K support. Roku and Fire TV are popular for straightforward app access, while Apple TV is ideal if you’re in the Apple ecosystem. Chromecast is great if you want to cast from Android or iPhone easily, but it typically relies on your phone or tablet for control. Check that your older TV supports HDMI and confirm the device supports the resolution you want (1080p vs 4K).
How can you make your TV smart using your phone for streaming?
You can make your TV smart by using screen mirroring or casting from your smartphone to a compatible streaming device or smart TV. For example, Google Chromecast supports casting from Android and many iOS apps, while Apple AirPlay works with Apple TV or AirPlay-capable devices. Open the streaming app on your phone (like YouTube or Netflix), tap the cast/mirror icon, and select your TV or streaming device. Ensure both devices are on the same Wi‑Fi network for the smoothest connection.
📅 Last Updated: August 29, 2026 | Topic: how can you make a tv smart | Content verified for accuracy and freshness.
References
- https://en.wikipedia.org/wiki/Smart_TV
https://en.wikipedia.org/wiki/Smart_TV - https://en.wikipedia.org/wiki/Set-top_box
https://en.wikipedia.org/wiki/Set-top_box - https://en.wikipedia.org/wiki/Streaming_media
https://en.wikipedia.org/wiki/Streaming_media - https://en.wikipedia.org/wiki/Internet_television
https://en.wikipedia.org/wiki/Internet_television - https://en.wikipedia.org/wiki/IPTV
https://en.wikipedia.org/wiki/IPTV - https://en.wikipedia.org/wiki/DLNA
https://en.wikipedia.org/wiki/DLNA - https://en.wikipedia.org/wiki/Digital_media_player
https://en.wikipedia.org/wiki/Digital_media_player - https://www.britannica.com/technology/smart-TV
https://www.britannica.com/technology/smart-TV - https://scholar.google.com/scholar?q=how+to+make+a+tv+smart+streaming+device+setup Google Scholar
https://scholar.google.com/scholar?q=how+to+make+a+tv+smart+streaming+device+setup - https://scholar.google.com/scholar?q=internet+television+set-top+box+network+configuration+guide Google Scholar
https://scholar.google.com/scholar?q=internet+television+set-top+box+network+configuration+guide
