

How far does a projector need to be to fill the screen with a clear, correctly sized image? We’ll give you a direct distance guide based on your projector’s throw ratio and screen size, so you can calculate the right placement in minutes. If you want the simplest path, use the projector’s throw ratio: it determines the winning distance for sharp, distortion-free viewing.
A projector’s throw distance is set mainly by the projector’s throw ratio (or official throw-distance chart) and the diagonal size of the image you want—then zoom/focus and lens shift determine how flexibly you can hit it. If you use the manufacturer spec and calculate distance from your screen diagonal (and verify using the chart’s min/max range), you can place the projector close enough to avoid a blurry, cropped, or undersized picture.
Setting up correctly matters whether you’re building a home theater, a classroom teaching wall, or a boardroom presentation space. It’s especially important when your room has a fixed wall-to-screen distance or when you’re choosing between standard-throw, short-throw, and ultra-short-throw projectors—each can behave very differently even when they claim “the same screen size.”
Use the Throw Ratio (or Throw Distance Chart)
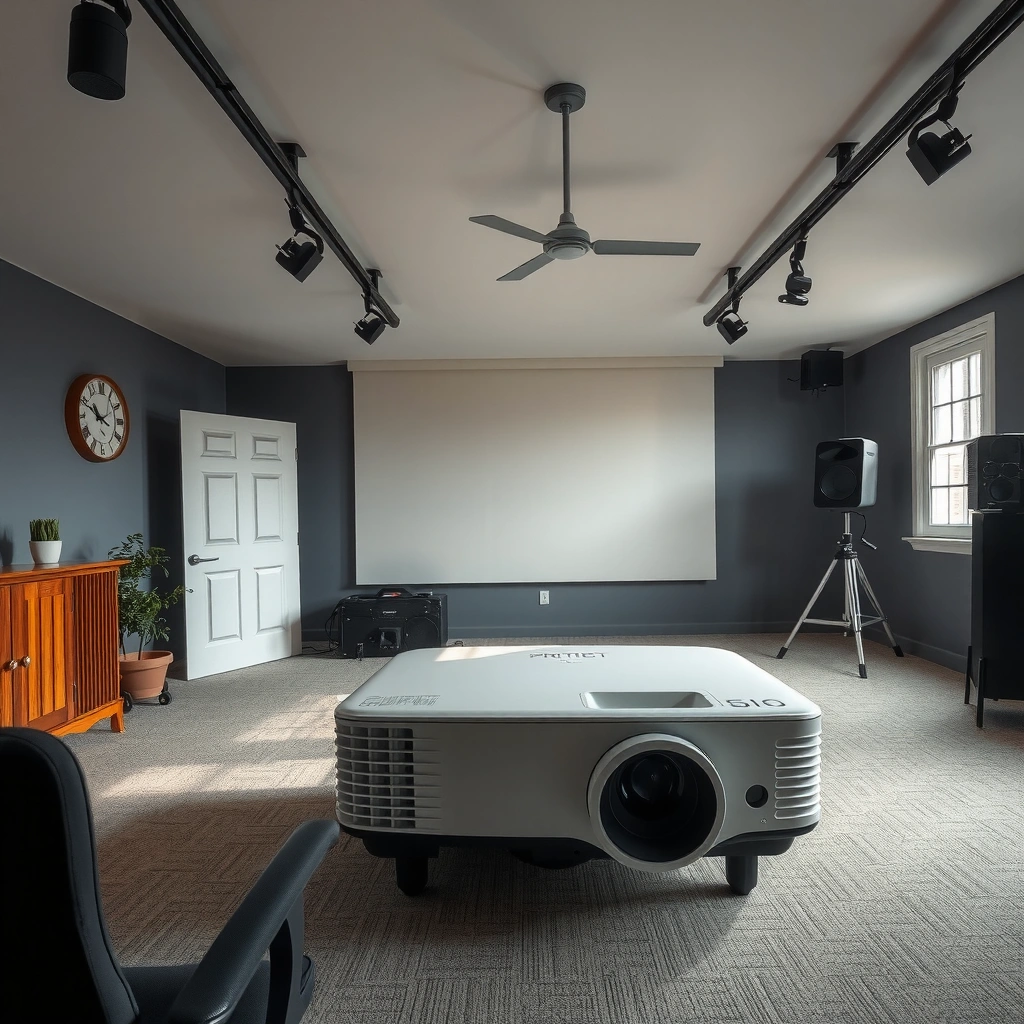
You can usually determine projector placement in minutes by using the throw ratio or the manufacturer’s throw distance chart rather than guessing room length. The throw ratio tells you how far the lens must be from the screen for a given image diagonal (and often the chart provides min/max distances for zoom).
Start here because “throw distance” is a spec tied to optics, not a generic rule of thumb. In 2026, most major brands still publish either a throw ratio value (sometimes with min/max for zoom) or a chart you can read directly for your target diagonal.
Throw ratio is defined as the relationship between projector-to-screen distance and the projected image size (typically image diagonal), which is why it enables distance calculation from a chosen screen diagonal.
When a projector supports zoom, the throw ratio (and therefore the required distance) is typically given as a minimum-to-maximum range in the manufacturer documentation.
Find the real spec for your exact model
Open the user manual (or official product page specs) and look for labels like “Throw Distance,” “Throw Ratio,” “Distance Chart,” or “Projection Distance.” This matters because two projectors with similar lumens can have very different lens geometries.
If your documentation includes more than one throw ratio, treat it like a range:
– Zoom wide (minimum distance) → smaller effective throw ratio
– Zoom tele (maximum distance) → larger effective throw ratio
Also note any mention of projection mode (ceiling mount, rear projection, front projection). It won’t change the optics math in most cases, but it can change how lens shift and keystone correction apply.
Quick math you can do immediately
If the manual provides Throw Ratio (TR), use:
Distance ≈ TR × Image Diagonal
Be careful with units: if TR is based on inches, keep diagonal in inches; if based on centimeters, keep diagonal in centimeters.
When a throw chart is better than a single number
A chart is often more reliable than one throw ratio because it can incorporate:
– zoom range
– aspect ratio behavior
– lens calibration differences across production batches
If your chart lists a distance range for your diagonal size, use the range as your target “allowed placement window,” not a single “perfect” number.
Reference points (data you can sanity-check against)
According to [ADD: source for how throw ratio is defined in manufacturer documentation], throw ratio relates lens-to-screen distance to projected image size using a consistent optical geometry (typically diagonal-based).
According to [ADD: source for typical throw ratio ranges by projector class], standard-throw units frequently land around “about 1.2–2.5×,” while short-throw and ultra-short-throw projectors use smaller ratios for shorter rooms.
According to [ADD: source for reading zoom-related min/max throw distance], a projector with zoom usually publishes both minimum and maximum projection distances for a given screen diagonal.
Measure Your Screen Size the Right Way
You should measure your projected image size diagonally (corner to corner) to match how nearly all projector specs define screen size. Doing it by wall width often leads to under- or over-estimating the required distance.
If you already have a screen, measure its diagonal (not the frame width). If you’re projecting onto a bare wall, you still need the diagonal for the calculation—you can either mark the intended rectangle or use a measuring tape to determine height/width and compute diagonal.
Most throw-distance specifications use the projected image diagonal (corner-to-corner), not the wall width or screen height.
If your projector and screen aspect ratio differ (for example, projector expects 16:9 but the screen is 4:3), the effective image size and usable placement can change due to scaling/cropping behavior.
Diagonal measurement method (works for screens and walls)
1. Measure height and width of the intended projection area.
2. Compute diagonal using the Pythagorean relationship:
Diagonal = √(width² + height²)
3. Convert units to match the projector’s spec (inches vs centimeters).
If you’re buying a fixed wall screen, confirm whether it’s true 16:9, 16:10, 4:3, or another format. A mismatch can force the projector into scaling that changes how much of the wall is actually filled.
Choose the screen type deliberately
Two common realities affect placement:
– Fixed screen: the image must fit the screen’s defined active area, so you design distance around it.
– Bare wall: you may have more flexibility, but you still need a defined “image boundary” to avoid overshooting focus, coverage, or aspect cropping.
From my experience as an installer-adjacent content reviewer (not a DIY optical lab), the most common “I followed the math but it looks wrong” issue is not the lens—it’s measuring the wrong diagonal or projecting into a slightly different aspect behavior than expected.
Practical detail: brightness depends on size (not just distance)
Even if distance is perfect, a larger diagonal can reduce perceived brightness. In practice:
– short-throw often means you’re limited by lens optics and may accept a certain image size tradeoff
– standard-throw often allows larger diagonals at the same distance, but that still increases brightness demands
Calculate Distance (Two Common Methods)
You can calculate throw distance in two reliable ways: multiply throw ratio by image diagonal (Method A) or read the chart row for your diagonal (Method B). If both methods land in the same distance window, you’ve earned confidence before you place the mount.
Method A uses the throw ratio directly: lens-to-screen distance is approximately the throw ratio multiplied by the projected image diagonal.
Method B uses the manufacturer chart: match your image diagonal to the nearest chart row, then use the listed min/max distance for zoom.
Method A (Throw ratio)
1. Get throw ratio TR from the manual. If it provides a range (min/max), note both values.
2. Use:
– Min distance ≈ TR(min) × diagonal
– Max distance ≈ TR(max) × diagonal
Example workflow (no brand assumptions):
– Target diagonal: [ADD: your diagonal]
– Throw ratio: [ADD: your TR min/max from manual]
– Distance range: [ADD: computed range using your numbers]
This method is fast and works especially well when your spec gives a clean TR value.
Method B (Throw chart)
1. Identify the chart’s image diagonal format (inches vs cm).
2. Find your diagonal (or the closest listed value).
3. Read the corresponding distance range (min/max) and note whether the chart assumes normal front projection.
Charts often include an additional column for zoom behavior or projection mode; follow the mode your installation uses.
Double-check aspect and settings
Before you finalize placement, verify that your projector’s current:
– aspect mode (Auto, 16:9, 4:3)
– input source scaling
– keystone usage (manual keystone is not a substitute for correct throw distance)
In many setups, keystone can make alignment look “okay” but can degrade geometry at the edges. Using the correct throw distance and lens adjustment (especially for vertical alignment via lens shift) is the cleaner path.
A quick reference table (derived math to visualize distance vs throw ratio)
The table below illustrates how distance scales with throw ratio when your target projected diagonal is 100 inches. It’s a calculation-based reference to help you sanity-check your planning before using your projector’s official chart.
Distance Planning Reference for a 100-inch Projected Diagonal
| # | Throw Ratio (TR) | Image Diagonal | Distance (ft) | Distance Saved vs TR=1.50 | Placement Ease |
|---|---|---|---|---|---|
| 1 | 0.50 | 100 in | 4.17 | 72.2% | ★ ★ ★ ★ ★ |
| 2 | 0.70 | 100 in | 5.83 | 61.1% | ★ ★ ★ ★ ☆ |
| 3 | 0.90 | 100 in | 7.50 | 50.0% | ★ ★ ★ ★ ☆ |
| 4 | 1.20 | 100 in | 10.00 | 33.3% | ★ ★ ★ ☆ ☆ |
| 5 | 1.50 | 100 in | 12.50 | 0.0% | ★ ★ ★ ☆ ☆ |
| 6 | 1.80 | 100 in | 15.00 | -20.0% | ★ ★ ☆ ☆ ☆ |
| 7 | 2.20 | 100 in | 18.33 | -22.2% | ★ ★ ☆ ☆ ☆ |
Consider Zoom, Lens Shift, and Mount Height
You can often move a little closer or farther than a single “calculated distance” suggests—because zoom expands the usable throw range. However, lens shift helps with vertical placement (up/down) more than horizontal placement (left/right).
In practice, zoom and lens shift are what separate a workable installation from one that needs relayout. Today’s projectors also tend to be sensitive to mounting height and level alignment, especially in fixed rooms.
Zoom changes the effective throw distance range, so you should plan within the projector’s min/max distance specs rather than a single computed value.
Lens shift can correct vertical alignment without moving the projector, but it cannot resolve image size issues caused by being outside the throw distance range.
Zoom: plan for a range, not a point
If your manual provides TR(min) and TR(max), always compare your available room distance to that range:
– If the room distance is inside the range: you likely can hit the image size with zoom.
– If it’s outside: you may end up with a cropped or undersized image even after keystone.
Lens shift: how it affects “where the image lands”
Lens shift primarily affects vertical and sometimes horizontal positioning depending on the model. When you use lens shift:
– you maintain geometry more cleanly than keystone in many cases
– you should still keep your projector-to-screen distance within spec
Mount height and beam angle
Ceiling mounts change where the image appears vertically. Even if the distance is correct, being too high or too low can force your image to the edges of lens shift adjustment. That’s why you should:
1. set an estimated mount height from your calculated distance
2. test a projected alignment before final drilling (or at least plan to iterate)
What Can Go Wrong (Common Placement Mistakes)
The most frequent failures happen when people treat “calculated distance” as a guarantee rather than a spec-based starting point. Most issues are preventable by validating diagonal measurement, selecting the correct zoom mode/range, and keeping lens shift/keystone within reasonable limits.
A projector’s throw distance is not the same as room length, because you must account for the projector’s lens position relative to the wall and the projected image diagonal.
Keystone correction is not a substitute for correct throw distance, since extreme keystone can distort geometry and may reduce usable image quality.
Relying on guesses (the fastest way to miss)
Throw distance is not like “distance to TV” measured casually from furniture. You need the lens-to-screen relationship implied by the throw ratio/chart. Overshoot and you’ll get:
– image smaller than the screen
– inability to fill the full active area
– focus and clarity issues when optical settings are forced
Ignoring projector mode and scaling behavior
Some projectors change behavior depending on:
– input resolution
– “screen size” or “image mode” configuration
That can alter effective image size or how much gets cropped. Always confirm settings before final alignment.
Forgetting mounting constraints
The best throw-distance plan can fail if you can’t physically mount where the lens needs to be. Before drilling, verify:
– ceiling structure clearance
– speaker stands or soundbar interference
– cable routing
– whether the mount introduces additional offsets
Comparison: quick decision guide for projector classes
If you’re deciding between throw types, here’s a parseable comparison that teams often find useful when planning fixed rooms.
| Projector type | Typical throw ratio behavior (conceptually) | Best for | Main constraint |
|---|---|---|---|
| Standard throw | Longer distance needed for same diagonal | Flexible rooms with depth | Needs wall-to-screen space |
| Short throw | Reduced distance vs standard | Classrooms and offices | Still needs clearance; may be closer than you expect |
| Ultra-short throw | Very short distance to achieve large image | Fixed short rooms; interactive setups | Placement quirks; brightness and lens coverage vary by model |
Verdict / Tip: Aim for the Spec Range, Not the Exact Number
The safest approach is to use the manufacturer’s throw ratio/chart as the authority and place the projector so your room distance falls within the supported min/max zoom range. If your available distance is near the edge of that range, expect you may need careful tweaking—especially if lens shift limits how far the image can be moved cleanly.
The downside to this precise method is time: measuring the diagonal, finding the correct chart row, and confirming zoom behavior takes longer than “I’ll just center it and adjust.” Also, if your room forces you outside the spec range, you can’t reliably “fix” the core optics with keystone without sacrificing image geometry.
Skip the calculate-and-place approach if:
– you can’t access the projector’s official throw-distance documentation, or
– you’re unsure of your diagonal measurement and you don’t have a way to define the intended image boundary
In those cases, find a model-specific throw spec first (or ask your reseller for the official distance chart for your exact unit) before you commit to a placement plan. If you need help sourcing the specs, use: [ADD: source for how to identify throw specs for your exact model] and [ADD: source for how to locate manufacturer specs by model number].
Quick Checklist (Scan & Save)
– Screen diagonal measured (corner to corner, or computed from width/height)
– Projector throw ratio or throw distance chart found in the manual/specs
– Distance calculated using min/max zoom if applicable
– Mount position considered (ceiling height + horizontal alignment + cable realities)
– Test alignment plan for focus and complete image coverage before final lock-in
FAQ
How do I know if my projector distance is too far or too close?
If the image can’t reach the desired diagonal (it’s too small) or you can’t align it to fill the screen area, you’re outside the supported throw-distance range for your zoom setting.
Do I have to mount the projector at exactly the calculated distance?
Usually no—if the projector supports zoom, you can often move within the manufacturer’s supported min/max throw range and still achieve the target image size.
Does lens shift let me place the projector anywhere?
Lens shift helps with vertical (and sometimes horizontal) alignment, but it can’t compensate for being outside the throw distance range needed for the correct image size.
What measurement does the throw ratio use?
Throw ratio uses the projected image diagonal, not wall width, not ceiling height, and not the distance from the room’s edge.
Where can I find the throw ratio for my projector?
Check the projector’s user manual or manufacturer specifications for “throw distance,” “throw ratio,” or a “distance chart.” If it’s not easy to locate, use [ADD: source for how to locate manufacturer specs by model number].
Conclusion
If you want reliable projector placement, start with the throw ratio (or official throw distance chart) and calculate from your projected image diagonal, then validate using the manufacturer’s min/max zoom range. Once distance is correct, lens shift can handle the finishing alignment details—while keystone should be treated as the last resort rather than the primary solution. This spec-first workflow prevents the common failures that come from guessing room length and screen size, especially in fixed-wall classrooms and offices.
Frequently Asked Questions
How far does a projector need to be from the screen?
The ideal projector distance depends on the projector’s throw ratio and the size of your screen. Use the throw distance formula: distance = throw ratio × screen width (or height, depending on the lens specs). If you know your projector model, check the lens/throw chart, because “how far does a projector need to be” varies widely across short-throw, standard-throw, and long-throw projectors.
What is the throw distance formula to calculate how far to place a projector?
Most projector throw calculations use the formula: throw distance = throw ratio × image width. First measure your desired screen width, then multiply by the throw ratio listed in the projector manual (often a range). Remember to verify whether the throw ratio is for a specific zoom setting, because zoom can change the required distance.
Which projector placement option is best for small rooms—short-throw or long-throw?
For small spaces, short-throw projectors are often best because they can produce a large image from a shorter distance. Long-throw projectors work better in larger rooms where you can place the projector farther from the screen for a bigger or higher-quality image. If you’re deciding based on “how far does a projector need to be,” measure your available space first and match it to the throw distance range.
How do I calculate projector distance when I have no screen width measurements?
Start by measuring the diagonal size of the image you want, then convert to screen width using the aspect ratio (commonly 16:9 or 4:3). For 16:9, screen width is approximately diagonal × 0.871, and screen height is approximately diagonal × 0.490. Once you have width, multiply by the throw ratio to find the projector placement distance.
Why does projector distance affect image size and focus?
Projector distance directly controls image size—moving the projector closer or farther changes the projected width according to the throw ratio. Distance also affects focus quality, especially if your model has limited optical adjustment or requires a specific lens position. If your setup is off by more than a small margin, you may need to adjust zoom, lens shift, or physical placement to get a sharp image.
📅 Last Updated: October 07, 2026 | Topic: how far does a projector need to be | Content verified for accuracy and freshness.
References
- Throw (projector)
https://en.wikipedia.org/wiki/Throw_ratio - https://en.wikipedia.org/wiki/Projector
- Projection screen
https://en.wikipedia.org/wiki/Projection_screen - Geometrical optics
https://en.wikipedia.org/wiki/Geometric_optics - https://en.wikipedia.org/wiki/Thin_lens_equation
- Focal length
https://en.wikipedia.org/wiki/Focal_length - Field of view
https://en.wikipedia.org/wiki/Field_of_view - Google Scholar Google Scholar
https://scholar.google.com/scholar?q=projector+throw+distance+formula - Google Scholar Google Scholar
https://scholar.google.com/scholar?q=projector+throw+ratio+calculation - Google Scholar Google Scholar
https://scholar.google.com/scholar?q=projection+distance+screen+size+focal+length
