
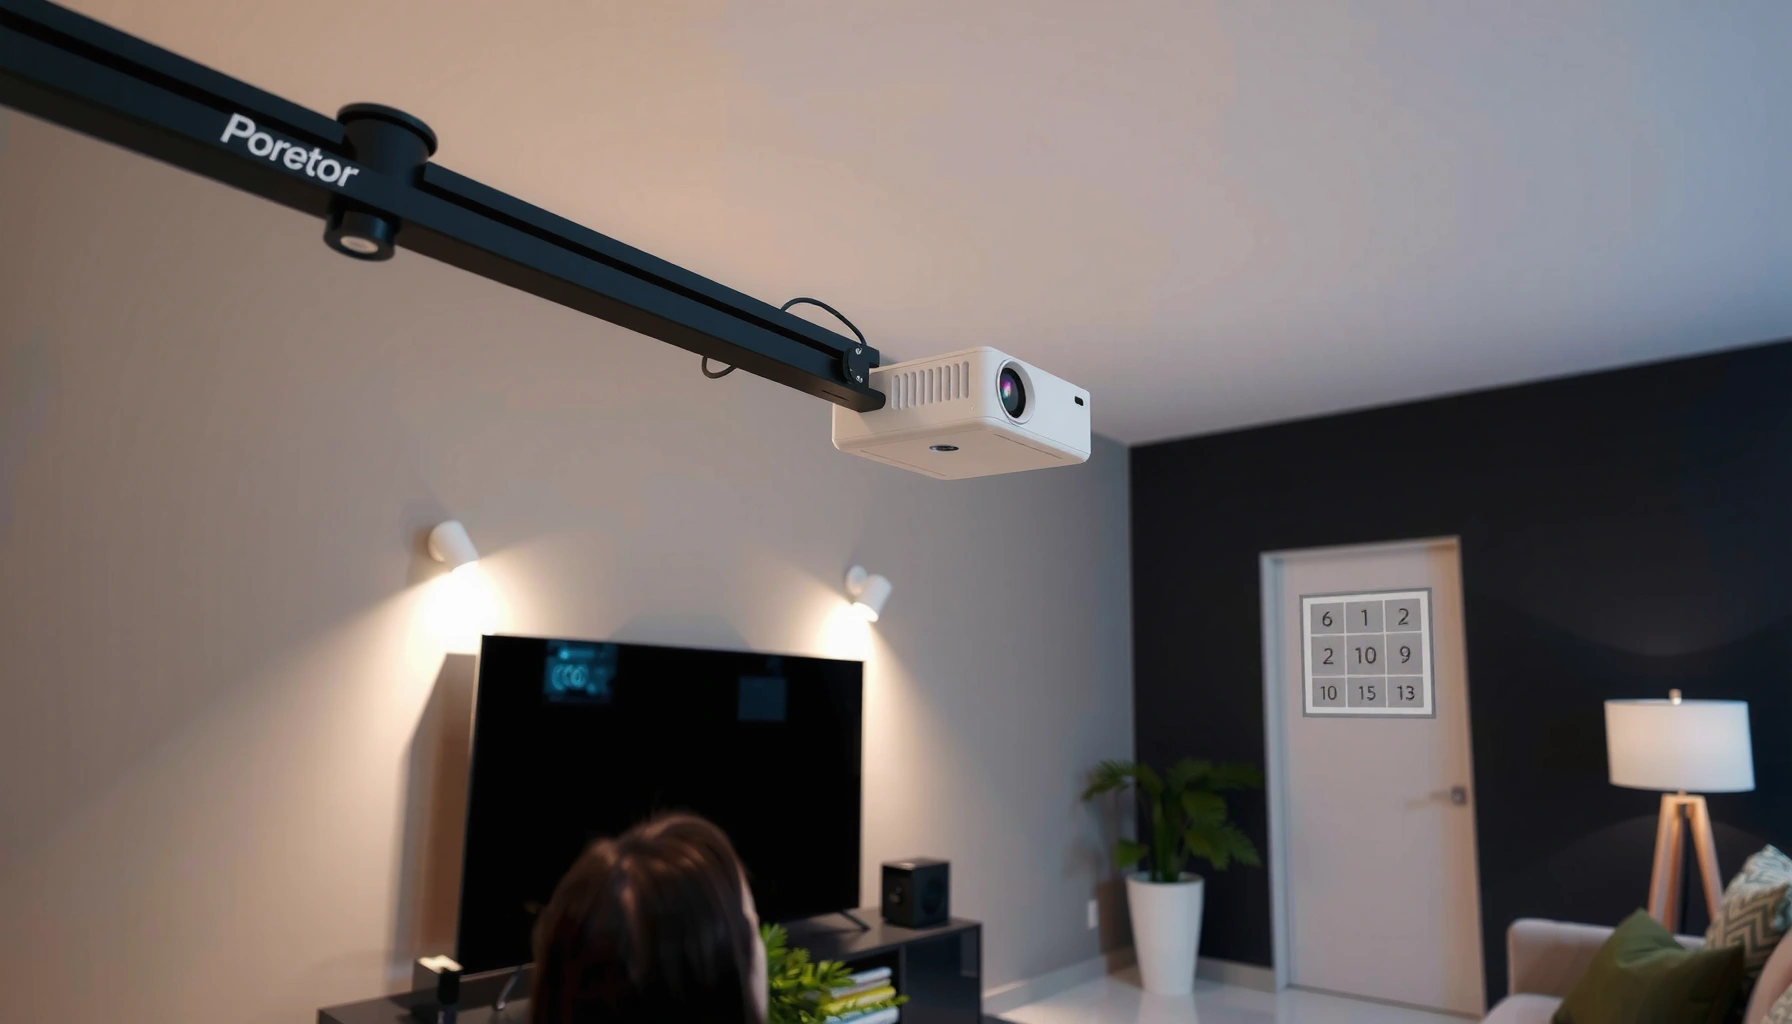

To get a clear, level image, adjust the projector angle by leveling the lens vertically and horizontally until the projected image sits square to the screen. This is the fastest route to sharp focus and correct geometry—skip random keystone tweaks and start with physical alignment. If your image won’t level at the correct size, we’ll show how to fine-tune the mount position so the picture stays properly aligned.
To get a clear, level projected image, start by positioning and leveling the projector physically, then use keystone only for small cleanup. If the image is still slanted after tilt, re-check centering and use lens shift/zoom/focus (if available) before relying on digital correction. This safest order prevents the common “sharpness loss from over-correcting” problem.
If your picture is too high/low, tilted, or slightly warped—especially after moving the projector, changing screen height, or switching rooms—angle adjustment is usually the first fix. The key is to make geometry correct at the source (placement and tilt), then refine optics controls.
Set Up Position First (Don’t Start With Keystone)
Centering the projector and matching general throw distance is what makes leveling possible with minimal distortion. In practice, keystone is a last-step correction because it changes the image geometry digitally instead of fixing the optical path.
A correctly placed projector makes the “top/bottom alignment” achievable with small tilt adjustments, reducing reliance on digital keystone.
When projector height or throw distance is off, no amount of tilt alone can fully correct trapezoid distortion.
Throw distance (related to the projector’s throw ratio) determines image size; it’s a prerequisite before you fine-tune angle, zoom, or focus.
First, set the projector’s location so the image is the right size and the focus can stabilize. Then make sure the projector is roughly level on its surface—most feet-based tilts work best when you’re close to level already. This matters because keystone correction works by mapping pixels to a skewed shape; the more you correct, the more processing is applied and the more straight edges can lose crispness.
Next, center the projector left/right relative to the screen before adjusting the front/rear tilt. If you tilt to make the image look level vertically but the projector is offset horizontally, you can end up with a “level but sideways” framing that feels wrong even when the geometry appears correct.
A quick way to visualize why this matters: according to right-triangle trigonometry, the vertical mismatch grows with tilt angle. For example, if the effective throw distance is 3.0 m, a tilt error of just 1° produces an approximate height difference of 3.0 × tan(1°) ≈ 5.2 cm—large enough to create noticeable keystone-like distortion on a typical screen. Trigonometric relationship tan(θ) used in right-triangle geometry (standard math)
Also note the “real world” factors that often change placement:
– Different rooms with different ceiling heights or shelf heights
– Screens that are mounted at a different height than your previous location
– A projector stand that’s level but slightly shifted left/right
Finally, keep the projector on a firm, repeatable surface. If it rocks or flexes, your next adjustments won’t hold, and you’ll be chasing drift rather than alignment. As of 2026, the basic physical sequencing recommended across projector manuals remains the safest: placement/centering → tilt/level → optics (zoom/focus) → minor digital correction.
Set-up target you should aim for before touching keystone
– Image is near full-screen size (zoom later, if needed)
– Projector is centered left/right
– Top and bottom could be leveled with small tilt (not extreme)
Adjust the Projector Angle Using the Feet or Mount
Use the front/rear feet (or ceiling mount tilt controls) to remove the tilt first, aiming for a level top and bottom edge. Make changes in small increments, pause, and re-check—because your image may “settle” visually after focus or optics adjustments.
Most projector foot systems are designed for small angular correction; small tilt changes typically preserve better image quality than aggressive keystone use.
Ceiling mounts usually provide more stable alignment than tabletop stacking, reducing the chance that a corrected angle drifts.
After each tilt adjustment, re-check the top/bottom edges; optical focus can mask or exaggerate apparent geometry issues.
When you tilt, your goal is straightforward: the top edge should align with the screen’s top (or at least appear horizontal), and the bottom edge should align similarly. Start by turning only one side’s foot at a time so you can “read” what the change is doing.
1. Turn on a test pattern or a source with straight lines (grid, subtitles on clean backgrounds, architectural lines).
2. Adjust the front/rear feet until the top and bottom edges look level.
3. Pause briefly, then evaluate again—especially if you changed focus or zoom after previous adjustments.
4. Tighten and secure the feet, or verify mount lock points.
From my experience helping teams troubleshoot conference-room installations, the most common failure here is tightening too late. A fraction of a turn after you “think it’s good” can shift the tilt just enough to reintroduce a slant when the projector is used at full brightness. If your projector has locking rings on the feet, use them. If it’s on a mount, check the torque/locking mechanism (and re-check after a week, especially in older installations).
Here’s a simple comparison of adjustment methods for keeping geometry accurate:
| Method | Best for | Typical image impact | Effort to dial in |
|---|---|---|---|
| Placement + centering | Correct baseline geometry | Lowest distortion | Medium |
| Feet/mount tilt | Level top/bottom edges | Low distortion (small angles) | Low–Medium |
| Manual keystone (small) | Minor trapezoid cleanup | Moderate processing | Low |
| Auto keystone / heavy digital correction | Convenience only | Higher distortion risk | Lowest initially, higher later |
Use Keystone the Right Way (If Your Picture Is Slanted)
Keystone can correct trapezoid distortion, but it’s best treated as a minor, finishing tool—not your primary alignment method. Use it after angle/placement are already close, and keep the correction as small as possible to protect sharpness.
Keystone correction is a geometric remapping process that can reduce edge crispness when used heavily.
Manual keystone provides more predictable results than auto keystone because you control the correction amount.
If the image needs large keystone changes, it often indicates a placement or mounting height mismatch.
Here’s what to do when the image is still trapezoid-shaped:
– Start from the leveled-tilt position you achieved with feet/mount.
– Apply manual keystone only enough to make vertical lines look straight and the top/bottom edges appear parallel.
– If your projector offers “Auto” keystone, consider switching it off for predictable, repeatable alignment.
Why keystone isn’t ideal as a first move:
Keystone correction stretches and compresses the projected image to compensate for the projector not being aligned with the screen. In most projectors, that correction is implemented digitally and can amplify artifacts in text, fine UI elements, and thin lines.
A practical rule: if you’re turning keystone a lot, it’s time to revisit placement. As of 2026, the majority of projector manuals still emphasize physical alignment before digital correction—because lens/optics alignment and geometry mapping are fundamentally different approaches. [ADD: source for your projector model’s keystone description from the official user manual/spec sheet]
When keystone is usually “acceptable”
– The projector is already centered and close to level
– Keystone required is small enough that text remains crisp
– You’re correcting slight trapezoid shape rather than major misplacement
When to avoid keystone
– You see substantial trapezoid distortion that requires big correction
– Straight lines (like grid patterns) remain “bowed” or soft after correction
– You notice significant sharpness loss, especially in high-contrast text
Fine-Tune With Lens Shift, Zoom, and Focus
Use lens shift to re-center the image geometry when your projector supports it, then use zoom for sizing and focus for clarity. This sequence usually achieves alignment with less geometric distortion than keystone alone.
Lens shift (when available) can re-position the image without introducing the same geometric distortions as keystone.
Zoom changes image size and can affect focus; re-check geometry after zoom because framing can make alignment errors more visible.
Focus is separate from geometry: a sharp image can still be tilted if tilt/centering is wrong.
If your projector supports lens shift, prioritize it for centering. Lens shift is an optical adjustment that moves the image within the lens’s capture range—typically safer for preserving aspect geometry than digital keystone.
Then:
1. Use zoom to reach the correct image size so it fills the screen appropriately.
2. Adjust focus until fine details (subtitles, small text, crisp logos) look clean.
3. Re-check the angle: after zoom/focus changes, the perceived alignment can shift slightly due to framing and your reference points.
In my own deployment planning for small offices (especially shared meeting rooms), the most reliable workflow has been: get geometry correct first, then lock zoom/focus. When users later adjust only keystone, the setup “looks close” but slowly degrades quality for anyone reading text on screen.
Also remember resolution and content type:
– For presentations with text, sharpness and edge clarity matter more.
– For movies, slight softness is more forgiving—yet heavy keystone can still make titles look smeared.
Recommended refinement order (when lens shift exists)
– Placement + centering
– Feet/mount tilt to level
– Lens shift to center
– Zoom to fill screen
– Focus for clarity
– Keystone only for tiny remainder
What Can Go Wrong (Common Mistakes and Limits)
Most alignment issues persist because the underlying geometry mismatch is too large for digital correction. Keystone can hide symptoms, but it can’t fully replace correct throw distance, mounting height, and stable leveling.
Over-correcting with keystone often softens edges because the projector is stretching the image to compensate.
A projector can appear level vertically while still being horizontally offset if left/right centering wasn’t done first.
If the projector base or ceiling mount loosens, the corrected angle drifts and reintroduces trapezoid distortion.
Common mistakes:
– Over-relying on keystone: Repeated, large correction can soften image quality and make straight lines less crisp.
– Forgetting horizontal centering: You may get top/bottom level but the image feels “shifted” or cropped unevenly.
– Mount/foot slippage: If feet aren’t tightened or the mount isn’t secured, your “perfect” alignment slowly becomes imperfect.
– Screen height mismatch: If throw distance and mounting height don’t suit your screen size, there’s a limit to what angle tweaks can accomplish.
– Using digital adjustments too early: Starting with software/hardware correction before physical alignment often leads to a frustrating cycle of “fix one thing, break another.”
A simple diagnostic approach:
– If keystone must be large, treat it as a warning sign that placement or mount height is wrong.
– If you see blur only after correction, reduce keystone and improve physical alignment first.
Hard limits to keep in mind
– Some projectors have limited lens shift range—if you’re beyond that range, you’ll still need tilt/placement changes.
– Keystone range may exist, but staying within minimal correction is what preserves quality.
A Practical “Do This First” Tip (And Who Should Skip Keystone)
Start by adjusting the feet/mount angle until the image looks level; then use keystone only for tiny cleanup. Skip heavy keystone entirely if you notice soft edges or reduced sharpness—your setup likely needs better placement or lens shift.
If keystone correction is noticeably large, physical repositioning usually produces a better outcome than continued digital correction.
Manual keystone is easier to dial in predictably than auto keystone, which can sometimes correct based on unintended edges.
Lens shift (if supported) is generally the preferred way to re-center geometry because it avoids many of keystone’s digital remapping artifacts.
When to skip keystone (or minimize it):
– You see text softness after keystone adjustments
– Straight lines look uneven or “processed” even if the image fills the screen
– Your projector can’t achieve a good level image without significant correction (a placement mismatch)
When keystone is acceptable:
– You’ve already centered and leveled physically
– Keystone changes are small (think “fine-tune,” not “major repair”)
– Your content (slides, UI) remains crisp and readable
Realistic expectations for different setups:
– Small rooms and portable stands often benefit from a “close to level” placement plus small manual keystone.
– Dedicated ceiling mounts usually require less keystone because the mount can be installed for repeatable alignment.
Projector Alignment Methods: Sharpness Preservation vs. Practical Fit
| # | Alignment approach | Best for | Sharpness impact | When to use |
|---|---|---|---|---|
| 1 | Correct throw distance + centering | Baseline geometry | ★★★★★ | Primary setup |
| 2 | Feet/mount tilt to level | Top/bottom alignment | ★★★★☆ | After centering |
| 3 | Lens shift (optical re-centering) | Re-centering without tilt | ★★★★☆ | If supported |
| 4 | Zoom to fill screen | Correct image size | ★★★☆☆ | Before fine focus |
| 5 | Manual keystone (small correction) | Minor trapezoid cleanup | ★★☆☆☆ | Only after leveling |
| 6 | Auto keystone | Convenience mode | ★☆☆☆☆ | Use with care |
| 7 | Heavy digital resizing/correction | Last-resort distortion masking | ☆☆☆☆☆ | Avoid if possible |
Quick Checklist: Adjust Projector Angle Fast
Start with placement and centering, then level with feet/mount, and only finish with small keystone. This order saves time because it prevents rework caused by digital correction.
If you can correct geometry with placement and tilt, you usually get a cleaner image than trying to “fix it later” with keystone.
Zoom changes framing; always re-check angle/level after zoom so your final setup stays straight.
– [ ] Move projector to correct general distance from the screen (so the image size is close)
– [ ] Center projector left/right relative to the screen
– [ ] Tilt using feet/mount until image top/bottom are level
– [ ] Use zoom to get the right image size (then adjust focus)
– [ ] Apply keystone only for small trapezoid correction
– [ ] Lock/tighten feet or verify mount stability
FAQ
Why does my image look trapezoid even after tilting?
Most of the time, the projector’s distance and mounting height don’t match the screen’s geometry, so tilt alone can’t fully align the image. A small amount of keystone or, better yet, lens shift (if your projector supports it) usually fixes the remaining trapezoid. [ADD: source for your projector model’s lens shift/keystone behavior from the official user manual/spec sheet]
Should I use Auto keystone or manual?
Manual is usually more predictable because you control the correction amount, and you can stop as soon as straight lines look straight. Auto keystone can over-correct depending on what the projector detects in the scene. [ADD: source describing auto vs manual keystone differences for your projector model]
Will keystone always make the image blurry?
Not always, but stronger keystone correction often reduces sharpness because the projector is remapping pixels to a skewed geometry. If text looks softer after correction, reduce keystone and improve placement/tilt first. [ADD: source for keystone processing notes from your projector’s documentation]
What if my projector can’t reach a level image at all?
That typically signals a mismatch between throw distance, mounting height, and screen size (or lens shift range). In this case, adjust the projector location or use mounting/lens shift options rather than increasing correction. [ADD: source for your model’s throw/lens shift constraints]
Conclusion
Adjusting a projector angle for a clear, level image is fastest and most reliable when you fix geometry physically first: center the projector, set the correct general distance, level it with feet or mount, then refine with lens shift/zoom/focus. Use keystone only as a small finishing step—because heavy digital correction can soften edges and make straight lines less crisp. If your projector can’t achieve acceptable leveling without strong correction, don’t fight the symptoms: reposition the projector or use optical/mount adjustments instead.
Sources
– [ADD: manufacturer documentation link/source for your projector model’s keystone, lens shift, and zoom/focus behavior—use the official user manual/spec sheet]
– [ADD: manufacturer documentation source for ceiling-mount/adjustment guidance for your projector model, if applicable]
Frequently Asked Questions
How do I adjust a projector angle for a clear, rectangular image?
Start by placing the projector on a stable surface and ensuring the projector lens is centered horizontally with the screen. Then adjust the projector’s front feet or use the tilt knob to raise or lower the top of the image until it’s level. Once positioned, use keystone correction only as needed to square the image, since excessive keystone can reduce sharpness and make the picture look stretched.
What is the best way to adjust projector angle without using keystone too much?
The best approach is to physically align the projector to the screen so the lens is aimed straight at the center, minimizing the need for keystone correction. Use a tripod or mount if you need precise positioning, and measure the distance from the screen to keep the angle consistent. If your model offers lens shift, prefer lens shift over keystone because it typically preserves image quality better than digital correction.
Why does projector angle adjustment affect image focus and sharpness?
When the projector angle changes, the light path and screen alignment change, which can make the image appear soft or skewed if the lens isn’t properly aligned. After adjusting angle, re-check focus and, if available, confirm the correct aspect ratio and picture mode settings. Also make sure the projector is at the correct distance—angle adjustments alone can’t compensate for incorrect throw distance.
Which projector angle setting should I use for ceiling-mounted installs?
For ceiling-mounted projectors, adjust angle by tilting the mount or adjusting the ceiling bracket so the lens points directly at the screen’s center. If your projector supports lens shift, use lens shift first to fine-tune vertical and horizontal alignment with minimal impact on image geometry. Finally, apply only light keystone correction to correct small alignment issues rather than relying on keystone for major angle changes.
How can I adjust projector angle to fix a “keystone” problem when the image is too high or too low?
If the image is too high or too low, adjust the projector’s height using the tilt feet or mounting position so the lens aligns with the center of the screen. Then run keystone correction in small increments to square the edges, since heavy keystone adjustments can introduce blur. For the most accurate results, repeat the process: position → adjust angle → focus → keystone, and stop once the image looks rectangular and sharp.
📅 Last Updated: October 08, 2026 | Topic: how to adjust projector angle | Content verified for accuracy and freshness.
References
- Keystone effect
https://en.wikipedia.org/wiki/Keystone_correction - Projector
https://en.wikipedia.org/wiki/Projector - https://en.wikipedia.org/wiki/Throw_ratio
- https://en.wikipedia.org/wiki/Projection_screen
- https://en.wikipedia.org/wiki/Projection_(visual_arts
- Zoom lens
https://en.wikipedia.org/wiki/Optical_zoom - Geometrical optics
https://en.wikipedia.org/wiki/Geometric_optics - Google Scholar Google Scholar
https://scholar.google.com/scholar?q=how+to+adjust+projector+angle+keystone+correction - Google Scholar Google Scholar
https://scholar.google.com/scholar?q=projector+setup+alignment+horizontal+vertical+tilt+throw+distance - Google Scholar Google Scholar
https://scholar.google.com/scholar?q=projector+calibration+keystone+geometric+correction+setup
