
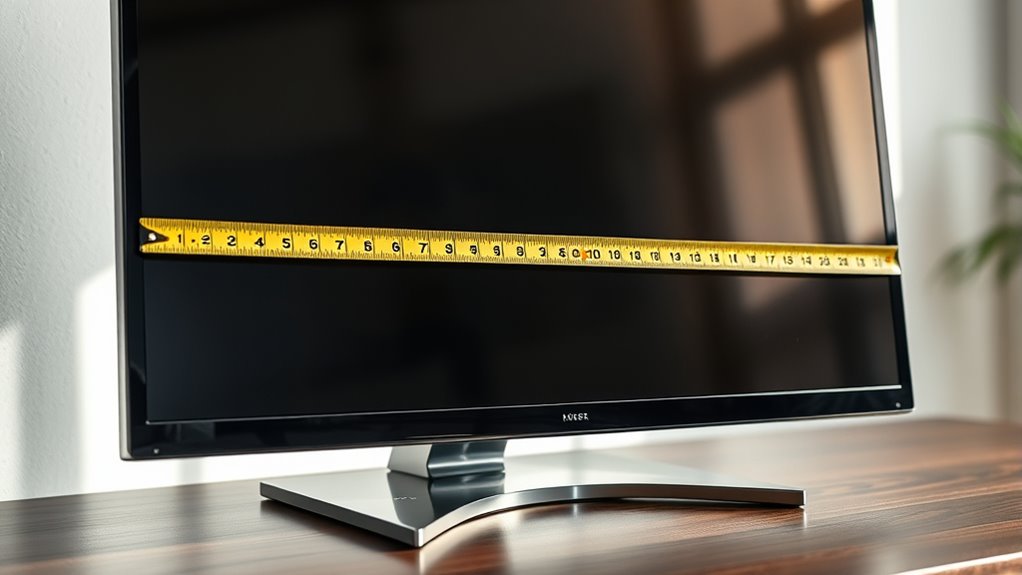

To measure a monitor, start by determining the screen size, which is given in diagonal inches from corner to corner, excluding the bezel. Next, calculate the aspect ratio by dividing the width by the height. Don’t forget to assess the thickness and weight for workspace fit and portability. Check the viewing angles for ideal color accuracy. By understanding these key specifications, you can make an informed choice that suits your needs. More insights await you!
Understanding Monitor Terminology
When you’re looking to measure a monitor, it helps to first understand some key terminology. Familiarizing yourself with monitor specifications is fundamental for making informed decisions. You’ll encounter terms like resolution, which denotes the number of pixels, affecting image clarity. Refresh rate indicates how many times the display updates per second, impacting smoothness during motion.
Next, consider display technology types, such as LCD, LED, or OLED, each offering distinct advantages in color accuracy and energy efficiency. Understanding these terms empowers you to evaluate different monitors effectively, ensuring you choose one that meets your needs. By grasping this essential terminology, you can navigate the world of monitors with confidence and freedom, making choices that truly resonate with your preferences.
Measuring Screen Size
When it comes to measuring screen size, you’ll primarily focus on the diagonal measurement method. Understanding the aspect ratio is also essential, as it affects how your content is displayed. Finally, calculating the screen area can help you make better choices based on your needs.
Diagonal Measurement Method
To accurately determine the size of your monitor, you’ll want to use the diagonal measurement method, which is the industry standard for screen size. This technique involves measuring the distance from one corner of the screen to the opposite corner. Grab a measuring tape or ruler, and verify you’re measuring just the screen, excluding the bezel. This gives you the true screen dimensions that manufacturers advertise. Remember, it’s essential to measure diagonally, as this is how most monitors are listed. By following this method, you’ll have a clear understanding of your monitor’s size, helping you make informed decisions about upgrades or replacements. Embrace the freedom that comes with knowing exactly what you’re working with!
Aspect Ratio Importance
Understanding aspect ratio is essential for measuring screen size, as it directly influences the overall viewing experience. Different aspect ratio types, like 16:9 or 4:3, can markedly affect how content is displayed. A wider aspect ratio, for example, allows for more immersive experiences in films and gaming. Conversely, a standard ratio might be better suited for traditional tasks like word processing. The aspect ratio impact extends beyond just aesthetics; it can enhance productivity and comfort during use. Knowing your preferred aspect ratio helps you choose the right monitor for your needs, ensuring you enjoy your digital activities to the fullest. So, before purchasing, consider which aspect ratio aligns with your viewing habits and preferences.
Screen Area Calculation
Choosing the right aspect ratio is just the beginning; next, you’ll want to measure the screen area to determine its overall size. To do this, start by noting the screen’s width and height in inches. Multiply those two numbers to get the area in square inches. It’s essential to evaluate different monitor types, as they can affect how you perceive screen resolution and usability. For instance, a widescreen display may offer a larger area but could impact pixel density. When you know the screen area, you’ll have a clearer idea of how much visual real estate you have for multitasking, gaming, or watching movies. This understanding helps you make an informed choice that aligns with your needs.
Calculating Aspect Ratio
Calculating the aspect ratio of your monitor is essential for guaranteeing ideal viewing experiences. This ratio helps you understand how the width relates to the height of your display. To perform aspect ratio calculations effectively, follow these steps:
- Determine the display resolution: Note your monitor’s width and height in pixels (e.g., 1920×1080).
- Divide the width by the height: For 1920×1080, you’d calculate 1920 ÷ 1080.
- Simplify the fraction: This equals approximately 1.78, which can be expressed as 16:9, a common aspect ratio.
Understanding your monitor’s aspect ratio guarantees that you enjoy your content without distortion, maximizing your viewing freedom.
Determining Screen Depth
When measuring a monitor, it’s important to take into account its thickness, as this affects how it fits in your workspace. You’ll also want to distinguish between depth and screen size, since a larger screen doesn’t always mean a deeper monitor. Understanding these differences will help you make an informed choice for your setup.
Measuring Monitor Thickness
To accurately measure a monitor’s thickness, you first need to understand the importance of knowing its screen depth, especially if you’re planning to fit it into a specific space. Here’s how you can do it:
- Get a Measuring Tool: Use a ruler or caliper for precise measurements.
- Measure at the Thickest Point: Place the measuring tool at the back of the monitor, where it’s usually the thickest, to guarantee a reliable thickness comparison.
- Record the Dimensions: Write down the monitor dimensions, noting the thickness in millimeters or inches.
Depth vs. Screen Size
Understanding the relationship between depth and screen size is crucial, especially if you’re trying to optimize your workspace. When considering monitor dimensions, keep in mind that a larger screen size often means a deeper monitor. However, this isn’t a strict rule. You’ll find various models with different screen proportions that can affect how much space they occupy. For instance, ultrawide monitors may have a larger screen size but can be surprisingly shallow, allowing for better placement options. It’s important to measure the depth alongside the screen size to guarantee it fits comfortably in your setup. Balancing these factors will help you create a more efficient and enjoyable workspace tailored to your needs.
Assessing Viewing Angles
While you might be focused on screen size and resolution, evaluating viewing angles is equally important for an ideal monitor experience. A poor viewing angle can distort color accuracy and diminish your overall enjoyment. Here are three key points to take into account:
Evaluating viewing angles is crucial; they can significantly impact color accuracy and your overall monitor experience.
- Horizontal Viewing Angle: Check how the monitor performs when you view it from the side. A wider angle means better color consistency.
- Vertical Viewing Angle: Verify the monitor maintains color accuracy when viewed from above or below. This is essential for collaborative work.
- Panel Type: Different panel technologies (IPS, TN, VA) offer varying viewing angles. IPS panels generally provide the best performance.
Evaluating Pixel Density
How can you guarantee that your monitor delivers sharp visuals? The key lies in evaluating pixel density. Measured in pixels per inch (PPI), pixel density indicates how tightly packed the pixels are. Higher PPI means more detail and clarity in images. When you’re doing a resolution comparison, look for monitors with higher resolutions relative to their screen size; this often results in better pixel density. For instance, a 4K monitor on a smaller screen will generally have a higher pixel density than a 1080p monitor of the same size. By focusing on pixel density, you ascertain that your monitor not only meets your visual needs but also enhances your overall viewing experience, giving you the freedom to enjoy crisp, vibrant images.
Measuring Bezels and Stand
Beyond pixel density, another important aspect of a monitor’s overall design is the bezels and stand. Measuring these elements can greatly impact your setup. Here’s how to do it:
- Bezel Width: Measure the thickness of the bezels around the screen. This influences the monitor’s aesthetics and how much screen real estate you have when using multiple displays.
- Stand Height: Check the height of the monitor’s stand. This affects your viewing comfort and desk space. A taller stand can help prevent neck strain.
- Overall Dimensions: Don’t forget to take into account the monitor’s total size, including bezels and stand, to guarantee it fits well in your workspace.
These measurements will help you choose a monitor that truly fits your needs.
Considering Monitor Weight
When selecting a monitor, you shouldn’t overlook its weight, as it can greatly affect installation and portability. A heavier monitor might offer better stability, but it can also complicate mounting or relocation. Consider how you’ll use the monitor—if you plan to move it frequently, a lighter option may suit your needs better. Also, think about weight distribution; a well-balanced monitor on its stand can enhance monitor stability, reducing the risk of tipping or wobbling. If you’re setting up in a confined space, guarantee your desk can support the monitor’s weight without compromising safety. By factoring in weight, you’ll make a more informed choice that accommodates your lifestyle and workspace.
Tips for Accurate Measurements
To guarantee you get accurate measurements of your monitor, it’s essential to use the right tools and techniques. Here are three tips to help you achieve precision:
- Use a Measuring Tape: A flexible measuring tape is ideal for measuring the diagonal screen size. Ascertain you measure from corner to corner.
- Monitor Calibration: Before taking any measurements, calibrate your monitor to ascertain the colors and brightness are accurate, as this can affect perceived sizes.
- Check Screen Resolution: Make sure you know your monitor’s screen resolution. This will help in understanding the pixel density and how it relates to your measurements.
Frequently Asked Questions
What Tools Do I Need to Measure a Monitor Accurately?
To measure a monitor accurately, you’ll need measuring tools like a ruler or tape measure, along with calibration techniques such as colorimeters or spectrophotometers. These guarantee your display’s performance aligns with your expectations for visual freedom.
How Do I Measure a Curved Monitor?
To measure a curved monitor, use a flexible measuring tape. Start at one edge of the curved screen and follow its contour to the opposite edge, applying accurate measuring techniques for precise results.
Can I Measure a Monitor in Inches or Centimeters?
You can measure a monitor in both inches and centimeters, depending on your preference. Just remember, converting between units is like dancing—find your rhythm with monitor dimensions, and you’ll glide through it effortlessly!
Does Monitor Size Include Bezels in Measurements?
No, monitor size doesn’t include bezels in measurements. When considering monitor dimensions, focus on the screen area only. This gives you a better understanding of the display space you’ll actually have for your projects.
How Often Should I Re-Measure My Monitor?
Think of your monitor as a canvas; to keep your colors true, you should re-measure it periodically. Regular monitor calibration frequency guarantees accuracy, making accurate measurements essential for peak performance and visual freedom.

[…] A good projector typically delivers about 2,000–3,000 lumens for a reliable bright picture in a normally lit room. If you want the clearest “set-and-forget” performance for daytime viewing or larger screens, look closer to 3,000 lumens. This guide tells you exactly how many lumens a good projector needs based on your room brightness and screen size. […]
[…] budget closer to 5,000–8,000 lumens. Keep reading to get the exact lumens target based on your screen size, throw distance, and how much light you can […]
[…] image, and often 5,000+ lumens when the room stays bright. The “right” lumen number depends on screen size, ambient light, and how much you can control daylight—so two projectors with similar brightness […]
[…] lumens can be enough for enjoyable viewing. The right number depends mostly on throw distance and screen size—but lumens is the deciding spec when you’re […]
[…] keep some ambient light on (or project on a larger screen). The exact number depends mostly on your screen size and how dark your viewing space is—dim rooms let you use fewer […]
[…] for a home projector you need? Here’s the direct rule: choose a brighter projector based on your screen size and room light level—aim for about 2,000 lumens for a dim or fully treated room, and […]
[…] you’d use in a dark space—often about 2,000–4,000 lumens for a watchable image, depending on screen size and how bright the room is. If you can’t control ambient light much, prioritize brightness plus […]
[…] wasting money on overkill. You’ll learn practical lumen ranges, how to match brightness to screen size, and what can go wrong when daylight hits the […]
[…] higher lumens for bigger screens or darker rooms that still have stray light. If you tell us your screen size and typical ambient light (mostly dark vs. lights on near the yard), you can narrow down the lumen […]
[…] a large image, you’ll need to jump higher—this guide gives you the exact lumen target by screen size and lighting […]
[…] This guide gives you realistic brightness targets so you can buy the right lumens for your screen size and room […]
[…] For daytime projector use, the right answer to “how many lumens” is usually 3,000+ lumens if you want a visible, reliably bright picture in typical indoor lighting. If you’re projecting in a fully light-controlled room, you can often drop to around 2,000 lumens; with more ambient light, plan on 3,500–5,000 lumens to keep contrast from washing out. The brightness guide below tells you exactly what lumens to buy based on room light level and screen size. […]
[…] 3,000+ lumens for a visible image. Keep reading for the single brightness target that matches your screen size and room […]
[…] lumens for a home theater projector is the make-or-break question—and the winner depends on your screen size and room light control. If you want the cleanest “TV-like” picture in a dark room, aim for […]
[…] How many lumens for an indoor projector should you choose? For most living rooms and offices, 2,000–3,000 lumens is the clear sweet spot for a bright, readable image with lights dimmed. If you plan to use more ambient light or larger screens, you’ll likely need 3,000–5,000 lumens to avoid a washed-out picture. Keep reading to get the exact lumens target based on room brightness and screen size. […]
[…] room, 1,000–2,000 lumens is often enough. This guide will tell you the lumens sweet spot for your screen size and viewing conditions so you don’t overpay or […]
[…] For an outdoor daytime projector, 3,000–5,000 lumens is the clear target when you want a bright, viewable image without fighting the sun. If the screen is large or you’re projecting with only partial shade, expect to move closer to the 5,000+ lumens end. This guide cuts through the specs to tell you exactly how many lumens you need based on typical daylight conditions and screen size. […]
[…] using a larger screen. The exact number depends on ambient light (streetlights/patio lamps), screen size, and whether you can keep spill light off the screen and surrounding […]
[…] screen. This guide will tell you exactly how many lumens you need based on your throw distance, screen size, and how much ambient light you have. If you’re choosing between “bright enough” and “money […]
[…] moves higher toward the 5,000-lumen range. Read on for the exact brightness target based on screen size, ambient light, and how much shade you can […]
[…] being the safer range for most living rooms. This article gives you a direct lumens cutoff based on screen size and ambient light so you can avoid buying a projector that looks dim the moment the curtains […]
[…] lumens to keep text and colors readable. Want the quickest verdict? Match lumens to brightness and screen size—but for most daylight setups, 4,000 lumens is the practical minimum sweet […]
[…] closer to 4,000+ lumens. This guide will tell you exactly what lumen level to target based on your screen size and lighting conditions, so you don’t waste money on an underpowered […]
[…] you can compare it more reliably across models. What you *feel* on your wall still depends on screen size, screen gain, lens throw, and room light, which is why 1200 ANSI lumens can look “bright” on a […]
[…] small, dim-room image but won’t compete with daylight or large screens. Keep reading to see what screen size and ambient light levels make 300 ANSI lumens feel bright—or […]
[…] in brighter rooms. The “best” number depends mainly on room brightness (light control) and screen size, so the right approach is to map lumens to your viewing conditions instead of chasing the biggest […]
[…] while 1,000–2,000 lumens can work in darker rooms. You’ll also get the quick bump factors—screen size and ambient light—so you can dial in the right brightness without […]
[…] answers exactly how many lumens is good for your home projector based on room brightness and screen size—so you can pick the right model without […]
[…] lumens to cut through ambient light. This guide tells you the exact lumens target based on your screen size and typical outdoor light […]
[…] dark on a mid-size screen. Keep reading to get the exact lumens range based on ambient light and screen size, so you don’t overpay or end up with a washed-out […]
[…] movie, that 500-lumen figure is your verdict. You’ll also learn how that brightness translates to screen size and picture quality so you can choose the right […]
[…] light increases. This article tells you how many lumens you need for daytime projection based on screen size, throw distance, and how much light you can control. Get the right number up front so your […]
[…] or you’re projecting a large screen. The right choice depends mainly on ambient light and your screen size—because in outdoor conditions you need both brightness *and* usable […]
[…] how many lumens needed for a projector? The right brightness depends on your screen size and room lighting, and you’ll learn the exact lumen targets that produce a clear, readable […]
[…] image. This article tells you exactly how many lumens you need based on your room brightness and screen size, and when to choose a higher-lumen projector versus a lighter compromise. Get the direct daylight […]
[…] light (daylight, overhead lights, or bright walls). The key idea is simple: lumens help, but screen size, throw distance, and how much you can dim the room determine whether the image looks crisp or […]
[…] good projector’s brightness comes down to this: how many lumens you should buy for your room and screen size. If you want a clear verdict, choose 2,000–3,000 lumens for a typical darkened living room, and […]
[…] How many lumens should a projector be? For most home movie setups, aim for 2,000–3,000 lumens for a clear picture in a dim-to-moderate room. If your space is bright or you’re projecting a larger image, you’ll usually need closer to 3,500–5,000 lumens. This guide gives you the exact brightness target based on room light and screen size. […]
[…] only when you can fully control the light. You’ll get clear lumens targets by room brightness and screen size so you can pick the right projector without […]
[…] rises. The right lumens number depends less on marketing claims and more on your ambient light, screen size, and viewing […]
[…] roughly 1,500–2,500 lumens for a watchable image, but the “right” number depends mainly on screen size and how much ambient light you’ll have. If you match lumens to your screen width/diagonal and […]
[…] bright and vivid, the “right” projector lumens depend mainly on your room light level and your screen size. As a starting point for many home setups, 2,000–3,500 lumens is usually enough for moderate […]
[…] Looking for how many lumens to project outside? For most outdoor movie setups, you’ll want about 2,000–3,000 lumens for a visible image on a typical backyard screen, with more required as your screen gets larger or ambient light increases. If you’re projecting in full daylight, plan on 5,000 lumens or more—or switch to a blackout strategy. This quick sizing guide tells you the exact lumens target based on your brightness conditions and screen size. […]
[…] less will look washed out in most bright rooms. This guide gives you a clear lumens target based on screen size and ambient light so you can choose the right brightness without guessing. If you’re aiming for a […]
[…] A good target for how many lux is good for a projector is 100 lux for clear, true “movie brightness” in a typical room. If you want an easy, reliable image without constant fiddling, keep ambient light at or below 200 lux; above that, blacks wash out and contrast drops fast. This article tells you the exact lux range you should aim for based on your projector brightness and screen size. […]
[…] how many watts projector you need, use one rule: target brightness in lumens for your room and screen size, then pick the wattage that can realistically produce it. This power guide tells you the exact watt […]
[…] this guide helps you turn that spec into a practical target based on your room lighting and screen size—so you don’t end up with a dim, washed-out […]
[…] can determine how much distance you need for a projector by using its throw ratio and the screen size you want—no guesswork required. For most home setups, you’ll get the best results when you […]
[…] settings when not actively projecting. Matching the projector’s brightness to your room—using screen size and ambient light control—can prevent running the unit at unnecessarily high power. If your […]
[…] is easier than most people think—this guide tells you the exact brightness to target for your screen size and room lighting. If you’re projecting in a dim room, you can get away with far fewer lumens […]
[…] for an outdoor projector” isn’t one universal number—lumens interact with ambient light, screen size, and throw distance, so using a realistic lumens target helps you avoid the washed-out, gray […]
[…] many lumens you need for a projector depends on screen size and room light, and there’s a clear target to hit for a bright, readable image. For most home […]
[…] lighting, 1,000–1,500 lumens can be enough for a crisp picture. Keep reading to match lumens to screen size, room brightness, and content so you buy the right projector the first […]
[…] modes and matching the projector brightness setting to your room lighting conditions. Use correct screen size, reduce unnecessary keystone correction, and keep the projector clean—blocked vents can force […]
[…] distance is determined by the projector’s throw ratio—so pick the throw that matches the screen size you want. Use the projector’s lens specs to calculate the exact throw distance and eye space you […]
[…] a projector screen comes down to one decision: pick the right screen size, type, and fit for your room and viewing distance. If you want the clearest, most “TV-like” […]
[…] calculate projector lens throw distance, use the throw ratio and your screen size to get the exact feet or meters you need—no guesswork. This guide walks you through the one […]
[…] get the quickest method to measure throw distance, pick the right lens ratio, and translate your screen size into a usable placement number. By the end, you’ll know whether your projector will fit your room […]
[…] distance projector measurements precisely, so you can translate projector specs into an accurate screen size every time. This step-by-step guide shows the exact formulas and inputs you need—lens throw […]
[…] You’ll get the formula, what measurements to take, and how to interpret the result to predict screen size and viewing distance. By the end, you’ll be able to confirm compatibility before you buy or mount […]
[…] method? This guide gives you the one distance-based conversion that tells you the right screen size for your viewing setup. Measure from your seating to the TV, apply the recommended range, and […]
[…] measure the claimed lumens against real-world brightness, then decide if it will hold up for your screen size and viewing distance. You’ll know exactly what numbers to look for—and how to verify […]
[…] a projector screen for home theater is mostly about matching screen size, gain, and material to your room’s light levels and your projector’s brightness/output. If you […]