To clean earwax out of your earbuds, start by unplugging them and removing the ear tips. Use a soft-bristled brush or a toothpick to gently dislodge debris. For stubborn buildup, dampen a cloth with isopropyl alcohol and wipe the earbud surfaces carefully. Let them air dry before reattaching ear tips. Regularly disinfect your earbuds to maintain hygiene. For more cleaning tips and tricks, keep exploring how to enhance your earbud care routine.
Understanding the Importance of Cleaning Earbuds
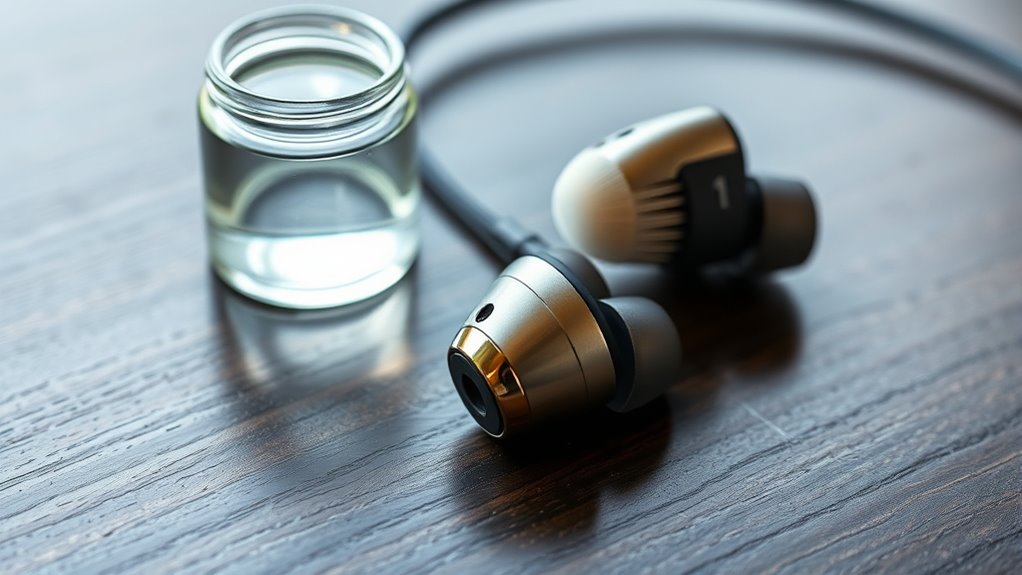
While you might not think about it often, cleaning your earbuds is essential for maintaining their performance and your health. Earwax buildup can considerably impact sound quality, muffling the audio you enjoy. It can also lead to bacterial growth, posing risks to your ear health. Regularly cleaning your earbuds not only enhances your listening experience but guarantees you’re using a safe device.
To start, check for visible debris and wax on the earbuds. Use a soft, dry cloth to wipe down the surfaces. Make sure to clean the mesh filters gently to avoid damage. By keeping your earbuds clean, you’re promoting better sound quality and protecting your ears, allowing you the freedom to enjoy your favorite tunes without worry.
Tools You’ll Need for Cleaning
To effectively clean your earbuds, you’ll need a few essential tools. Start with a soft-bristled brush, which is perfect for gently removing earwax and debris from the speaker mesh. You’ll also want a microfiber cloth to wipe down surfaces without scratching them. A toothpick or a similar pointed tool can help dislodge stubborn wax, but be careful not to damage any components. Isopropyl alcohol can serve as a disinfectant, so keep some handy for sanitizing your earbuds after cleaning. Finally, consider having some cotton swabs in your maintenance supplies for those hard-to-reach areas. With these cleaning tools, you’ll be well-equipped to keep your earbuds in top condition and enjoy your music without interruption!
Preparing Your Earbuds for Cleaning
Before you start cleaning your earbuds, make certain they’re unplugged and turned off to avoid any damage or accidental activation. This first step in earbud preparation guarantees safety and sets the stage for effective cleaning. Next, gather your cleaning tools—soft brushes, microfiber cloths, or cotton swabs—so you’re ready to tackle any stubborn earwax buildup. Check for any visible debris on the earbud surfaces and remove loose particles gently with a dry cloth. It’s essential to avoid using water or cleaning solutions at this stage; keep your earbuds dry for peak cleaning readiness. Once you’ve prepped your earbuds, you’re all set to move on to the next steps in the cleaning process.
Cleaning the Ear Tips
Cleaning the ear tips of your earbuds is essential for maintaining sound quality and hygiene. Start by removing the ear tips from the earbuds. Depending on the ear tip materials—like silicone, foam, or plastic—you’ll choose different cleaning methods. For silicone or plastic tips, rinse them under warm water, using mild soap. Gently scrub with a soft brush to remove stubborn debris. For foam tips, use a damp cloth to wipe them down, avoiding soaking. Allow all tips to air dry completely before reattaching them. Regular cleaning can prevent buildup and enhance your listening experience. Remember, keeping your ear tips clean not only improves sound quality but also promotes ear health. Enjoy your music without the worry!
Cleaning the Mesh Screens
Now that you’ve cleaned the ear tips, it’s time to tackle the mesh screens. First, gather your cleaning supplies, like a soft brush and some isopropyl alcohol. Next, use the brush to gently remove debris, then lightly dab the mesh screens with alcohol to guarantee they’re clean without damaging them.
Gather Cleaning Supplies
To effectively clean the mesh screens of your earbuds, you’ll need a few essential supplies. Start by gathering some cleaning tools: a soft-bristled toothbrush or a small paintbrush, a microfiber cloth, and some isopropyl alcohol. These items are vital for earwax removal without damaging the delicate mesh. You might also want to have a pair of tweezers on hand for stubborn debris. Make sure your workspace is well-lit so you can see the details clearly. Once you have everything ready, you’ll be set to tackle the buildup of earwax that can muffle sound quality. With the right supplies, you can maintain your earbuds and enjoy the freedom of crisp audio.
Proper Cleaning Technique
One effective method for cleaning the mesh screens of your earbuds involves using a soft-bristled toothbrush or a small paintbrush. This simple technique can help remove stubborn earwax types that accumulate over time. Here’s how to do it:
- Turn off your earbuds to avoid any accidental sounds.
- Gently brush the mesh screens to dislodge earwax without damaging them.
- Use a microfiber cloth to wipe away any remaining debris.
- Check your cleaning frequency; aim for every few weeks to maintain sound quality.
- Store your earbuds properly when not in use to minimize buildup.
Wiping Down the Earbud Body
Wiping down the earbud body is essential for maintaining their appearance and hygiene. To start, gather a microfiber cloth or soft, lint-free material. If your earbuds are made of plastic or metal, use a damp cloth with a mild soap solution. For silicone or rubber materials, a dry cloth may suffice for routine cleaning.
Make sure to clean your earbuds regularly—a good frequency is once a week or after heavy use. Gently wipe the outer surfaces, avoiding any openings or mesh areas where moisture could enter.
After cleaning, let them air dry completely before using them again. This simple step not only keeps your earbuds looking fresh but also helps prevent the buildup of bacteria.
Dealing With Stubborn Earwax Buildup
If you’re facing stubborn earwax buildup in your earbuds, it’s crucial to understand the common causes first. Effective cleaning techniques can help tackle the issue, and implementing preventative maintenance can keep your earbuds cleaner for longer. Let’s explore these steps to guarantee your listening experience isn’t compromised.
Common Causes of Buildup
Earwax buildup in earbuds can stem from several common causes, making it a frustrating issue for many users. Understanding these factors can help you manage earwax production and maintain better hygiene habits.
- Frequency of use: The more you wear your earbuds, the more likely they’ll collect earwax.
- Earwax type: Some people naturally produce more wax, leading to quicker buildup.
- Hygiene habits: Neglecting regular cleaning or not washing your ears can contribute to excess wax.
- Ear shape: Individual ear anatomy can affect how wax accumulates.
- Environmental factors: Dust and moisture can exacerbate earwax buildup.
Effective Cleaning Techniques
To effectively tackle stubborn earwax buildup in your earbuds, start by gathering the right tools. You’ll need a soft brush, isopropyl alcohol, and cotton swabs. First, unplug your earbuds and gently brush away any loose debris using the soft brush. Next, dip a cotton swab in isopropyl alcohol and carefully clean the earbud tips and mesh, ensuring you don’t saturate them. For tougher spots, let the alcohol sit for a minute before wiping. Always check your cleaning frequency; if you use your earbuds daily, aim to clean them weekly to prevent excessive buildup. By staying proactive, you can maintain clear sound quality and extend the life of your earbuds. Enjoy your music without interruptions!
Preventative Maintenance Tips
Three simple habits can help you prevent stubborn earwax buildup in your earbuds. By incorporating these practices into your routine, you’ll keep your sound experience crisp and clean.
- Store earbuds properly: Use a case to avoid dust and debris.
- Practice regular inspections: Check your earbuds weekly for any wax buildup.
- Keep ears clean: Make sure your ears are clear of excess wax before using your earbuds.
- Limit use in sweaty situations: Avoid using earbuds during intense workouts to minimize moisture.
- Use a cleaning brush: A soft brush can help remove loose debris before it sticks.
Disinfecting Your Earbuds
Although it might seem minor, disinfecting your earbuds is crucial for maintaining hygiene and preventing ear infections. Regular cleaning can help keep harmful bacteria at bay. Here’s a simple guide to disinfecting your earbuds:
| Step | Action |
|---|---|
| 1 | Gather disinfecting materials: isopropyl alcohol, cotton swabs, and a microfiber cloth. |
| 2 | Dampen the cloth with alcohol, making sure it’s not dripping wet. |
| 3 | Wipe down the earbud surfaces and any attached parts gently. |
| 4 | Use cotton swabs for tight spots, then let them air dry. |
Aim to disinfect your earbuds at least once a week, or more frequently if you use them daily. Keeping this routine guarantees your earbuds stay clean and safe.
Tips for Preventing Future Buildup
Since preventing earwax buildup can save you from frequent cleaning, there are a few simple habits you can adopt. Prioritizing ear hygiene and regular maintenance will keep your earbuds in top shape. Here are some tips to help you out:
- Clean your ears regularly, but avoid using cotton swabs deep inside.
- Store your earbuds in a case when not in use to keep them dust-free.
- Avoid sharing earbuds with others to minimize contamination.
- Take breaks during extended use to allow your ears to ‘breathe.’
- Use a protective cover on your earbuds, which can help reduce wax accumulation.
When to Seek Professional Help
If you find that earwax buildup is causing discomfort or affecting your hearing despite regular cleaning, it might be time to seek professional help. First, listen to your body; if you experience pain, persistent itching, or reduced hearing, don’t hesitate. Next, consult an audiologist or an ENT specialist. They’ll assess your ear health and determine if professional cleaning is necessary. This procedure is quick and safe, ensuring your ears are clear without causing damage. Also, if you notice unusual discharge or a strong odor, it’s essential to get checked out. Remember, maintaining ear health is important for your overall well-being, so don’t ignore these signs. Trust the experts when the situation calls for it.
Frequently Asked Questions
Can I Use Water to Clean My Earbuds?
You shouldn’t use water for cleaning your earbuds. Water risks damaging components. Instead, opt for safer cleaning methods like using a dry cloth or a soft brush to keep them clean without the risk of harm.
How Often Should I Clean My Earbuds?
“An ounce of prevention’s worth a pound of cure.” For ideal earbud maintenance, clean ’em every few weeks. If you notice buildup or hear muffled sound, don’t hesitate—clean more frequently to guarantee top performance.
Is It Safe to Use Alcohol on Earbuds?
It’s best to avoid alcohol on earbuds, as it can damage materials. Instead, use alcohol alternatives like mild soap or vinegar. Clean them regularly for ideal performance, ideally every few weeks, to maintain hygiene.
Can Earwax Damage My Earbuds?
Absolutely, earwax buildup can damage your earbuds over time. Regular earbud maintenance is essential; clean them often to prevent sounds from muffling or components from degrading. Keep your listening experience clear and enjoyable!
What Should I Do if My Earbuds Smell?
If your earbuds smell, start with proper earbud maintenance. Wipe them with a damp cloth, then use a mixture of water and vinegar for odor removal. Let them dry completely before using again for fresh sound.
