To split your monitor screen, start by connecting multiple displays and adjusting your display settings to extend the desktop. On Windows, use Snap Assist to easily organize windows by dragging them to the edges or using keyboard shortcuts. If you’re on macOS, hover over the green button on a window to select full-screen options. With these techniques, you’ll enhance your productivity considerably. If you’re interested in more tips and tools, keep exploring!
Understanding Screen Splitting
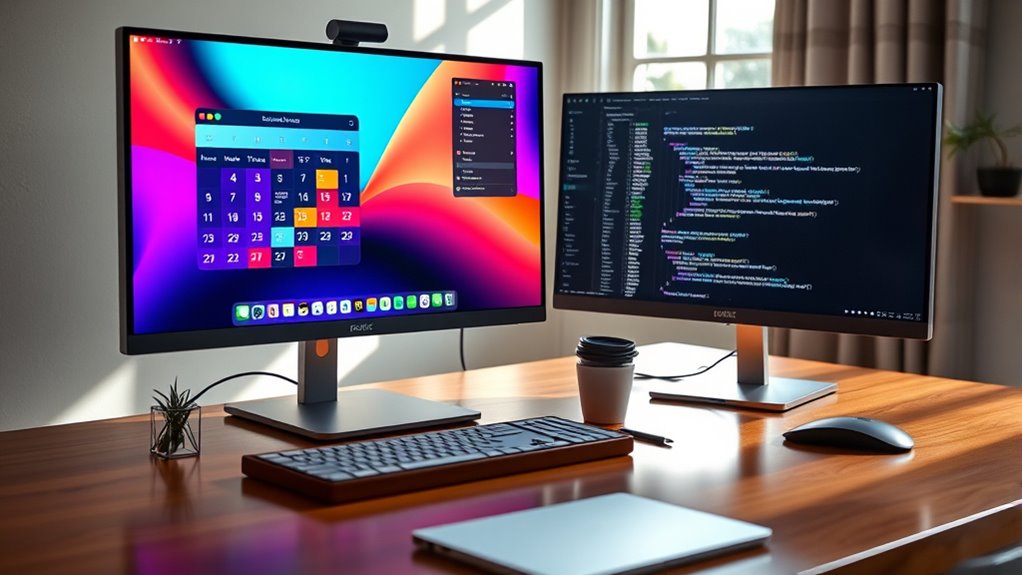
Screen splitting is a powerful tool that can enhance your productivity. By effectively utilizing your monitor setup, you can manage multiple tasks without feeling overwhelmed. To get started, consider your screen resolution; a higher resolution allows for better clarity and more workspace. If you’re using a dual-monitor setup, it’s easy to drag and drop windows between screens, giving you the freedom to organize your workflow as you see fit. Adjusting the screen resolution can also help in making everything more readable and accessible. With a little practice, you’ll find that screen splitting not only helps you multitask but also keeps distractions at bay, allowing you to focus on what truly matters. Embrace the freedom that comes with an organized digital workspace!
Splitting Your Screen on Windows
Wondering how to split your screen on Windows? It’s easier than you think! First, verify your monitor configurations are set up properly, supporting your desired screen resolutions. If you’re using multiple monitors, connect them and adjust the display settings to extend your desktop. For a single monitor, you can manually resize your windows by dragging the edges. Just grab a window and pull it to one side until it snaps into place, then do the same for the other window. You can also use keyboard shortcuts to maximize efficiency: press the Windows key and the left or right arrow key to position your windows quickly. Enjoy the freedom of multitasking with this simple technique!
Using Snap Assist in Windows
To make multitasking easier, you can enable the Snap Assist feature in Windows. This handy tool lets you snap windows together with just a few clicks, organizing your workspace efficiently. Let’s explore how to set it up and maximize your screen real estate.
Enable Snap Assist Feature
One of the easiest ways to split your monitor screen in Windows is by using the Snap Assist feature. To enable it, head to your Snap settings by searching for “Settings” in the Start menu. Click on “System,” then “Multitasking.” Here, make sure Snap windows is turned on. This allows you to utilize Snap layouts, making it simple to arrange your open applications. Once activated, just drag a window to the edge of your screen, and Snap Assist will suggest layouts for you to choose from. You can snap multiple apps simultaneously, giving you the freedom to multitask without hassle. Embrace this feature and transform your workspace into an organized hub of productivity!
Snap Windows Together Easily
Snapping windows together using Snap Assist in Windows is a game-changer for multitasking. It simplifies screen organization and enhances your window management experience. Just drag a window to the edge of your screen, and Snap Assist automatically suggests areas for it to fit alongside other open windows. You can easily choose which app to snap next, creating a productive workspace tailored to your needs. This feature allows you to keep an eye on important documents while browsing the web or video conferencing. Plus, it’s intuitive, giving you the freedom to arrange your workspace without hassle. Embrace Snap Assist to maximize your efficiency and enjoy seamless multitasking like never before.
Splitting Your Screen on Macos
If you’re looking to enhance your productivity on macOS, splitting your screen can be a game changer. You can easily manage multiple tasks by using macOS shortcuts. To start, open your desired full screen app and hover over the green maximize button in the upper-left corner. Click and hold, then drag the window to one side of the screen. Release it, and the app will fill that side. Next, select another window to fill the other half. This allows you to work on projects side by side without the hassle of constantly switching between apps. Embracing this feature can free up your workflow, enabling you to accomplish more in less time while enjoying the flexibility macOS offers.
Utilizing Mission Control on Macos
Once you’ve mastered screen splitting in macOS, you might want to explore how Mission Control can further enhance your multitasking experience. Mission Control lets you effortlessly manage your open windows and applications. By swiping up on your trackpad or pressing F3, you’ll see all your Desktop Spaces at a glance. You can create new spaces by dragging an app window to the top of your screen, organizing your workflow as you see fit. This feature allows you to switch between tasks quickly without cluttering your main screen. Plus, you can easily assign apps to specific Desktop Spaces, making your multitasking smoother and more efficient. Embrace the freedom to customize your workspace with Mission Control!
Screen Splitting on Linux
When it comes to screen splitting on Linux, you’ve got plenty of options at your fingertips. You can use built-in tools, explore third-party applications, or master keyboard shortcuts to tailor your workspace. Each method has its perks, so let’s explore what works best for you.
Using Built-in Tools
While utilizing built-in tools on Linux can greatly enhance your productivity, mastering screen splitting is essential for multitasking. With a multi monitor setup, you can take full advantage of your screen size, allowing you to work on several applications side by side. Most Linux distributions offer window management features that let you easily snap windows to the edges of your screen. Simply drag your desired window to the left or right edge, and it’ll resize automatically. You can also use keyboard shortcuts, like `Super + Left/Right Arrow`, to split the screen quickly. This functionality not only maximizes your workspace but also streamlines your workflow, giving you the freedom to juggle tasks with ease.
Third-Party Applications
For those looking to enhance their screen-splitting capabilities beyond the built-in tools, third-party applications offer powerful options. Linux users can explore tools like Spectacle or KDE Connect for seamless screen sharing and organization. These applications allow you to manage your multi monitor setup effectively, enabling you to split your display into customizable segments. With features like drag-and-drop resizing and preset layouts, you’ll find it easier to multitask and improve productivity. Additionally, applications like i3 or xmonad provide flexible tiling window management, giving you total control over how your workspace looks. By leveraging these third-party tools, you’ll reveal a new level of freedom in your screen management.
Keyboard Shortcuts Techniques
Although many Linux distributions come with built-in window management features, mastering keyboard shortcuts can greatly streamline your screen-splitting experience. Using keyboard shortcuts not only enhances your workflow but also allows you to navigate your desktop with ease. For instance, you can often use `Super + Left` or `Super + Right` to snap windows to the sides of your screen. If you want to maximize productivity, try `Super + Up` to maximize a window or `Super + Down` to minimize it. These simple keyboard shortcuts are essential productivity tips that let you control your workspace without a mouse. By integrating these shortcuts into your routine, you’ll gain the freedom to multitask effortlessly, making your Linux experience even more efficient.
Tips for Effective Screen Organization
To maximize your productivity and maintain focus, effective screen organization is essential. Start by customizing your screen arrangement to fit your workflow. Group similar applications together to reduce distractions and streamline your tasks. For instance, keep your communication tools on one side and your work documents on the other.
Utilize split-screen features to view multiple windows simultaneously, enhancing workspace efficiency. This allows you to compare information or multitask seamlessly. Remember to adjust window sizes for ideal visibility; larger windows for primary tasks and smaller for reference materials.
Finally, declutter your desktop regularly. A tidy workspace promotes clarity, enabling you to stay focused and efficient. By implementing these simple tips, you’ll create a workspace that fosters productivity and freedom.
Third-Party Applications for Screen Splitting
If you’re looking to enhance your screen-splitting experience, third-party applications can be a game changer. Popular tools offer a variety of features designed to optimize your workflow and make multitasking easier. It’s important to evaluate what features best suit your needs before choosing the right application for you.
Popular Screen Splitting Tools
When it comes to enhancing your productivity, a variety of third-party applications can help you split your monitor screen effectively. These tools allow you to customize your screen layout, making multitasking a breeze. Here are three popular options:
- DisplayFusion – It offers extensive features for managing multiple displays, giving you full control over your workspace.
- Divvy – With its intuitive interface, you can quickly divide your screen into custom proportions, streamlining your workflow.
- Microsoft PowerToys – This free tool includes a FancyZones feature that allows you to create specific layouts for your windows, boosting your productivity enhancements.
Explore these tools and find the one that fits your needs, revealing a more efficient way to work and enjoy your digital space!
Features to Consider
Choosing the right screen splitting application involves considering several key features that can greatly enhance your workflow. You’ll want an app that allows for easy adjustments to your display settings and supports various screen resolutions. Don’t forget to check for user-friendly interfaces and customizable layouts, as these can save you time and boost productivity.
| Feature | Importance |
|---|---|
| User-Friendly Interface | Makes navigation easy |
| Customizable Layouts | Tailors to your needs |
| Multi-Monitor Support | Expands workspace |
| Hotkey Functionality | Speeds up tasks |
| Compatibility | Works with your OS |
Troubleshooting Common Screen Splitting Issues
Screen splitting can enhance your productivity, but it’s not uncommon to run into issues that disrupt the experience. Here are three common problems and how to troubleshoot them:
- Check Display Settings: Verify your screen resolution aligns with your monitor’s compatibility. Incorrect settings can cause distortion and frustration.
- Update Graphics Drivers: Outdated drivers can hinder performance. Regularly check for software updates to keep everything running smoothly.
- Assess Hardware Limitations: If your system performance is sluggish, it may be due to hardware constraints. Understanding your user preferences can help you optimize settings without compromising speed.
Addressing these issues can restore your screen splitting experience and give you the freedom to work efficiently.
Customizing Your Screen Layout for Productivity
After resolving any issues with screen splitting, it’s time to tailor your layout to boost productivity. Start by focusing on screen organization; categorize your applications based on tasks. For instance, keep your email and calendar on one side while your project management tools occupy the other. This layout optimization not only minimizes distractions but also enhances your workflow.
Consider using grid systems or third-party software to create custom layouts that fit your unique needs. Experiment with different configurations until you find what feels right. Remember, the goal is to create a workspace that empowers you to work efficiently and freely. By optimizing your screen setup, you’ll reveal your potential and make multitasking a breeze.
Frequently Asked Questions
Can I Split My Screen on a Tablet or Smartphone?
Yes, you can split your screen on a tablet or smartphone! Using tablet features or smartphone settings, you can embrace multitasking, balancing apps like a juggler, allowing freedom to explore and connect effortlessly.
How Do I Revert Back to a Single Screen After Splitting?
To revert to a single screen, open your screen settings and navigate to display options. Select the option to disable the split view, and your display will return to its original single-screen mode effortlessly.
Does Screen Splitting Work With Multiple Monitors?
Yes, screen splitting works with multiple monitor setups! You can maximize productivity and multitask effectively. The benefits of screen splitting become even more pronounced when you use several monitors, giving you more freedom and workspace.
Will Screen Splitting Affect My Computer’s Performance?
Yes, screen splitting can affect your computer’s performance, but think of it as a multitasking superhero! While you gain multitasking benefits, your system might struggle under the weight of all those open windows. Balance is key!
Are There Any Keyboard Shortcuts for Screen Splitting?
Yes, there’re keyboard shortcuts for effective screen management. For Windows, use Windows Key + Left or Right Arrow to split your screen. On Mac, try Control + Command + F for full-screen options. Enjoy your multitasking!
