To turn on your Beats earbuds, find the power button on the earbuds or charging case. Press and hold this button until you see the LED indicator light up. This signals that your earbuds are ready for use. Make sure they’re charged and within close range of your device for pairing. If you want to know how to connect them via Bluetooth or troubleshoot connection issues, keep going for more helpful tips!
Unboxing Your Beats Earbuds
When you first receive your Beats earbuds, it’s exciting to unbox them and see what’s inside. The unboxing experience sets the tone for your journey ahead. As you lift the lid, you’ll find the earbuds nestled securely, showcasing their sleek design. Alongside them, you’ll discover essential accessories like the charging case, ear tips, and a quick start guide.
Take a moment to appreciate the product features—like noise cancellation and impressive sound quality—that promise to elevate your listening experience. The careful packaging not only protects your new gear but also reflects the brand’s commitment to quality. This first interaction with your Beats earbuds is a blend of anticipation and curiosity, making it a memorable part of your audio adventure.
Checking the Battery Charge
To enjoy your Beats earbuds, it’s essential to check the battery charge. Look for the battery indicator light status to see how much power you have left. If they’re low on battery, you’ll need to charge them before use.
Battery Indicator Light Status
The battery indicator light on your Beats earbuds is a handy feature that keeps you informed about their charge status. Understanding the indicator colors can help you gauge your battery life effectively. Here’s a quick overview of what the different colors mean:
| Indicator Color | Battery Status |
|---|---|
| Green | Fully charged (100%) |
| Yellow | Moderate charge (20%-99%) |
| Red | Low charge (5%-19%) |
| Flashing Red | Critical (0%-4%) |
Charging the Earbuds
Checking the battery charge of your Beats earbuds is simple and guarantees you’re always ready to listen. To check the battery status, connect your earbuds to your device; a pop-up will show the remaining charge. If you notice the battery’s running low, it’s time for a charge. For ideal battery maintenance, follow a few charging tips: avoid letting your earbuds completely drain before charging, and try to keep them between 20% and 80% charged. This helps extend their overall lifespan. When you’re ready to charge, use the provided cable and connect it to a power source. In no time, you’ll be back to enjoying your favorite tunes without interruption!
Pairing Your Earbuds With Your Device
To enjoy your Beats earbuds, you’ll first need to access your device’s Bluetooth settings. Once you’re there, you can easily follow the pairing process to connect your earbuds. Let’s go through the steps to get your music playing right away.
Bluetooth Settings Access
Before you can enjoy your music, you’ll need to access the Bluetooth settings on your device to pair your Beats earbuds. First, make sure your device supports Bluetooth connectivity; check the manufacturer’s specifications for Bluetooth device compatibility. On most smartphones or tablets, swipe down from the top of your screen or go to the settings app to find Bluetooth options. If you’re using a computer, look for Bluetooth in the system preferences or settings. For ideal performance, keep your device and earbuds within a close range during the pairing process. Remember these Bluetooth connectivity tips: turn off any other connected devices to avoid interference, ensuring a smooth connection. Now you’re ready to pair your Beats earbuds and plunge into your favorite tunes!
Pairing Process Steps
Pairing your Beats earbuds with your device is a simple process that takes just a few steps. First, verify your device is compatible with your earbuds. Then, follow these pairing tips to connect seamlessly:
| Step | Action | Notes |
|---|---|---|
| 1 | Turn on Bluetooth on your device | Make sure it’s discoverable |
| 2 | Open the case of your earbuds | This powers them on |
| 3 | Select your earbuds from the list | Look for “Beats” |
| 4 | Confirm the pairing | You’ll hear a sound |
| 5 | Enjoy your music | Freedom to move! |
Now you’re all set to enjoy your audio experience!
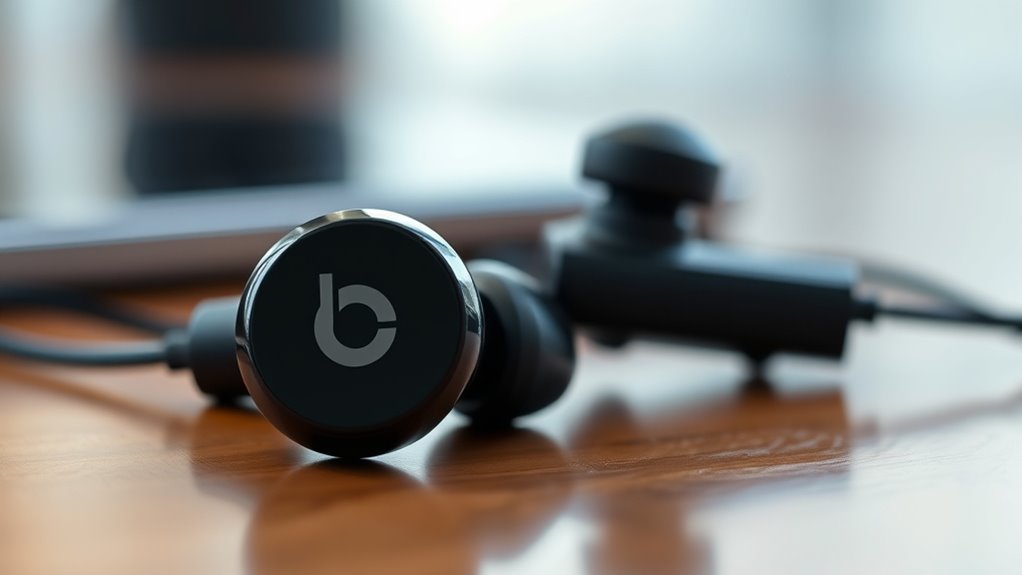
Turning On Your Beats Earbuds
Whether you’re enthusiastic to enjoy your favorite tunes or take a call, turning on your Beats earbuds is a simple process. First, locate the power button on your earbuds; it’s usually on one of the earbuds or the charging case. Press and hold the button until you see the LED indicator light up. This means your earbuds are powered on and ready to connect to your device. Make sure your device’s Bluetooth is enabled for seamless compatibility. If you’re using the earbuds for the first time, they’ll enter pairing mode automatically. By following these steps, you’ll experience the freedom of high-quality sound and effortless connectivity with your devices. Enjoy your music or calls with ease!
Connecting via Bluetooth
Connecting your Beats earbuds to your device via Bluetooth is a straightforward process. First, verify your device has Bluetooth compatibility and that it’s turned on. Open the Bluetooth settings on your smartphone, tablet, or computer. Next, put your Beats earbuds in pairing mode; usually, this involves holding the power button until the LED indicator flashes. Once your earbuds appear in the device selection menu, tap on them to connect. You might hear an audible confirmation that they’re paired. If you want to switch devices in the future, simply repeat these steps. Enjoy the freedom of wireless listening with your Beats earbuds, and experience your favorite music without any hassle!
Troubleshooting Connection Issues
If you’re having trouble connecting your Beats earbuds, there are a few common issues to check. First, verify your earbuds are charged and turned on; low battery can lead to connection problems. Next, confirm that Bluetooth is enabled on your device. If you’re still facing audio issues, try disconnecting your earbuds and reconnecting them. Sometimes, forgetting the device in your Bluetooth settings and re-pairing can solve connection troubleshooting challenges. Also, make certain no other devices are interfering with the connection. If you’re in an area with many Bluetooth devices, it can cause disruptions. Finally, updating your device’s software may help resolve lingering connectivity issues, giving you the freedom to enjoy your music without interruptions.
Using Touch Controls
Once you’ve resolved any connection issues, it’s time to explore the touch controls on your Beats earbuds. These intuitive gesture controls let you manage your music and calls effortlessly. To play or pause audio, simply double-tap on the earbud. Swiping forward skips to the next track, while swiping back plays the previous one. You can adjust the touch sensitivity settings in the companion app, ensuring your earbuds respond just the way you like. If you want to activate voice assistants, a long press on either earbud will do the trick. Familiarizing yourself with these features will give you the freedom to enjoy your music without fumbling with your device. Embrace the convenience that comes with mastering your touch controls!
Caring for Your Beats Earbuds
To keep your Beats earbuds in top condition, it is essential to give them proper care and maintenance. Start with regular cleaning to prevent dirt buildup. Use a soft, dry cloth to wipe the exterior and a slightly damp cloth for the ear tips. For stubborn grime, a little mild soap can help. Remember to avoid harsh chemicals!
When it comes to storage solutions, always place your earbuds in their case when not in use. This protects them from damage and tangling. If you’re on the go, consider a small pouch to keep them safe. By following these cleaning tips and smart storage practices, you’ll guarantee your Beats earbuds last longer and perform at their best.
Enjoying Your Music
After ensuring your Beats earbuds are clean and well-stored, it’s time to enjoy your music. With their incredible sound quality, you can immerse yourself in your favorite music genres and experience every beat and note. Here’s how to enhance your listening experience:
- Explore New Genres: Step out of your comfort zone and try different music genres to discover fresh sounds.
- Adjust the Equalizer: Fine-tune your device’s equalizer settings to match your preferred sound profile for maximum enjoyment.
- Create Playlists: Curate playlists that fit your mood or activities, making it easy to enjoy your music without interruption.
With your Beats earbuds, the world of music is at your fingertips—embrace it!
Frequently Asked Questions
Can I Use My Beats Earbuds While Charging?
You can’t use your Beats earbuds while they’re charging. To maintain good battery health, it’s best to develop healthy charging habits, allowing them to charge fully before using them for peak performance and longevity.
Are My Beats Earbuds Water-Resistant?
Your Beats earbuds aren’t fully waterproof, but they do have some water resistance features. To keep them lasting longer, avoid exposure to excessive moisture and follow maintenance tips like cleaning them regularly. Enjoy your freedom!
How Long Does the Battery Last on Average?
On average, your Beats earbuds’ battery life lasts around 8 to 12 hours, depending on the model. Charging time is typically 1 to 2 hours, so you can quickly get back to enjoying your music.
Can I Connect My Earbuds to Multiple Devices?
You can connect your earbuds to multiple devices, but not simultaneously. With Bluetooth connectivity, you’ll enjoy seamless switching between devices, ensuring compatibility and freedom to enjoy your audio wherever you go. Just remember to disconnect first!
What Is the Warranty Period for Beats Earbuds?
Your Beats earbuds typically have a one-year warranty period, covering defects in materials and workmanship. Don’t forget to complete the warranty registration; it guarantees you enjoy full warranty coverage, giving you peace of mind.
