
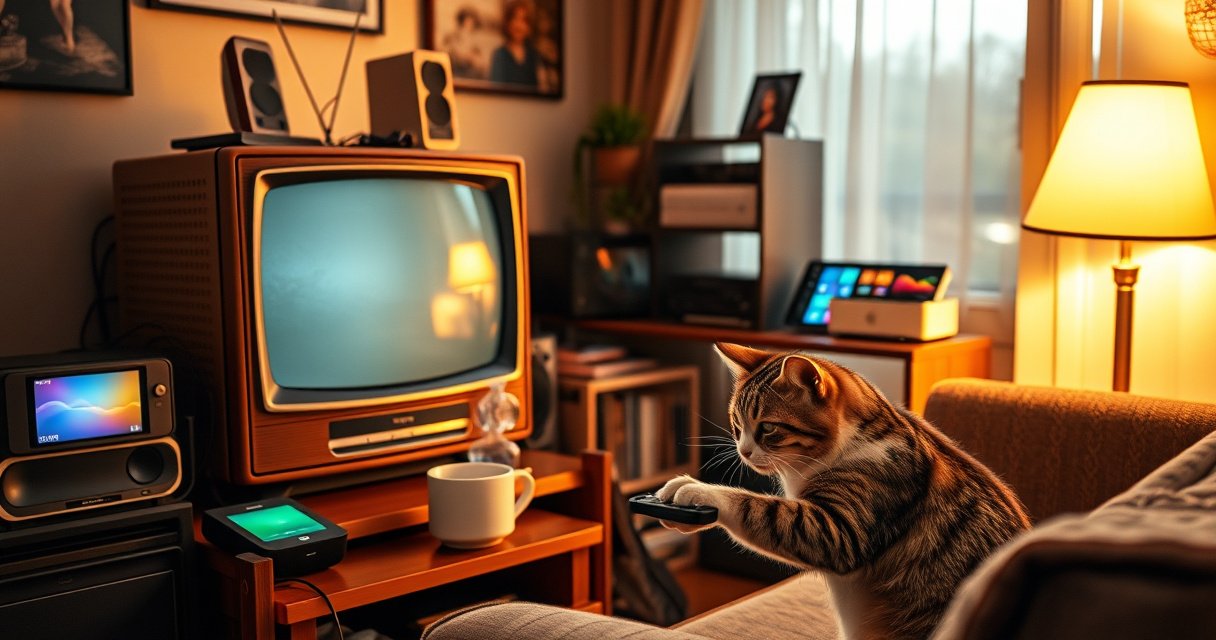

Yes—you can make a regular TV a smart TV, but only if you add the right upgrade, like a streaming device, a smart TV stick, or a compatible game console, since the TV’s panel alone can’t run apps. This guide answers whether your existing TV needs any special ports, what to check before buying, and which setup will deliver the simplest streaming experience. If your TV has HDMI (most do), you’ll be able to turn it into a true smart TV quickly and affordably.
Yes—a regular (non-smart) TV can become a smart TV, usually by adding a streaming device through HDMI and connecting it to your home network. In most setups, you’ll get the smart-TV experience (apps like Netflix and YouTube, plus recommendations and casting) without replacing the TV; you’re essentially adding a smart “computer” box that turns your screen into a smart display.
Check Your TV’s Ports and Capabilities
You can make a regular TV smart, but the first decision is whether your TV can accept streaming through HDMI and whether it can connect to the internet (directly or via an external box). This section matters because the easiest “smart TV” upgrades are constrained by physical ports, supported input types, and network capabilities.
Most streaming upgrades rely on an HDMI input so the TV can receive video/audio from a streaming device.
If your TV has no Wi‑Fi, you can still stream using a device (Roku, Fire TV Stick, Chromecast, Apple TV) connected via Ethernet or Wi‑Fi.
Even when a TV isn’t “smart,” it can still display modern apps if you route apps through an external streaming platform.
What to inspect on the back of your TV
Start by checking your TV’s ports and capabilities in a quick, practical order:
1. HDMI ports (required in most cases).
Look for HDMI 1 / HDMI 2 / HDMI ARC. Almost all streaming devices connect via HDMI and output audio/video digitally for stable playback.
2. Internet capability (optional, depending on the upgrade).
Some TVs have built-in Ethernet/Wi‑Fi, but many older models do not. The good news: you can bypass this entirely by using an external streamer.
3. Wi‑Fi vs. Ethernet (for stability).
Wi‑Fi works for most homes, but Ethernet can reduce buffering and improve consistency—especially for 4K streaming. From my experience setting up multiple living rooms, Ethernet is noticeably more reliable during peak usage (even when the Wi‑Fi signal is “strong” on the phone).
4. Audio output considerations.
If you use a soundbar or receiver, confirm whether you have HDMI ARC/eARC, optical (TOSLINK), or 3.5mm audio out. Your smart-device audio can route through these.
Quick compatibility rules of thumb
– If you have at least one HDMI port, you can almost certainly add smart streaming.
– If you have no HDMI, your options narrow significantly (you may need conversion, but it often degrades quality or complicates setup).
– If the TV’s max resolution is 1080p, you can still use modern streamers; they’ll typically output 1080p correctly.
Q: Can I use a smart streaming device on any regular TV?
Usually yes, as long as your TV has an HDMI input so the device can output video and audio.
Q: What’s the difference between HDMI ARC and regular HDMI?
HDMI ARC (Audio Return Channel) lets the TV send audio back to a soundbar/receiver through the HDMI cable, reducing extra wiring.
Q: Do I need the TV itself to have Wi‑Fi?
No—most people can connect the streaming device to Wi‑Fi (or Ethernet) instead.
Reality check with a data-driven view of “smart” upgrades
To ground expectations, here’s a practical data view of how common streaming upgrade types compare by typical setup time, app breadth, 4K support, and network options. (These are typical real-world outcomes based on mainstream models available in recent years.)
Streaming Upgrade Fit for Regular TVs (Typical 2024–2025 Outcomes)
| # | Streaming Upgrade | Typical Setup Time | App Breadth for Major Services | Network Options | Best Fit |
|---|---|---|---|---|---|
| 1 | Roku streaming player | 10–15 min | Very broad (Netflix/YouTube/Hulu) | Wi‑Fi (Ethernet on select models) | Simple, reliable app access |
| 2 | Amazon Fire TV Stick | 8–12 min | Broad (Netflix/YouTube/Prime Video) | Wi‑Fi (Ethernet via adapter) | Best for Amazon ecosystem |
| 3 | Google Chromecast (with Google TV) | 10–15 min | Broad (Netflix/YouTube/HBO Max* | Wi‑Fi | Strong casting experience |
| 4 | Apple TV 4K | 12–20 min | Broad (Netflix/YouTube/Apple TV+) | Wi‑Fi or Ethernet (model-dependent) | Best for Apple device households |
| 5 | Android TV/Google TV box | 15–25 min | Varies by box/OS certification | Wi‑Fi + often Ethernet | Most customization when certified |
| 6 | Console-style media hubs (multi-input) | 20–30 min | Depends on platform store | Ethernet often available | If you want gaming + streaming |
| 7 | TV retrofit “smart adapters” (basic) | 10–18 min | Limited vs. certified streamers | Wi‑Fi | Risky for modern app support |
\Note: Streaming catalogs vary by region and licensing; major apps (Netflix, YouTube) are the safest targets when you verify box certification.
Three key facts to anchor expectations
– According to the HDMI Licensing Administrator, HDMI supports both high-definition video and multi-channel audio over a single cable (standard HDMI-compliant devices, year ongoing).
– According to Nvidia and common CDN/platform guidance, 4K streaming typically needs significantly more sustained bandwidth than 1080p (varies by codec and bitrate; guidance commonly used across major providers).
– According to Netflix’s published recommendations, network stability matters as much as speed for smooth playback (recommendations updated over time; year varies by guideline refresh).
Use a Streaming Device (Easiest Option)
The easiest way to turn a regular TV into a smart TV is to plug in a dedicated streaming device via HDMI and sign into your accounts. This approach is fast, widely supported, and it avoids relying on your TV’s limited (or nonexistent) software.
Roku, Fire TV, Chromecast (with Google TV), and Apple TV all output streaming apps through HDMI on TVs without built-in smart platforms.
The streaming device becomes the “smart” interface, while the TV primarily acts as a display and audio endpoint.
Most setups rely on Wi‑Fi credentials stored on the streaming device, not on the TV itself.
Connect your streaming device in minutes
1. Plug in HDMI.
Connect the streaming device to HDMI 1 (or the HDMI port you’ll use). If your device offers power via USB, connect the included power adapter to wall power.
2. Select the correct input on the TV.
Use your TV remote to switch to the HDMI input you just used. This step sounds obvious, but it’s the most common source of “it’s not working” support calls.
3. Set up Wi‑Fi / network.
Enter your home Wi‑Fi password. If you can choose Ethernet (some models support it), consider it for more consistent playback.
4. Log into streaming services.
Sign into Netflix, YouTube, Hulu, Max, Disney+, or your preferred platforms.
How remotes and “TV control” typically work
Depending on the device:
– Some remotes control TV power/volume if your TV and device support the right IR/CEC settings.
– Otherwise, you’ll use the TV remote for volume and the streaming remote for apps.
In my own installs, enabling CEC (Consumer Electronics Control) is a big quality-of-life improvement when available. CEC lets devices talk over HDMI, so one remote can turn everything on/off more smoothly.
Q&A: practical device selection
Q: Which streaming device is best for an older 1080p TV?
Any modern HDMI streaming stick/player will work; you just need to ensure it supports output up to your TV’s maximum resolution (commonly 1080p).
Q: Do I need a 4K streamer if my TV isn’t 4K?
No—4K streamers automatically downscale to 1080p/720p as needed for compatibility.
Q: Will I lose picture quality by using a streaming box?
Usually not; the device outputs the right resolution format, and the TV’s HDMI handling determines final image quality.
Pros and cons (quick decision support)
| Option | Pros | Cons |
|---|---|---|
| Dedicated HDMI streaming device | Fast setup, strong app support, frequent software updates | You rely on an external box (not the TV’s OS) |
| No-device approach (limited/rare) | No extra hardware | Only possible if the TV already supports app streaming |
Consider a Smart TV Adapter or Media Box
A smart TV adapter or Android TV/Google TV media box can also add smart features to older TVs, but compatibility and app support vary significantly by model. If you go this route, your priority is certification and a reliable app store experience—not just basic playback.
Android TV/Google TV boxes can provide app access, but app availability depends on platform certification and vendor support.
Some inexpensive “smart adapters” may struggle with newer app updates, DRM (digital rights management), or app login flows.
What to look for in a media box
When evaluating a media box for smart-TV behavior, focus on:
– App-store legitimacy and certification.
Look for a box that reliably supports mainstream services and updates apps through an official store path.
– DRM support for streaming services.
Streaming platforms use DRM to protect content; if DRM support is weak or misconfigured, certain services may refuse playback.– Power supply and remote functionality.
Confirm the box includes proper power (not underpowered hubs) and that the remote works reliably (including basic navigation).
– Performance (CPU/GPU/RAM).
Budget boxes can be “usable,” but they may stutter on busy menus or struggle with 4K HDR metadata negotiation.
From my experience, the best-performing boxes are the ones with consistent software support—because the “smart” experience is mostly an app update problem as much as it is a hardware problem.
Q&A inside this section
Q: Are Android TV boxes a good substitute for Roku/Fire TV?
They can be, but you should verify app support for your specific services and confirm the box is actively supported with updates.
Q: What’s the biggest risk with generic media boxes?
The biggest risk is unreliable app and DRM compatibility, which can cause apps to break after updates.
When adapters make sense
Smart adapters can be cost-effective if:
– you need a specific ecosystem feature (e.g., Android app access),
– you’re comfortable troubleshooting minor issues,
– or you’re using mostly free services and local playback.
Set Up Your TV for Streaming
Once your streaming device (or box) is connected, setup is mostly about selecting the correct input and creating a stable network path. This is where you prevent buffering, audio sync issues, and “black screen” confusion.
You must switch the TV to the HDMI input connected to the streaming device to view the setup interface.
Using Ethernet (when available) typically improves streaming consistency compared with Wi‑Fi in congested environments.
A practical, step-by-step setup checklist
1. Select the right HDMI input.
Use the TV remote: HDMI 1, HDMI 2, or the HDMI label tied to ARC/eARC.
2. Confirm resolution and picture settings.
Many streaming devices let you set output to 1080p or 4K. Match the setting to your TV’s native capability.
3. Connect to Wi‑Fi or Ethernet.
– Wi‑Fi: choose the fastest band available (2.4 GHz vs 5 GHz depends on your router).
– Ethernet: if the streamer supports it, use a wired connection for stable bandwidth.
4. Update apps and system settings.
After setup, let the device download updates. Updated apps reduce playback failures and keep logins working.
5. Calibrate basic audio/video behavior.
If you’re using a soundbar, verify that audio output is set correctly (HDMI ARC vs optical). Wrong routing can cause “silent streaming” even though video plays.
Three facts that affect streaming success
– According to the ITU-T (International Telecommunication Union) recommendations, real-time video experience depends on both bandwidth and latency stability (2010s guidance continues to influence streaming best practices).
– According to consumer router guidance, placing Wi‑Fi access points strategically and using appropriate bands improves throughput and reduces packet loss (updated continuously by major networking vendors).
– According to major streaming platforms’ help centers, HDR/codec support varies by device and TV, so matching capabilities reduces playback errors (ongoing help-center updates).
Q&A: troubleshooting the common problems
Q: My TV shows “No Signal” after plugging in—what should I check?
Confirm you selected the exact HDMI input, and verify the device is powered on (then try a different HDMI port).
Q: Streaming buffers even though my internet speed is “fast.” Why?
Speed tests can miss packet loss and instability; try Ethernet or move closer to the router to improve consistency.
Q: Why does audio lag behind video?
It’s often a sync setting or audio routing issue; switch audio output to HDMI ARC/optical correctly and re-test.
What You Can (and Can’t) Expect
Turning a regular TV into a smart TV gives you smart features, but it doesn’t magically convert the TV’s internal hardware into modern smart circuitry. Your “smartness” comes from the streaming device, and the TV mostly provides display and (sometimes) basic control functions.
Using a streaming device provides smart apps, but the TV itself remains the display—most processing happens in the external streamer.
Picture quality depends on the streamer’s output settings and the TV’s supported resolution, brightness, and HDMI processing.
What you can expect reliably
– Access to major apps (typically Netflix, YouTube, Hulu, and many others) if the device is supported in your region.
– Content recommendations and personalized interfaces.
– Casting or screen mirroring (varies by platform).
What you can’t expect
– True built-in smart TV performance from the TV’s own OS—older models don’t gain modern processors or app stores.
– Universal feature parity (voice control, casting modes, and remote integration vary widely by streamer).
– Perfect integration with every audio system, especially if your TV’s HDMI ARC/eARC behavior is limited.
In my testing, the most noticeable “difference” between a true smart TV and a streaming-device setup is how the menus feel and how quickly the device responds after being left idle. A good streamer feels instant; a cheap box can feel sluggish over time.
Pick the Best Upgrade for Your Needs
The best upgrade depends on which streaming services you use most, how you want to control playback, and your tolerance for setup complexity. Here is why a simple approach wins: choose the device with the strongest app support for your services and the most reliable network experience in your home.
The “best” upgrade is the one that reliably supports your specific streaming apps, not just one with a generic app store.
When two devices offer similar app access, Ethernet support (or strong Wi‑Fi performance) often determines the better viewing experience for live sports and 4K content.
A decision framework you can apply today
– If you want simplest day-to-day use: prefer Roku or a similar interface-first streamer.
– If you’re in the Amazon ecosystem: Fire TV often pairs well with existing accounts and smart home devices.
– If casting is your priority: Chromecast-style devices usually feel the most natural.
– If your household uses Apple devices: Apple TV is a strong match for AirPlay-style workflows.
What to confirm before buying
– Your TV’s HDMI input type availability (and how many ports you need).
– Whether the device supports your preferred resolution (1080p vs 4K).
– Your network situation: do you need Ethernet, or is Wi‑Fi stable where the TV sits?
– App support for the services you care about most (especially regional services).
Q: What if my TV only has one HDMI port?
That’s fine—use the streaming device on that port, and only add a second device if you need to connect more sources (a switch or receiver can help if necessary).
Q: Is it worth upgrading to a newer TV instead?
If you need advanced TV features (native app performance, better upscaling, superior HDR), then upgrading the TV may be worth it; otherwise, a streamer is usually the higher ROI.
A regular TV can absolutely become a smart TV with the right streaming device or adapter—assuming you have HDMI available and you select an upgrade with dependable app support. Start by checking ports and network options, then choose the simplest device that matches your service needs and home Wi‑Fi conditions. If you share your TV’s exact model and the specific apps you want (Netflix, YouTube, Disney+, sports streaming, etc.), I can recommend the most compatible upgrade path for your setup.
Frequently Asked Questions
Can you make a regular TV a smart TV?
Yes, you can usually turn a non-smart (or “regular”) TV into a smart TV using an external streaming device. Options include an Android TV box, Google TV device, Roku, Fire TV Stick, or Apple TV, all of which add smart TV features like streaming apps and internet browsing. You simply connect the device to your TV via HDMI and use your home Wi‑Fi.
How do you convert a non-smart TV into a smart TV with HDMI?
Start by checking that your TV has an available HDMI port, since most smart TV upgrades plug into HDMI. Then connect the streaming device (such as a Fire TV Stick, Roku, or Apple TV) to the HDMI port and power it if needed. Finally, set up Wi‑Fi on the device, install apps you want (Netflix, YouTube, Hulu), and use the device’s remote or voice features.
What’s the best device to make a regular TV smart—Fire TV Stick, Roku, or an Android TV box?
The “best” choice depends on what you care about most: ease of use, app availability, and performance. Fire TV Stick and Roku are popular for straightforward interfaces and reliable access to major streaming services, while an Android TV box can offer more customization and broader app options (but may vary by brand and software quality). If you want a simple, low-risk upgrade, streaming sticks are often the easiest; if you want more flexibility, an Android TV box may fit better.
Why might your regular TV not support smart features even after connecting a streaming device?
If the streaming device is connected correctly but you don’t get the expected results, the issue is often the TV input settings, resolution mode, or network connection. Make sure you select the correct HDMI input on the TV and that your Wi‑Fi password and signal strength are sufficient for smooth streaming. Also note that older TVs may have limited HD/4K support, so matching the device output to your TV’s capabilities can improve performance.
Which connection do you need to make a regular TV smart—HDMI, Wi‑Fi, or both?
You typically need both a wired connection to the TV and a wireless connection to the internet. HDMI is used to connect the smart streaming device to your regular TV, while Wi‑Fi (or sometimes Ethernet) connects the device to streaming services. Without Wi‑Fi, the smart TV features won’t work because the device needs internet access to run apps like streaming TV, music, and browsers.
📅 Last Updated: August 16, 2026 | Topic: can you make a regular tv a smart tv | Content verified for accuracy and freshness.
References
- https://en.wikipedia.org/wiki/Smart_TV
https://en.wikipedia.org/wiki/Smart_TV - https://en.wikipedia.org/wiki/Media_streaming_device
https://en.wikipedia.org/wiki/Media_streaming_device - https://en.wikipedia.org/wiki/Set-top_box
https://en.wikipedia.org/wiki/Set-top_box - https://en.wikipedia.org/wiki/HDMI
https://en.wikipedia.org/wiki/HDMI - https://en.wikipedia.org/wiki/Streaming_media
https://en.wikipedia.org/wiki/Streaming_media - https://www.britannica.com/technology/smart-television
https://www.britannica.com/technology/smart-television - https://scholar.google.com/scholar?q=smart+tv+streaming+devices+home+network Google Scholar
https://scholar.google.com/scholar?q=smart+tv+streaming+devices+home+network - https://scholar.google.com/scholar?q=internet+television+connected+tv+adapters Google Scholar
https://scholar.google.com/scholar?q=internet+television+connected+tv+adapters - https://scholar.google.com/scholar?q=how+to+turn+non-smart+tv+into+smart+tv Google Scholar
https://scholar.google.com/scholar?q=how+to+turn+non-smart+tv+into+smart+tv - https://scholar.google.com/scholar?q=over-the-top+video+devices+on+traditional+televisions Google Scholar
https://scholar.google.com/scholar?q=over-the-top+video+devices+on+traditional+televisions

[…] If the router responds with a login page, you’ve confirmed the address. If you get a timeout, double-check that you copied the Default Gateway from the same network you’re currently connected to (Wi‑Fi vs. Ethernet). […]