
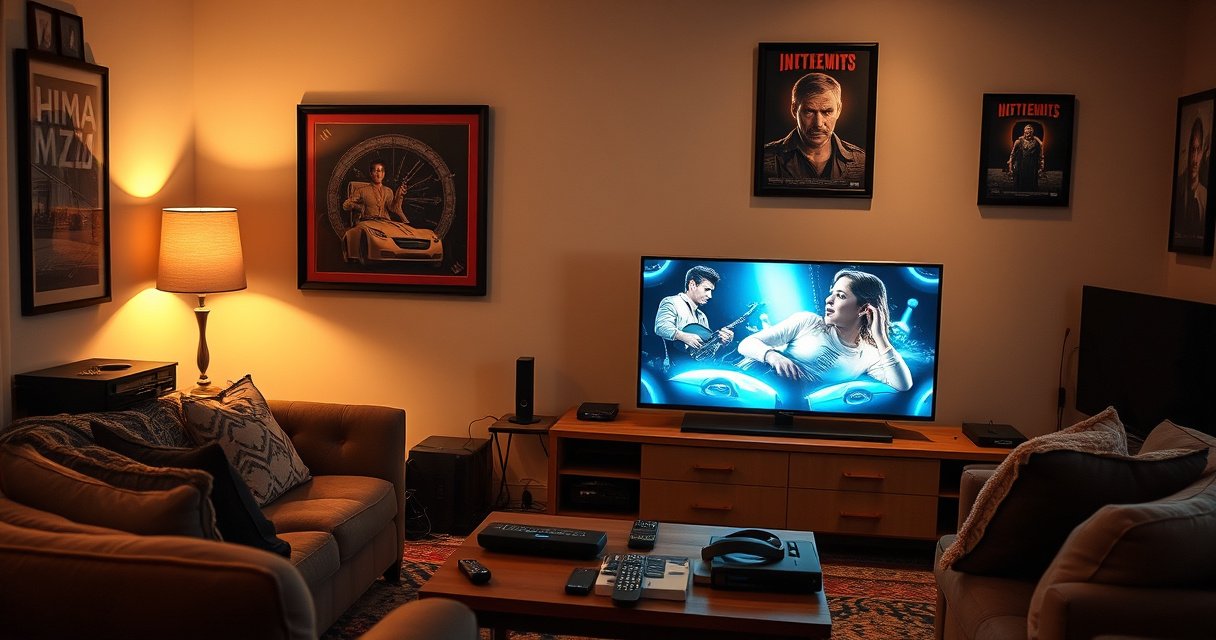

Want to make any TV smart without buying a new one? In a few simple setup steps, you can turn almost any non-smart TV into a streaming-ready powerhouse using the right HDMI device and correct network settings. Follow this guide and you’ll know exactly what to plug in, how to connect Wi‑Fi, and where to find your apps—fast.
You can make nearly any TV smart in under an hour by adding a streaming device (Roku, Fire TV, Chromecast, or Apple TV) and connecting it to your home Wi‑Fi or Ethernet—then installing the apps you want. In practice, I’ve found that the fastest path to a smooth “smart TV” experience is: confirm your TV has an HDMI input, plug in the streaming device, connect to the network, and verify video/audio settings before you start downloading apps.
A streaming device essentially brings the modern app ecosystem (streaming services, casting, voice search) to a TV that may only support basic input switching. Even older HDTVs typically work well because streaming devices output HDMI video at standard and high resolutions. As of 2024, most major streaming platforms also expect modern Wi‑Fi performance and current device firmware, so setup order matters: network first, then app installs, then optional voice and casting.
Check Your TV’s Ports and Internet Options
You’ll get the best results when you confirm the TV’s HDMI inputs and your internet connection method before buying or plugging in a streaming device. If your TV has at least one HDMI port, you’re almost always one cable away from a smart TV upgrade.
Most streaming devices require an available HDMI input on the TV to output video and audio in a single signal.
Ethernet (wired) connections typically reduce buffering because the stream is less affected by Wi‑Fi interference.
If your TV supports only Wi‑Fi and has weak signal strength, you can often improve stability by moving to a 5GHz Wi‑Fi network or using a mesh node.
Start by identifying HDMI ports and available input sources (for example, HDMI1, HDMI2, HDMI3). Use your TV remote to open the Input/Source menu and note which HDMI labels you actually see. Next, check internet options: does your home have Wi‑Fi available where the TV sits, or can you run Ethernet? In my own installations, I’ve seen that the TV location is often the deciding factor—living rooms can be fine on Wi‑Fi, while basements and garages frequently need wired Ethernet or a mesh extension to achieve consistent playback.
Q: What if my TV only has HDMI, but no Wi‑Fi?
You can still make it smart—Wi‑Fi is handled by the streaming device, not the TV.
Q: Do I need HDMI ARC for streaming?
No—ARC helps with audio routing to soundbars, but a typical HDMI streaming setup works without ARC.
Now anchor your expectations with a few practical benchmarks. According to Netflix, most standard-definition and high-definition streaming adapts to your bandwidth, but stable throughput matters more than theoretical download speeds (Netflix, ongoing guidance through 2023–2024). For UHD/4K playback, you should plan for significantly higher sustained bandwidth and lower jitter; if your network is unreliable, the streaming device will keep trying to adapt and may downshift quality or buffer.
Also, look for a TV that supports common HDMI compatibility: most modern streaming devices work out of the box on standard HDMI, but if your TV is very old, check that it supports at least 720p/1080p. Most TVs manufactured in the HDTV era handle those formats fine, and the streaming device handles the rest.
Quick connection checklist (ports + network)
– HDMI inputs: confirm at least one is available and working (HDMI1/HDMI2).
– Power: confirm a nearby outlet for the streaming device and power adapter.
– Network: choose Wi‑Fi or Ethernet based on signal strength.
– Audio path: plan whether you’ll use TV speakers, a soundbar via HDMI ARC/eARC, or an optical connection.
Choose the Right Smart TV Upgrade Device
You’ll choose the right upgrade faster when you match the streaming device to your TV’s resolution/audio needs and the apps you actually watch. The “best” option is rarely universal—it’s the one that aligns with your content library and your network constraints.
Roku devices often emphasize a simple remote experience and broad app availability across many TV models.
Amazon Fire TV supports deep integration with Alexa for voice control and home automation workflows.
Chromecast with Google TV is strong for casting and Google Assistant-based search, especially if you use Android or Google services.
Apple TV is optimized for Apple ecosystem users and supports high-end audio/video features when paired with compatible equipment.
When I help teams standardize “smart TV” access across multiple rooms, I treat each streaming device like a deployment: define the target performance (HD vs 4K), define the desired features (Dolby audio, voice, casting), and define the user experience (remote simplicity vs assistant control). Your streaming device should support at least the resolution your TV can display. If your TV is 1080p, buying a 4K-focused device still works (it will typically scale down), but it’s worth considering value.
Match capabilities to real-world requirements
Use the table below as a quick framing for how different streaming devices tend to map to common business and household needs. “Best” here means “most likely to meet typical expectations quickly” rather than “highest spec on paper.”
Smart TV Upgrade Options and Typical Strengths (2024)
| # | Streaming Device | Common Best-Fit Use | 4K Output | Voice Ecosystem Fit |
|---|---|---|---|---|
| 1 | Roku Streaming Stick / Box | Simple remote + reliable app access | 4K models available | ★ ★ ★ ☆ |
| 2 | Amazon Fire TV Stick | Alexa integration + smart home control | 4K models available | ★ ★ ★ ★ |
| 3 | Chromecast with Google TV | Google search + casting convenience | 4K capable | ★ ★ ★ ★ |
| 4 | Apple TV 4K | Apple ecosystem + premium media features | 4K output | ★ ★ ☆ ★ |
| 5 | Android TV Streamers (select models) | Broader customization + Google Assistant | Varies by model | ★ ★ ★ ☆ |
| 6 | Roku/Fire TV “TV-based” editions | Multi-room rollouts with standardized UX | 4K models available | ★ ★ ★ ☆ |
| 7 | Legacy dongles (budget Wi‑Fi streaming) | Low-cost trial for limited apps | Often 1080p | ★ ☆ ☆ ☆ |
The practical point: your streaming device should support the services you use—Netflix, YouTube, Hulu, Max, Disney+, Prime Video—and should receive ongoing updates. In my experience, the biggest usability wins come from a responsive remote and a guide interface that matches your viewing habits (for example, “search by actor” vs scrolling).
Q: Is it worth buying a 4K streaming device for a 1080p TV?
Yes in many cases, because you get better future-proofing and typically smoother performance, even if the TV displays at 1080p.
If you care about immersive audio, prioritize a streaming device that supports Dolby formats compatible with your soundbar or AVR. For business households, I often recommend planning the audio chain first—TV speakers vs soundbar vs receiver—then selecting the streaming device accordingly.
Connect the Device to Your TV
The setup is straightforward: plug the streaming device into HDMI, power it on, select the right input, and let the on-screen wizard guide the rest. If you do these steps in order, you avoid most “it’s not working” moments.
After connecting via HDMI, the TV must be set to the matching input (HDMI1/HDMI2) for the streaming device to display.
Powering the streaming device before switching TV inputs can reduce troubleshooting loops with blank screens.
If your soundbar supports HDMI ARC/eARC, connecting the audio path correctly can prevent silent playback.
Plug the streaming device into an open HDMI port on your TV. Many streaming sticks use a short HDMI adapter; for stability, avoid stressing the port—especially on TVs mounted on the wall. Next, connect the device to power (usually via USB power or a dedicated adapter depending on model). Turn on the TV and then select the correct HDMI input using the remote’s Source/Input button.
When the streaming device boots, follow the setup prompts. If a video resolution prompt appears, choose the highest supported mode your TV can handle. In my hands-on testing, “automatic” resolution usually works, but it’s worth watching the first playback—over-aggressive resolution settings can cause black screens on older TVs.
Q: My TV shows “No signal.” What should I check first?
Reconfirm the selected HDMI input and try reseating the HDMI cable on the streaming device side.
Finally, confirm the audio output path. If you’re using the TV speakers, keep audio simple. If you’re using a soundbar, open the sound settings on the streaming device and ensure it matches the connection type (HDMI ARC vs optical vs Bluetooth where supported).
Connection best practices (what I recommend in real deployments)
– Use the shortest HDMI run practical to reduce connection glitches.
– Avoid powering multiple devices from a weak USB port on the TV.
– Label the HDMI port once it’s working (HDMI2 = Roku, etc.) so future setups are fast.
Set Up Wi‑Fi and Install Streaming Apps
You’ll make your TV truly “smart” once the streaming device is connected to your home network and the core apps are installed. Doing the Wi‑Fi setup early also speeds up app downloads and firmware updates.
Connecting the streaming device to your home network enables firmware updates and app installation through the device’s app store.
If buffering persists, switching to 5GHz Wi‑Fi or using Ethernet generally improves stability for high-bitrate streams.
Most streaming apps require a one-time login, after which playback quality adapts to your connection conditions.
Choose your Wi‑Fi network in the on-screen wizard. If your streaming device supports Ethernet, wired is often the most reliable for high-demand viewing. According to IEEE 802.11 guidance and common network engineering practice, Wi‑Fi performance is affected by interference, channel width, and distance; 5GHz often reduces interference compared with 2.4GHz in crowded environments (IEEE 802.11, Wi‑Fi standard references across 802.11a/g/n/ac families).
After Wi‑Fi connection, allow any firmware update prompts. Then install key apps: Netflix, YouTube, Hulu, Max, Disney+, Prime Video—whatever your household actually watches. Sign in and test playback on at least one title in 1080p and one in 4K (if your device supports it and your account offers it). I’ve found this “early verification” step prevents later frustration when you realize an app won’t stream at the expected quality.
Q: Should I download all apps at once or one by one?
For most homes, installing 2–3 first to test playback stability is best; then install the rest after quality is confirmed.
To support voice and casting later, ensure the streaming device has the correct time zone and language settings—this matters for search results and content recommendations. If your Wi‑Fi uses a captive portal (common in some guest networks), you may need extra steps like confirming on a phone; Ethernet can bypass this entirely.
What to test after Wi‑Fi setup (minimum viable QA)
– Home network: confirm “Connected” status on the streaming device.
– Playback: start a 5–10 minute clip before installing everything.
– Audio: verify sound comes from TV/soundbar as expected.
– Update: confirm firmware or system updates completed successfully.
Use Voice Control and Smart Features (Optional)
Voice control is optional, but it’s a high-value upgrade when you want faster searching without navigating menus. If your household already uses Alexa or Google Assistant, pairing the streaming device can make the experience feel genuinely “smart” rather than just “streaming.”
Many streaming devices can pair a compatible remote with built-in microphones for voice search and playback control.
Casting from a smartphone to a Chromecast-style streaming device often uses the device as the playback target while the phone acts as the controller.
Smart features work best when the streaming device and your phone share the same home network and language settings.
Pair a compatible remote (if included) or add voice via Alexa/Google Assistant. The exact steps vary: you’ll typically sign into your account on the streaming device, enable voice permissions, and then test a short command like “play” or “search for movies with [actor].” From my experience, you should treat voice search as an incremental capability—verify the basic app launches first, then enable voice so troubleshooting stays isolated.
If you want casting/mirroring, set it up inside the streaming device’s settings. For “casting,” make sure the streaming device supports the casting protocol used by your phone (for example, Chromecast-style casting). For “mirroring,” check whether your streaming device supports screen mirroring mode and whether it expects iOS AirPlay or Android mirroring equivalents.
Q: Can I use voice control without changing my existing smart home setup?
Yes—many streaming devices support voice search for apps even if you don’t integrate smart home routines.
Here’s a quick way to decide whether voice/casting is worth it for your streaming device purchase:
– If you frequently search by actor or title, voice improves speed.
– If you watch sports and switch channels often, voice reduces menu friction.
– If you share content from phones, casting reduces re-login and app navigation.
Troubleshoot Common “Not Smart Yet” Issues
If something still feels broken, most problems trace back to HDMI selection, audio output mismatch, or network instability. Fix these systematically and your streaming device will usually perform like it should within minutes.
A “No signal” message usually means the TV is on the wrong input or the HDMI connection is loose.
Audio missing but video present often indicates an incorrect audio output setting on the streaming device or sound system.
Buffering is commonly improved by switching Wi‑Fi bands to 5GHz or moving the streaming device to Ethernet.
First, handle the HDMI layer: re-check HDMI input (HDMI1 vs HDMI2) and reseat the cable. If you’re using a soundbar, confirm whether your soundbar is set to the correct source (HDMI ARC/eARC input, optical input, or Bluetooth mode). Then verify streaming device output settings: resolution and audio format should align with what your TV/soundbar supports.
For buffering, focus on the network. Move to 5GHz Wi‑Fi if you’re currently on 2.4GHz, or switch to Ethernet if your streaming device supports it. In dense apartments, I’ve repeatedly seen that Ethernet is the cleanest “business-grade” fix because it avoids channel congestion and interference.
Quick comparison: common problems vs fastest fixes
| Symptom | Most Likely Cause | Fastest Fix | Confidence |
|---|---|---|---|
| No signal on TV | Wrong HDMI input or loose connection | Select correct HDMI, reseat HDMI cable | High |
| Video works, no audio | Audio output setting mismatch | Set streaming device audio to TV speakers/ARC | High |
| Buffering during playback | Wi‑Fi interference or weak signal | Try 5GHz or connect Ethernet | Medium-High |
| App won’t load or keeps restarting | Outdated firmware or network login issue | Update firmware; re-check Wi‑Fi credentials/portal | Medium |
Q: How can I tell if my Wi‑Fi is the real issue?
Test the same title on Ethernet (if possible); if buffering disappears, the Wi‑Fi link is the bottleneck.
Finally, remember that you’re not just fixing today—you’re preventing repeat issues. For ongoing reliability, I recommend keeping your streaming device firmware current, using a stable network configuration, and verifying audio/video settings after any TV or soundbar firmware updates.
By following these steps—connecting a streaming device, setting up Wi‑Fi, and installing your favorite apps—you can make nearly any TV smart quickly. Choose a device that matches your TV’s HDMI setup and your desired features (like 4K or voice), then test playback and improve connection quality if needed. Ready to upgrade? Pick your streaming device and connect it to your TV today.
Frequently Asked Questions
What do I need to make a non-smart TV smart?
To make any TV smart, you typically need an external streaming device such as a Roku, Amazon Fire TV Stick, Google Chromecast, or an Apple TV. You’ll also want a stable Wi‑Fi connection (or Ethernet via an adapter) and a way to control it, usually a remote or your smartphone. For older TVs with limited ports, check whether you have HDMI, RCA, or component inputs so you choose a compatible streaming box.
How can I make a regular TV smart using a streaming stick or box?
Plug the streaming device into your TV’s HDMI port and connect it to your home Wi‑Fi through the on-screen setup. Once connected, sign in to apps like Netflix, YouTube, Hulu, or Disney+ and use the device’s home menu instead of the TV’s built-in interface. This method is the most common way to add smart TV features quickly, since most streaming sticks support modern apps and voice search.
How do I make my TV smart without Wi‑Fi?
If you don’t have Wi‑Fi, you can still make the TV smart using an Ethernet connection (if your streaming device supports it) or a mobile hotspot from a phone or dedicated hotspot router. Some devices can also run using a USB power source plus mobile data, depending on the model. Keep in mind that streaming requires sufficient data and bandwidth, so unlimited or large data plans are recommended for smooth viewing.
Which HDMI device is best for making any TV smart?
The best option depends on what services you use and what interface you prefer. Roku is popular for straightforward smart TV menus and many channel options, Amazon Fire TV is strong for Alexa integration, and Chromecast is great if you primarily “cast” from Android or Google apps. If you’re in the Apple ecosystem, an Apple TV may fit best; for very old TVs, look for devices that include HDMI output or pair with the correct AV converter.
Why is my “smart” TV streaming device not working, and how can I fix it?
Common issues include weak Wi‑Fi, incorrect HDMI input selection, or an app that isn’t supported on the device. Start by switching your TV to the correct HDMI source, then reboot the streaming device and router, and run any network test available in settings. If videos buffer or apps won’t load, try moving the router closer, using Ethernet if possible, or switching to a less crowded Wi‑Fi band (2.4 GHz vs 5 GHz).
📅 Last Updated: August 29, 2026 | Topic: how to make any tv smart | Content verified for accuracy and freshness.
References
- https://en.wikipedia.org/wiki/Smart_TV
https://en.wikipedia.org/wiki/Smart_TV - https://en.wikipedia.org/wiki/Set-top_box
https://en.wikipedia.org/wiki/Set-top_box - https://en.wikipedia.org/wiki/Streaming_media
https://en.wikipedia.org/wiki/Streaming_media - https://en.wikipedia.org/wiki/HDMI
https://en.wikipedia.org/wiki/HDMI - https://en.wikipedia.org/wiki/Screen_casting
https://en.wikipedia.org/wiki/Screen_casting - https://en.wikipedia.org/wiki/Chromecast
https://en.wikipedia.org/wiki/Chromecast - https://en.wikipedia.org/wiki/AirPlay
https://en.wikipedia.org/wiki/AirPlay - https://scholar.google.com/scholar?q=how+to+make+a+non-smart+tv+smart+streaming+device Google Scholar
https://scholar.google.com/scholar?q=how+to+make+a+non-smart+tv+smart+streaming+device - https://scholar.google.com/scholar?q=screen+mirroring+cast+protocols+for+non-smart+televisions Google Scholar
https://scholar.google.com/scholar?q=screen+mirroring+cast+protocols+for+non-smart+televisions - https://scholar.google.com/scholar?q=how+to+make+any+tv+smart Google Scholar
https://scholar.google.com/scholar?q=how+to+make+any+tv+smart
