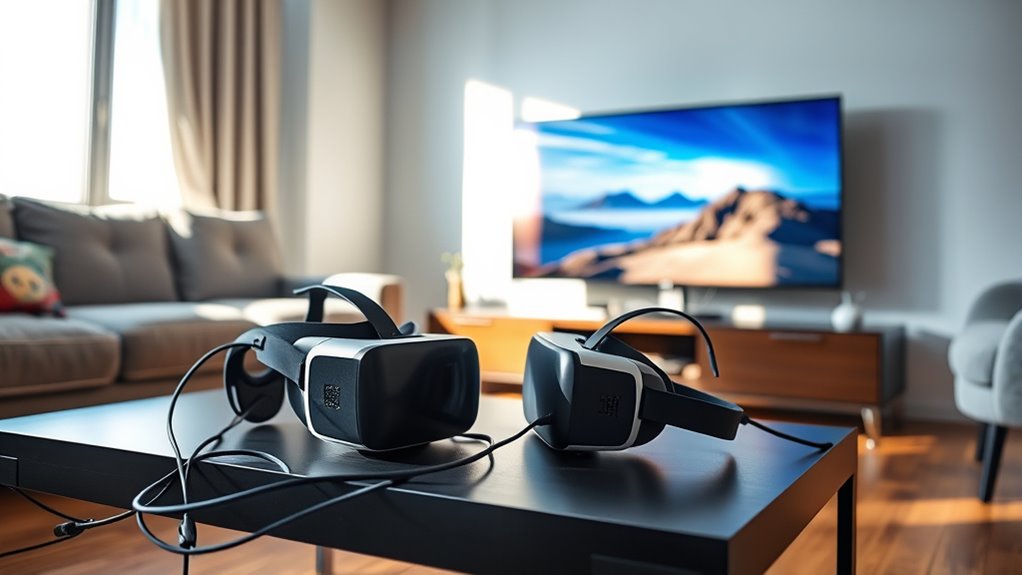
To connect your VR headset to your TV, start by gathering necessary equipment and checking compatibility. Power on your headset, then connect it using the right HDMI cable. Set up your TV display and configure the audio output for an immersive experience. Enable screen mirroring to showcase your gameplay, and finally, test the connection to verify everything’s working smoothly. By following these steps, you can fully enjoy your virtual reality adventures on the big screen and discover even more tips along the way!
Gather Necessary Equipment
To successfully connect your VR headset to your TV, you’ll need a few essential pieces of equipment. First, identify your VR headset types; some models connect directly to your TV, while others might require additional adapters. Next, check what HDMI variations you have available. Most modern TVs support standard HDMI, but some headsets might benefit from HDMI 2.0 or 2.1 for higher resolutions and refresh rates. It’s also wise to have a compatible audio output method if you plan on using external speakers. Finally, verify you have a stable power source for both your headset and TV. With these items gathered, you’re all set to enjoy immersive experiences on the big screen.
Check Compatibility
Before diving into the connection process, it’s crucial to guarantee your VR headset and TV are compatible. Ignoring compatibility issues can lead to frustration and wasted time. Here’s what you should check:
Ensuring your VR headset and TV are compatible is essential for a smooth connection experience.
- Device Specifications: Confirm both devices support the same resolution and refresh rate.
- Connection Type: Verify if your TV has the necessary ports (HDMI, USB-C, etc.) to connect to your headset.
- Software Compatibility: Check if your TV’s firmware is up to date and supports casting from your VR headset.
- Brand Compatibility: Some brands are more likely to work seamlessly together, so look into known compatibility.
Taking these steps will help you avoid potential problems and enjoy a smooth experience connecting your devices.
Power On Your VR Headset
Now that you’ve confirmed your devices are compatible, it’s time to power on your VR headset. Locate the power button, usually found on the side or front of the headset. Press and hold it until you see the headset indicators light up. This visual cue means your headset is booting up and ready for action. If the indicators don’t respond after a few seconds, double-check that the headset’s charged or connected to power. Once it’s powered on, you’ll likely hear a startup sound, confirming it’s operational. Enjoy the freedom of immersive experiences as you prepare to connect your VR headset to your TV. You’re one step closer to diving into your virtual adventures!
Connect VR Headset to HDMI
To connect your VR headset to your TV, you’ll need the right HDMI cable to guarantee a smooth display. Make certain your headset and TV both support the same HDMI version for peak performance. Once you’ve got that sorted, setting up the display is a breeze!
HDMI Cable Requirements
While connecting your VR headset to a TV, understanding the HDMI cable requirements is essential for a seamless experience. Here’s what you need to take into account:
- HDMI Cable Types: Choose between Standard, High-Speed, and Premium High-Speed cables based on your headset’s resolution and refresh rate.
- HDMI Cable Lengths: Verify the length is sufficient to bridge the distance between your headset and TV without being too long to cause signal degradation.
- Compatibility: Confirm your TV and headset support the same HDMI version for peak performance.
- Quality: Opt for well-reviewed cables to minimize issues like flickering or lag during use.
Setting Up Display
Connecting your VR headset to the HDMI port is an important step for displaying content on your TV. First, plug the HDMI cable into your headset and the TV. Once connected, power on both devices. You’ll want to adjust the display settings for the best experience. Start with some display calibration tips: verify the resolution matches your TV’s capabilities and select the correct input source. Next, optimizing screen brightness is vital; too bright or dim can affect immersion. Use your TV’s settings to find the sweet spot that feels comfortable for extended play. Finally, test your VR experience to confirm everything looks great. Enjoy your virtual adventures on the big screen!
Set Up the TV Display
Now that your VR headset is connected, it’s important to set up your TV display for the best experience. Start by choosing the right display resolution to match your headset, and then adjust the screen settings for ideal clarity. These steps will guarantee a seamless viewing experience while using your VR system.
Choose Display Resolution
Choosing the right display resolution for your TV is essential to enhance your VR experience. The resolution types you select can greatly impact visual clarity and immersion. Here’s how to choose wisely:
- Consider the native resolution of your TV, which is usually 1080p or 4K.
- Match the screen aspect ratio with your VR headset for seamless integration, typically 16:9.
- Adjust settings based on content type, as games may require different resolutions than movies.
- Test various resolutions to find the ideal balance between performance and visual quality.
Adjust Screen Settings
Once you’ve settled on the right display resolution, the next step is to adjust your screen settings to optimize your TV display for a seamless VR experience. Start by tweaking the screen brightness; too bright can strain your eyes, while too dim might hide detail. Find a balance that feels comfortable for extended viewing. Next, plunge into color calibration. This guarantees your colors pop without looking unnatural, enhancing immersion in your VR world. Many TVs have preset modes, but you can customize settings to match your preferences. Don’t forget to check for any motion smoothing features, as these can affect the fluidity of your VR visuals. With these adjustments, you’re all set to enjoy an intriguing VR adventure on your TV!
Adjust VR Headset Settings
Adjusting your VR headset settings is essential for optimizing your viewing experience. With the right adjustments, you can immerse yourself fully. Here are some key settings to take into account:
Optimizing your VR headset settings is crucial for an immersive viewing experience. Make the right adjustments for maximum enjoyment.
- Adjusting brightness: Tweak the brightness levels to guarantee clarity without strain.
- Optimizing refresh rate: Set the refresh rate to match your headset’s capabilities, enhancing smoothness.
- Field of view: Modify the field of view for a more expansive visual experience, making it feel more natural.
- Lens distance: Adjust the lens distance to fit your eyes comfortably, reducing fatigue during long sessions.
Configure Audio Output
Now that you’ve adjusted your VR headset settings, it’s time to configure the audio output. You’ll need to select the right audio output device, adjust the volume levels, and test the audio functionality to guarantee everything sounds good. Let’s explore how to make those adjustments for an immersive experience.
Select Audio Output Device
Although connecting your VR headset to a TV can enhance your gaming experience, selecting the right audio output device is essential for immersive sound. To guarantee you enjoy the best audio formats and sound quality, follow these steps:
- Check your TV settings: Verify your TV is set to the correct audio output option.
- Choose your headset: Select whether to use the VR headset’s built-in speakers or an external sound system.
- Adjust audio formats: Make sure the audio formats supported by your TV match those of your headset for peak performance.
- Test audio output: Play a game or video to confirm the sound is clear and immersive, enhancing your overall experience.
With these steps, you’ll be ready to plunge into your virtual world!
Adjust Volume Levels
To guarantee an ideal audio experience while using your VR headset, it’s vital to configure the volume levels appropriately. Start by locating the volume control on your headset or within the connected device settings. Adjust the levels to suit your sound preferences—too loud can be overwhelming, while too soft might make you miss significant audio cues. If your headset has a companion app, take advantage of any advanced audio settings to fine-tune your experience. Don’t forget to check the volume on your TV as well, ensuring it complements your headset’s output. Finding the right balance enhances immersion, allowing you to enjoy your virtual adventures without distractions. Happy gaming!
Test Audio Functionality
Testing your audio functionality is an essential step to confirm your VR experience is seamless. You’ll want to verify both audio quality and sound synchronization are on point. Follow these steps:
- Select Audio Output: Go into your VR settings and choose your preferred audio output device—TV or headphones.
- Play a Test Sound: Use a demo video or sound to check if the audio comes through clearly.
- Adjust Settings: If the sound isn’t right, tweak the balance, bass, or treble settings to enhance audio quality.
- Check Synchronization: Pay attention to any lag between the visuals and audio; adjust as needed to achieve perfect sound synchronization.
With these steps, you’re set to enjoy a fully immersive VR experience!
Enable Screen Mirroring
Once you’ve set up your VR headset, enabling screen mirroring allows you to share your immersive experience with others on a larger display. You’ll find various screen mirroring techniques and wireless display options that can enhance your viewing experience. Here’s a quick comparison to help you decide:
| Technique | Description |
|---|---|
| Wi-Fi Direct | Direct connection without a router |
| Chromecast | Stream from your headset to TV easily |
| Miracast | Wireless connection for Windows devices |
To enable screen mirroring, navigate to your headset’s settings and select the appropriate option based on your chosen technique. Once connected, everyone can enjoy your virtual adventures, making it a perfect way to share the freedom of VR!
Test the Connection
You might feel a mix of excitement and anticipation as you prepare to test the connection between your VR headset and TV. Here’s how to guarantee everything’s working smoothly:
- Put on your headset and check for a signal on your TV.
- Look for any display lag; if there’s a delay, it might indicate a connection issue.
- Adjust the settings on both devices to optimize performance—sometimes, resolution changes can help.
- Perform connection troubleshooting, like reconnecting the devices or restarting them if problems persist.
Testing your connection is crucial to guarantee a seamless experience. By following these steps, you’ll be ready to plunge into your VR adventures without interruptions or frustrating delays.
Enjoy Your VR Experience on TV
As you engage in your VR experience on the TV, it’s essential to immerse yourself fully in the virtual world. This is where immersive gaming truly shines, allowing you to escape reality and plunge into incredible adventures. You’ll want to verify your headset is properly calibrated and the audio is optimized for a richer experience. Share your journey with friends and family by letting them join in on the excitement; they can watch your gameplay unfold in real-time. Whether you’re battling enemies or exploring vast landscapes, the visuals will come alive on the big screen. Don’t forget to experiment with different games and experiences—each one offers unique challenges and wonders in the domain of virtual reality. Enjoy your freedom to explore!
Frequently Asked Questions
Can I Connect Multiple VR Headsets to One TV?
You can connect multiple VR headsets to one TV, depending on the system’s compatibility. This allows for VR sharing experiences, letting you and friends enjoy immersive adventures together, enhancing your gaming freedom and fun.
Will My VR Headset Work With Any TV Brand?
Connecting your VR headset to any TV brand is like fitting a puzzle piece; it depends on VR compatibility concerns. While most modern TVs work, some brand limitations might affect your experience, so check compatibility before buying.
What if My TV Doesn’T Have an HDMI Port?
If your TV doesn’t have an HDMI port, consider alternative connections like VGA or composite. Confirm your VR headset’s device compatibility with adapters, allowing you to enjoy immersive experiences without being limited by your TV’s ports.
Can I Use My VR Headset Without a TV?
You can absolutely use your VR headset without a TV; after all, “the world’s your oyster.” Enjoy full VR headset functionality for immersive gaming experiences without the need for a screen. Freedom awaits!
How Do I Troubleshoot Connection Issues Between Devices?
If you’re facing connection problems, first check device compatibility. Confirm both devices support the same connection type. Restart them, check settings, and update firmware. If issues persist, consult the user manuals for further assistance.
