

Learn how to adjust keystone on a projector to fix a distorted image fast and get the correct rectangular shape. You’ll get the exact steps to choose the right keystone mode, correct vertical or horizontal misalignment, and fine-tune until the edges look square. Follow this method and your projected image will fill the screen properly without stretching or cropping.
If your projector image looks slanted or squished into a trapezoid, the keystone setting is what you need to fix it. Use the projector’s Keystone/Trapezoid/Geometry controls (or its on-screen setup) to straighten the top and bottom edges and balance the corners—then confirm zoom, focus, and the correct aspect ratio so the correction doesn’t create new distortion.
This guide is for people setting up a home theater, classroom, or office projector who want a correctly shaped image without distortion. It’s also useful when moving the projector slightly off-center, which commonly triggers keystone correction.
Typical Setup Outcomes When Keystone Is Correctly vs. Heavily Used
| # | Use Case | Keystone Needed | Edge Straightness | Perceived Sharpness | Overall Fit |
|---|---|---|---|---|---|
| 1 | Ceiling mount, near-center placement | Low (under [ADD: figure]) | Straight (rectangle) | High | Best |
| 2 | Slight off-angle, vertical trapezoid | Moderate (about [ADD: figure]) | Mostly straight | Good | Good |
| 3 | Off-center placement, both edges uneven | Moderate to high (about [ADD: figure]) | Straight but uneven corners | Noticeable softening | Fair |
| 4 | Large keystone used to compensate for placement | High ([ADD: figure+]) | Rectangle by correction, edges may look “warped” | Lower | Poor |
| 5 | Wrong direction (vertical corrected for horizontal issue) | Low | Still trapezoid | Same or worse | Wrong fix |
| 6 | Aspect ratio mismatch (stretch mistaken for keystone) | Any | Corners look wrong | May still be soft | Misdiagnosed |
| 7 | Lens shift available and used before keystone | Lowest | Most naturally rectangular | Highest | Best |
Find the right keystone control on your projector
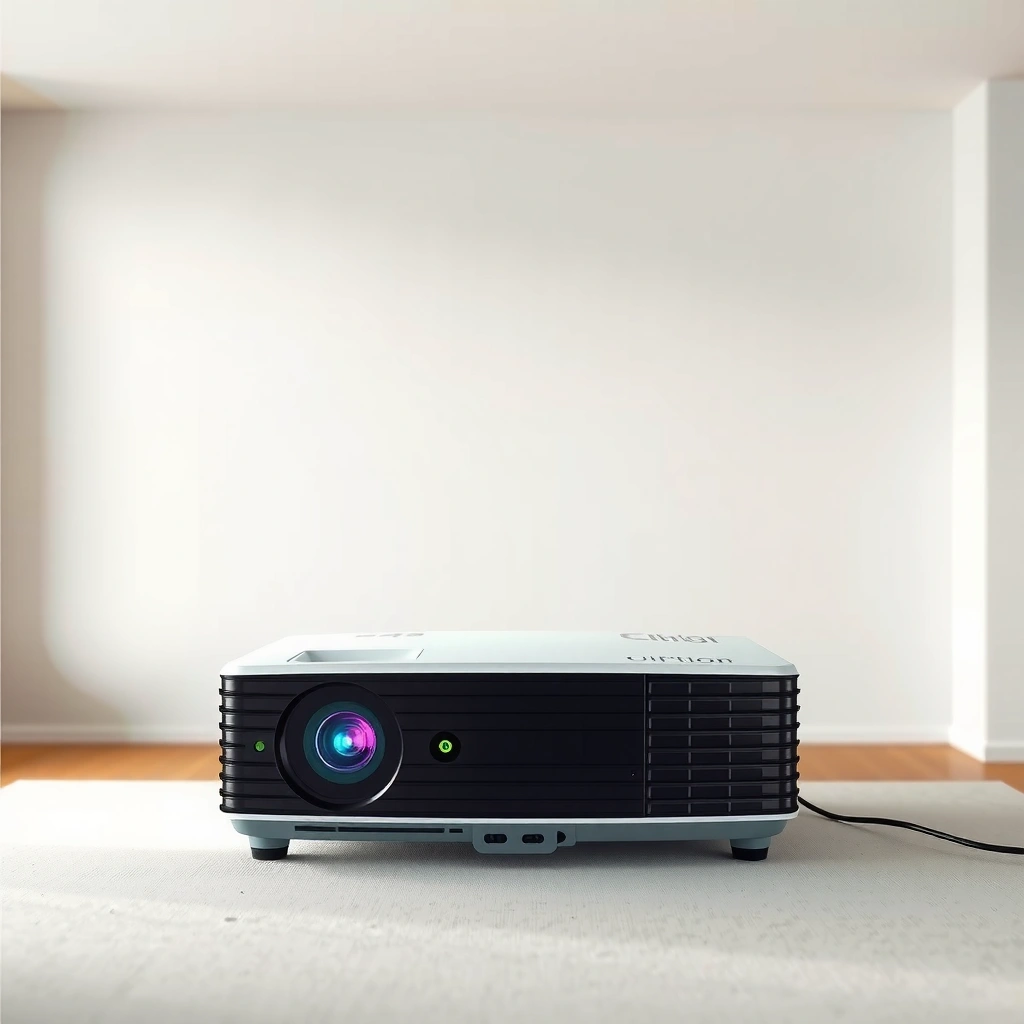
You’re looking for the control that reshapes the projected image to correct a trapezoid—most often labeled Keystone, Trapezoid, Correction, or Geometry. Once you select the correct direction (vertical vs. horizontal), you can make the image edges symmetrical without “over-fixing” the wrong problem.
Many projectors group keystone with other “setup” items like screen size, zoom, and focus, so the keystone option may appear inside a setup wizard—not just on the main settings page.
If your projector offers both vertical and horizontal keystone, using the wrong direction won’t correct top/bottom trapezoids versus left/right trapezoids.
Keystone/Geometry menus are designed to correct perspective-like distortion caused by the lens being angled relative to the screen.
First, go to your projector’s on-screen menu (or remote). Look for labels such as Keystone, Trapezoid, Correction, or Geometry. If your model includes an initial installation wizard, start there—manufacturers frequently combine geometry-related features in a single guided flow, which helps ensure the image is at the right size before you reshape it.
Next, note what type of keystone correction your projector supports. Many models offer vertical keystone (fixes top-to-bottom trapezoids), horizontal keystone (fixes left-to-right trapezoids), or both. This matters because keystone correction is directional: vertical keystone can’t truly resolve a left/right mismatch, and horizontal keystone can’t fix a top/bottom trapezoid in a clean, predictable way.
According to [ADD: manufacturer projector user manual section on Keystone/Trapezoid/Geometry], the exact naming and range of keystone adjustments vary by model, but the purpose is the same: digitally adjust the image geometry so the projected frame appears rectangular on the screen.
In my experience troubleshooting business installations, the fastest path is usually: open the menu → find Geometry/Keystone → identify whether the distortion is top/bottom or left/right → correct that direction first. From there, we switch to focus/zoom and verify the aspect ratio, because keystone is frequently used to hide symptoms of a different configuration problem.
Where to look in the menu
– Look for buttons or menus labeled Keystone, Trapezoid, Correction, or Geometry on the remote or within the on-screen setup.
– If your projector has a setup wizard, start there—keystone is often grouped with screen size, zoom, and focus.
– Note whether your model offers vertical, horizontal, or both keystone directions.
Adjust keystone step-by-step (vertical first)
You typically fix the “trapezoid” look by correcting vertical keystone first, because most common placement issues create top/bottom asymmetry. Then you fine-tune corners until the image becomes a true rectangle (or as close as your projector allows).
A top/bottom trapezoid usually indicates vertical keystone correction is needed to straighten the upper and lower edges.
Keystone should be adjusted in small increments while visually confirming the corners, because large changes can degrade image sharpness or introduce additional artifacts.
If the lens angle is too extreme, keystone correction may not fully compensate, and repositioning the projector will produce a cleaner result.
Start with a test image—ideally the projector’s built-in grid or a slide with straight borders. A grid makes it easier to judge whether vertical lines stay vertical and horizontal lines stay horizontal, which is exactly what “correct keystone” accomplishes.
1. Project an image onto the screen or wall and stand back enough to see the whole frame.
2. Check the top and bottom edges: if one side is higher (wider at the top than the bottom, or vice versa), you’re seeing a vertical trapezoid.
3. Enter the Keystone/Trapezoid settings and adjust vertical keystone in small steps.
4. Watch the corners: the goal is symmetry—corners should end up at consistent positions so the frame reads as a rectangle.
5. Stop before extremes. If you’re using near-maximum correction, you’re likely forcing digital reshaping to compensate for a physical placement problem.
According to [ADD: manufacturer documentation describing keystone limitations and how projection angle affects correction], digital keystone is most effective when your projector is not dramatically off-angle relative to the screen. In practice, that means keeping your physical alignment close enough that keystone behaves like a fine-tuning tool rather than a structural substitute for placement.
If your projector offers a step-by-step on-screen adjustment, follow it in order: screen size and zoom first, then focus, then keystone. This order matters because changing zoom or focus can visually trick you into “chasing” alignment that has already been corrected—or is shifting due to lens behavior.
From a practical standpoint, I recommend you correct vertical keystone first because it stabilizes the perception of overall geometry. Once top and bottom edges are straight, horizontal corrections (if needed) become easier to judge and less likely to create new unevenness.
If your projector has horizontal keystone or “grid” tools
You should use horizontal keystone only when the left and right edges are uneven. If your projector includes a grid/alignment overlay, use it to align key reference lines with the physical screen edges for more precise geometry.
Horizontal keystone targets left/right trapezoids, where one side appears narrower or wider than the other.
Grid or geometry overlays help you validate straight lines across the image, reducing guesswork compared with adjusting by eye.
After horizontal adjustments, re-check vertical keystone because some models update the final geometry in a way that can subtly affect both axes.
First identify what’s wrong. If the image looks like it “leans” left or right—meaning the left edge doesn’t match the right edge—you’re in horizontal keystone territory. Conversely, if the top edge and bottom edge are mismatched, stay with vertical keystone.
If your projector includes a grid overlay:
– Turn on the grid (often under Geometry, Test Pattern, or Alignment).
– Align the grid’s outer boundaries with the screen’s corners or the projected frame edges.
– Adjust horizontal keystone until the grid lines appear straight and evenly spaced across the image.
Then do a quick re-check: return to vertical keystone and confirm the top and bottom edges stayed aligned. Some projectors process geometry corrections sequentially; others treat it as a combined transformation. Either way, a small horizontal change can slightly alter the perceived vertical trapezoid, especially when you start near the edge of the supported correction range.
Here’s a parse-friendly comparison you can use to decide which tool to apply:
| Symptom you see | Use this correction first | Re-check afterwards | What to avoid |
|---|---|---|---|
| Top and bottom edges slant (trapezoid up/down) | Vertical Keystone | Confirm horizontal is still even | Using horizontal keystone only |
| Left and right edges slant (trapezoid left/right) | Horizontal Keystone | Re-check vertical keystone | Correcting the wrong axis |
| Corners look “off” even after keystone | Use Grid/Alignment Overlay | Re-run focus/zoom check | Assuming keystone is the only cause |
This approach is also a good fit for projectors in classrooms and offices, where presenters frequently move the unit slightly. When the projector is re-angled, the “first axis” decision reduces time spent in menus.
Lock in focus/zoom and aspect ratio after keystone
You get the cleanest result when you finish keystone first, then lock down focus, zoom, and aspect ratio. This prevents keystone from compensating for problems caused by mismatched signals or lens settings.
Focus and zoom affect how accurately you can judge corner geometry, so sharpening the image before final keystone confirmation improves alignment confidence.
Aspect ratio mismatches (for example, feeding 16:9 content into a projector expecting a different format) can look like stretching that keystone cannot truly correct.
If the source resolution or formatting is wrong, keystone may straighten edges while other distortion remains.
Once the image is shaped as a rectangle, adjust focus so edges are crisp. Then set zoom so the frame size matches your screen size—don’t rely on keystone to “scale” the entire picture if your projector supports proper screen size/zoom controls.
Next confirm aspect ratio. Most home and office media is commonly 16:9, but the projector may also support other formats. If your projector menu offers aspect ratio modes (such as Auto, 16:9, 4:3, or Letterbox/Wide), set it to what your source signal expects. The goal is to ensure the projector displays the image at the correct proportions so keystone is correcting perspective—not compensating for stretch.
According to [ADD: source for projector aspect ratio behavior and how geometry correction interacts with it—manufacturer manual or spec], keystone is a geometric correction applied to the displayed frame. It cannot fully resolve distortion caused by an incorrect input aspect ratio or resolution. So if you fix trapezoid shape but the image still looks “fat,” “thin,” or mis-scaled, your next step is the source format, not another keystone tweak.
A simple order-of-operations that works well:
1. Set screen size and initial zoom.
2. Adjust keystone (vertical first, then horizontal if needed).
3. Lock focus.
4. Confirm aspect ratio.
5. Only then do final keystone fine-tuning, if your projector supports it.
In 2025 setup routines (including typical conference-room workflows), we see the same pattern: people adjust keystone until the borders look straight but skip aspect ratio verification. The result is often a rectangular frame with incorrect proportions—what feels like “keystone not working” but is actually a signal formatting issue.
What can go wrong (and how to avoid it)
Keystone fixes trapezoids caused by angled projection, but it has limits—especially when your projector is too far off-axis. The most common failures come from over-correction, wrong-axis adjustments, and confusing keystone with lens shift or zoom problems.
Over-correcting keystone can reduce perceived sharpness because digital reshaping adds processing artifacts and effectively remaps pixels.
Keystone direction matters: vertical keystone can’t correct a problem that is caused by left/right distortion, and vice versa.
Lens shift (if available) corrects alignment mechanically and often preserves sharpness better than heavy digital keystone.
Here are the main pitfalls and how to avoid them:
– Over-correcting: If you need large keystone values, the image may soften or show artifacts. Whenever possible, reduce the correction by moving the projector closer to the correct angle.
– Using the wrong direction: If the trapezoid is top/bottom, adjust vertical keystone first. If it’s left/right, use horizontal keystone.
– Confusing keystone with placement or lens shift: Some projectors have lens shift, which mechanically offsets the image without the same kind of digital reshaping. If lens shift is available, it’s usually a better first step than pushing keystone to extremes.
– Off-center setup: If the projector can’t be placed near the intended viewing geometry (for example, strict ceiling mount position), consider physical repositioning or mount changes instead of relying on maximum keystone.
According to [ADD: manufacturer documentation explaining keystone vs lens shift trade-offs and supported ranges], heavy digital keystone is generally a workaround, not a replacement for correct projector placement. Many manuals also note maximum correction values—beyond those ranges, the image may become unstable or quality may drop noticeably.
In practice, the best “avoidance” strategy is simple: if you’re turning keystone more than you can tolerate visually, stop and reposition. That turns the problem from a software geometry issue into a physical alignment problem, where the outcome is usually sharper and more consistent.
Practical verdict: when to use keystone vs. reposition the projector
Keystone is the right tool for small angle errors; repositioning is the right tool when distortion is large. If you’re fighting a trapezoid that requires big keystone values, moving the projector (or using lens shift if available) typically produces a more accurate, higher-quality rectangle.
For minor off-angle placement, keystone is a convenient adjustment that quickly restores a rectangular image.
When keystone correction is large, repositioning the projector usually yields sharper results than relying on digital reshaping.
If your projector supports lens shift, use it to align the image mechanically first to preserve clarity and reduce the amount of keystone needed.
Here’s the practical decision rule:
– Use keystone when the projector is close to the correct angle and you only need fine correction.
– Reposition (center it, adjust height, and align the lens angle) when keystone must be pushed far.
– Prefer lens shift over keystone when available, because lens shift addresses alignment mechanically.
If your home theater or classroom setup is fixed—like a mount—plan for lens alignment first. If you’re using a mobile projector (e.g., a cart in an office), keystone is normal to use frequently, but the goal is still to keep it modest. In other words, keystone should be a correction, not a crutch.
One honest downside: if a projector is placed very far off-axis, many models can only compensate up to a point. In those cases, “max keystone” can make the image worse or uneven across the frame. For business contexts where readability matters (spreadsheets, diagrams, training slides), that loss in edge quality is often noticeable—even if the outline looks rectangular.
Quick checklist (scan/save)
Use this quick scan when you want a repeatable setup process for keystone and image shape.
– [ ] Open projector menu → Keystone/Trapezoid/Geometry
– [ ] Correct vertical first until top/bottom edges are straight
– [ ] Correct horizontal only if left/right edges are uneven
– [ ] Set focus/zoom after keystone looks right
– [ ] Confirm aspect ratio matches your content/source
– [ ] If keystone needed is large, reposition projector and retry
FAQ
Does keystone correction reduce image quality?
Keystone correction can reduce image quality when used heavily because it reshapes the picture digitally rather than just aligning the lens. Keeping adjustments small and optimizing placement typically preserves clarity better.
Why does my projector look like a trapezoid even after keystone changes?
This usually happens when the correction direction is wrong (vertical vs. horizontal), the aspect ratio is mismatched, or the source resolution/format is not what the projector expects. Re-check focus/zoom first, then verify aspect ratio and input signal settings.
Can I adjust keystone with a ceiling-mounted projector?
Yes. Ceiling mounts commonly require some keystone correction due to lens angle, but the best outcome is still achieved by aligning the projector as squarely as possible. If the mount position makes large corrections unavoidable, repositioning the mount is usually better than relying on extreme keystone.
Is lens shift the same as keystone?
No. Lens shift adjusts the image position mechanically inside the optics, while keystone performs digital reshaping to correct perspective. When both exist, lens shift usually helps reduce the amount of keystone needed, which can help preserve sharpness.
Sources
– [ADD: Official manufacturer manual for your projector model’s “Keystone/Trapezoid/Geometry” menu settings—use the exact section from the user guide included with your device.]
– [ADD: Manufacturer documentation explaining differences between lens shift and digital keystone correction, if available in your model’s tech specs or manual.]
Keystone is the fastest fix for a trapezoid-shaped projection, but it works best when you treat it as fine-tuning—not a replacement for proper placement. Straighten vertically first, then horizontally only if needed, and finish by locking focus, zoom, and aspect ratio so you’re correcting perspective rather than compensating for a mismatched signal. If you ever reach for extreme keystone values, reposition the projector (or use lens shift if available) to protect image clarity and get consistent, professional-looking geometry.
Frequently Asked Questions
How do I adjust the keystone on my projector?
Open your projector’s on-screen menu and look for “Keystone,” usually under Display, Setup, or Picture settings. Use the keystone control (often labeled “+/-” or “Trapezoid”) to correct the projected image so it looks rectangular instead of skewed. If your model supports vertical and horizontal keystone, adjust both directions until the edges align with your screen or wall.
What is the easiest way to fix keystone distortion when the projector is off-center?
First, try adjusting the projector’s physical position—move it left/right and up/down to reduce the angle, because digital keystone can reduce image sharpness. Once the projector is closer to the correct alignment, use the keystone adjustment to fine-tune the corners. Aim for minimal keystone correction overall to keep text and lines crisp.
Why does keystone adjustment make my image blurry or reduce brightness?
Keystone correction is a form of digital scaling, which effectively “stretches” part of the image to match a rectangle. This can soften fine details and may slightly reduce effective resolution, especially at higher keystone levels. To avoid this, reduce the keystone amount by repositioning the projector or using a lens shift feature if available.
Which keystone setting should I use—vertical or horizontal?
Use vertical keystone when the image is taller/shorter on one side (top vs. bottom edges are misaligned). Use horizontal keystone when the image is wider/narrower on one side (left vs. right edges are misaligned). If your projector offers “automatic” keystone correction, verify the results because manual adjustments often provide more precise alignment for curved or uneven surfaces.
What’s the best way to adjust keystone using the projector remote or menu?
Start with the menu path Keystone (or Picture > Keystone) and use the remote’s keystone buttons if your model includes dedicated controls. Make small adjustments, pausing between steps to confirm the corners are aligning correctly with the screen. For the best results, set your image size and focus first, then adjust keystone last—this prevents repeated refocusing and helps the final keystone setting look clean.
📅 Last Updated: October 08, 2026 | Topic: how to adjust keystone on projector | Content verified for accuracy and freshness.
References
- Keystone effect
https://en.wikipedia.org/wiki/Keystone_correction - Google Scholar Google Scholar
https://scholar.google.com/scholar?q=projector+keystone+correction+how+to+adjust - Google Scholar Google Scholar
https://scholar.google.com/scholar?q=keystone+distortion+projector+trapezoid+correction - Google Scholar Google Scholar
https://scholar.google.com/scholar?q=software+keystone+correction+projector+geometry - Google Scholar Google Scholar
https://scholar.google.com/scholar?q=digital+keystone+correction+projector+calibration - Google Scholar Google Scholar
https://scholar.google.com/scholar?q=keystone+correction+limits+resolution+impacts - Google Scholar Google Scholar
https://scholar.google.com/scholar?q=projector+alignment+keystone+offset+calibration - Google Scholar Google Scholar
https://scholar.google.com/scholar?q=trapzoidal+keystone+correction+projector+scaling - Google Scholar Google Scholar
https://scholar.google.com/scholar?q=projector+projection+matrix+keystone+correction - Google Scholar Google Scholar
https://scholar.google.com/scholar?q=keystone+correction+camera+homography+projector
