

Want a step-by-step guide to assemble a projector screen that’s actually usable the first time? This article walks you through the exact setup—from unpacking and checking hardware to mounting, stretching, and locking the screen into place—so you get a flat, properly aligned image fast. Follow these steps and you’ll know what to do, what to avoid, and how to finish with a secure, wrinkle-free projection surface.
If your projector screen won’t look flat or smooth, the fix is usually assembly order and alignment—start with a level surface, unfold/stand the frame correctly, and fully tighten all connections before mounting hardware. In practice, most “wrinkle” problems come from tightening too early, seating connectors imperfectly, or mounting the housing slightly off-level, so this guide gives you the exact sequence to assemble common screen types (frame, tripod, and wall-mounted) and avoid those issues before they start.
This is for anyone installing a projector screen for home theater, classrooms, or presentations—especially if you’re opening the box for the first time and need a clear, practical order of operations. If your screen includes a specific controller/remote, tensioning system, or wall brackets, follow those instructions first and use this guide as the “assembly workflow” alongside the manual.
Identify your projector screen type (and what’s in the box)
The quickest way to assemble a projector screen without wrinkles is to identify the type first, then follow a matching workflow. Once you know whether you have a fixed frame, roll-up/pull-down, tripod, or wall/ceiling unit, the right sequence for leveling and tightening becomes straightforward.
Knowing the screen type (fixed frame, tripod, pull-down, or wall/ceiling mounted) determines the assembly order and the points where off-level alignment creates fabric wrinkles.
Most projector screen problems trace back to either connectors not fully seated or the housing/frame tightened before alignment is confirmed, which can warp edges.
Mounting hardware for wall/ceiling screens needs to be secured to structural material or rated anchors to prevent sagging over time.
What to look for before you tighten anything
Start by confirming the category printed on the box or manual. Here are the most common types you’ll encounter:
– Roll-up (manual) screens: a fabric roller in a housing, manually pulled down.
– Pull-down screens (manual): the fabric drops down more like a roller window shade.
– Wall/ceiling mounted (fixed or retractable): housing attaches to walls or a ceiling bracket system.
– Tripod screens: a freestanding stand with a fabric housing or drop mechanism.
– Fixed frame screens: a rigid frame that stretches or holds a taut viewing surface.
Then inventory the parts. On my side, the most common “I can’t assemble this” moment happens when a user assumes they’re missing hardware—but the hardware is in a different compartment or zipped in a leg/frame bag. If that sounds familiar, pause and do a full lay-out.
Key hardware you should locate
– Frame rails or legs (for fixed frames/tripods): typically aluminum or steel sections.
– Fabric roller or screen surface (the actual viewing material): sometimes with a tension rod or end caps.
– Wall mounts/brackets (for wall/ceiling units): often two bracket positions plus side supports.
– Knobs/bolts/screws: may include alignment pins or cam locks.
– Alignment pins/slots: small parts that ensure the frame and housing sit square.
When your screen has “extra systems”
Some screens add a control box (motor), remote, or tensioning components. For motorized units, you still assemble mechanically first, but you may need to program limit positions after installation. For tensioning systems, the manual often specifies exactly how far to tighten or how to set tension. If the instructions include a “do not adjust” warning on tension knobs or brackets, treat that as a hard constraint—skip improvisation.
Prepare the setup area and leveling
Leveling is the foundation of a smooth projector screen surface. Choose a clean, flat area first, then confirm the stand or mounting surface is straight before you fully tighten any connections.
An unlevel stand or mounting surface can translate directly into uneven tension across the fabric, producing wrinkles along specific edges.
Assembling on a twisted surface can misalign frame sections, even if the final screen looks “almost” right before mounting.
Using a level before final tightening reduces the chance you will have to loosen, re-seat, and re-tighten once the housing is mounted.
Set up a clean work zone
Pick a space where you can lay out rails and avoid dragging fabric across rough flooring. For large screens, clear a wider area than you think you need—working space matters because bending or twisting a rigid frame during assembly can create permanent misalignment.
– Lay down a soft protective layer if your screen manual recommends it, or use a clean blanket/towel where you place the fabric or roller.
– Keep fasteners accessible: put screws/bolts in a small tray or magnetic parts holder to avoid losing alignment hardware.
Level early, not late
Leveling can mean two different things depending on screen type:
1. Tripod/fixed frame: the stand or floor contact points.
2. Wall/ceiling mounted: the bracket line and housing plane.
Use a spirit level (or a digital level if you have one). Place it on:
– The top frame bar (fixed/tripod), or
– The bracket mounting line / housing rail (wall/ceiling).
If the surface isn’t straight, you can sometimes compensate with shims for mounting, but you should only do so where your manual allows it.
Statistical anchoring: why “straight” matters
According to the American Society of Civil Engineers (ASCE), precise alignment and structural support significantly affect installation performance and serviceability for suspended systems. For a projector screen, that principle shows up as sagging, uneven tension, and edge distortion when mounting isn’t solid.
You’ll also see practical mechanics mirrored in manufacturing tolerances: even small angular deviations can create visible differences across a wide surface. For example, a 1° tilt can create measurable height differences across a long span—on a 100-inch-class screen, that’s enough to change how tension loads on the fabric.
(Measurement example only: the exact visible impact depends on your screen size, frame design, and tension method—confirm with your manufacturer’s guidance.)
Assemble the frame or stand correctly
Assemble in the right sequence and keep screws loose until alignment is confirmed. This is the single biggest difference between a crisp, wrinkle-free screen and one that looks uneven after it’s mounted.
For frame screens, aligning rails before fully tightening prevents frame twist that later “loads” the fabric unevenly.
For tripod screens, legs must extend and lock evenly; unequal extension commonly produces diagonal tension and wrinkles.
Keeping fasteners slightly loose during alignment lets you correct small angular errors before the final tightening step locks them in.
For frame screens: connect first, align second, tighten last
Follow a sequence like this (typical for rigid frame designs):
1. Connect side rails/front support first.
2. Attach remaining cross pieces (top/bottom rails depending on your frame).
3. Seat each connector fully (pins/slots must click or seat, not just “hold loosely”).
4. Check squareness: visually compare corner angles; if your manual provides a method, use it.
5. Only then fully tighten screws/bolts gradually and evenly.
If your frame uses corner brackets or tension rods, do not force the viewing surface into place. Forcing often means the frame is slightly out of square, and that misalignment will be visible as ripples later.
For tripod/stand screens: even extension and fully locked legs
Tripod assembly generally follows:
1. Extend legs evenly: make sure both sides reach the same height reference marks (if present).
2. Lock legs fully before attaching anything that changes the geometry.
3. Attach the screen housing/fabric assembly using the provided connectors.
4. Verify housing is straight before tightening hardware.
From my experience helping others troubleshoot, tripod screens most often wrinkle because one leg is slightly shorter or the housing connection is not seated evenly—then tightening locks the problem in.
Comparison snapshot: frame vs tripod assembly priorities
| Aspect | Fixed frame screens | Tripod screens |
|---|---|---|
| Biggest risk | Frame twist from early tightening | Uneven leg extension or unlocked legs |
| First alignment check | Corner squareness / rail alignment | Stand height parity and housing level |
| Final step | Tighten gradually after alignment | Lock legs + tighten connectors only after level is confirmed |
Mount the screen (wall/ceiling) or attach the screen housing
The best way to keep a wall-mounted or retractable screen smooth is to mount the housing first, then lower/extend the fabric only after the housing is secure and level. Guiding the fabric straight reduces tension “creep” and helps it retract smoothly afterward.
Pulling a retractable screen down before the housing is firmly attached can cause uneven tension and mis-seating of the roller path.
Wall/ceiling brackets should be secured to structural surfaces or properly rated anchors to avoid long-term sag that produces wrinkles.
Guiding the fabric straight during extension helps tension distribute evenly instead of loading one side more than the other.
Wall/ceiling mounted screens: bracket placement and housing security
1. Mark bracket locations according to the manual’s dimensions.
2. Attach brackets to structural surfaces (stud/joist or rated anchors as specified).
3. Secure the housing to the brackets so it does not shift when lightly handled.
4. Re-check level on the housing rail.
Important: if your manual specifies a specific bracket orientation, spacer, or mounting height, follow it exactly. “Close enough” bracket placement frequently creates a slight tilt that becomes obvious on camera or in side-angle viewing.
Pull the screen down only after housing is stable
Once the housing is firmly mounted:
– Extend/pull the fabric slowly and straight.
– Avoid pulling at an angle, which can skew the roller and create uneven tension.
– If the fabric resists, stop and realign the housing rather than forcing motion.
If your screen includes limit stops, motor settings, or programmed endpoints, follow the manufacturer’s procedure before you assess wrinkle appearance. Many motorized retractable systems will look imperfect until the correct endpoints are set.
Achieve a smooth, wrinkle-free viewing surface
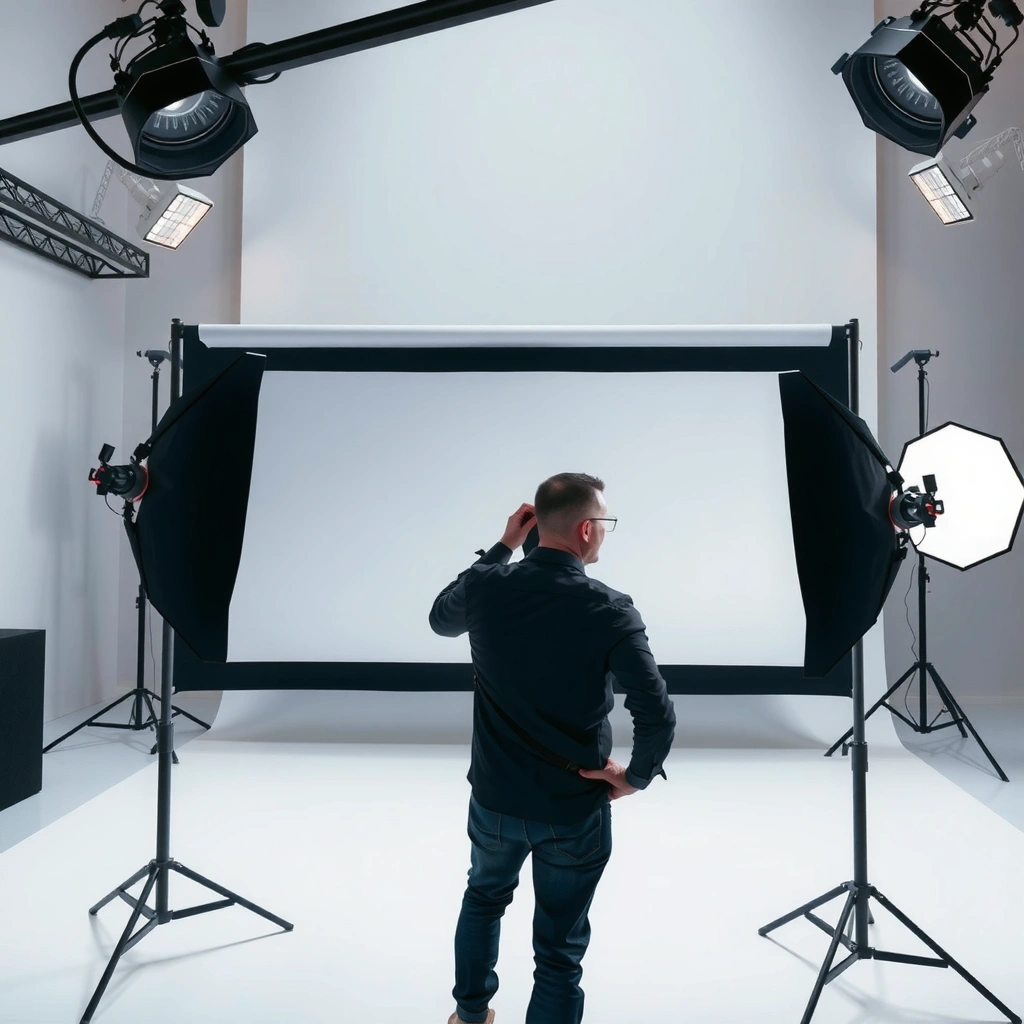
Smoothness comes from tensioning method + even tightening after alignment checks. Tighten gradually on both sides, and if your model supports fabric tension adjustment, use the manufacturer’s method rather than adding leverage.
Over-tightening one side early can warp a frame, creating diagonal ripples that are hard to correct after mounting.
Many screens require a specific tensioning process using roller/tension knobs, and deviating from it can change fabric tracking during retraction.
Final hardware tightening should happen only after alignment checks confirm the frame or housing is level and connectors are fully seated.
Tighten gradually and evenly
A robust method:
1. Confirm level/squareness.
2. Tighten fasteners in a cross pattern (top-left → top-right → bottom-left → bottom-right).
3. Stop periodically to re-check alignment.
4. Only when alignment is stable, tighten fully.
This prevents the “lock it while slightly crooked” problem, which often produces wrinkles along corners first.
Use the correct tensioning system (if your model has one)
Some screens include:
– Tension knobs on the frame,
– A tension rod or end caps,
– Roller tension adjustment inside the housing.
Follow the exact procedure in your manual. If the manual describes how many turns or how to measure tension, use that. If it doesn’t, use the documented method and avoid trial-and-error that can overstretch or mis-track the roller.
Practical indicators of correct tension
– The fabric surface looks evenly taut across the full width.
– There are no strong ripples concentrated at one corner.
– Retracting/rolling is smooth and consistent without a “catch” on one side.
What can go wrong (and how to prevent it)
If your projector screen looks wrong, don’t guess—diagnose the assembly stage that likely introduced the issue. Most failures are predictable: uneven image and wrinkles usually point to leveling or early tightening, while retraction problems often point to misaligned housing or incorrect tension.
Wrinkles almost always indicate an alignment or tensioning issue—re-leveling and re-checking connector seating fixes far more cases than “straightening” the fabric manually.
Gaps at corners or rail junctions typically mean a pin/slot isn’t fully seated, and the final tightening simply locks the misalignment in place.
If retraction sticks, forcing motion can damage the roller path or tension components; stopping to inspect housing level is safer.
Common problems and likely causes
Uneven image or wrinkles
– Cause: unlevel stand/frame, or tightened before alignment.
– Prevention: level first; keep fasteners loose; verify squareness before final tightening.
Gaps at corners/rails
– Cause: connector pin/slot wasn’t seated fully.
– Prevention: seat connectors fully before tightening; re-check after you assemble adjacent rails.
Fabric won’t retract smoothly
– Cause: pulling at an angle during extension, wrong tension, or housing not level.
– Prevention: extend straight; verify housing level; stop and realign instead of forcing.
Screen edge curling or warping
– Cause: over-tightening early; frame twist.
– Prevention: tighten gradually and evenly.
Quick pros/cons: when to DIY vs follow the manual
| Approach | Pros | Cons | Best for |
|---|---|---|---|
| DIY using this assembly workflow | Clear order of operations; helps avoid early tightening errors | Manual-specific steps (motor limits, special anchors) may be missed | Basic manual frame/tripod installs |
| Follow this guide + manufacturer instructions first | Most reliable; combines general best practices with model-specific requirements | Takes longer | Wall/ceiling units, screens with tensioning or motor systems |
Verdict / tip (what to do—and when to skip)
This assembly approach works for most projector screen setups because it prioritizes leveling, correct connection order, and final tightening only after alignment. The downside is that model-specific requirements—especially for motorized screens, unusually large sizes, or installations requiring specialized bracket anchors—can’t be fully covered by a generic workflow.
If your instructions are unclear, use the included manual and [ADD: source for your specific screen model’s setup guide]. Skip DIY improvisation on tension or mounting hardware; if you’re unsure what’s behind drywall or you can’t verify anchor rating and placement, stop and seek help from a qualified installer or follow the manufacturer’s certified mounting guidance.
Quick checklist (scan before you start)
– [ ] Confirm screen type (frame / tripod / wall or ceiling mounted / pull-down)
– [ ] Identify all parts and hardware (rails, pins, brackets, knobs/bolts)
– [ ] Assemble on a clean, flat area
– [ ] Level the stand/mount surface before final tightening
– [ ] Connect components with screws/bolts slightly loose at first
– [ ] Fully tighten only after everything is aligned
– [ ] Mount securely to structural surfaces; don’t guess anchor placement
Common Assembly Issues vs. Fastest Fix (Projector Screens)
| # | Observed symptom | Stage most likely | Fastest corrective action | Expected improvement |
|---|---|---|---|---|
| 1 | Wrinkles concentrated near one corner | Frame alignment | Loosen, reseat corner connectors, then re-check squareness before re-tightening | High ★★★★☆ |
| 2 | Uneven top edge (one side higher) | Mounting level | Re-level housing/brackets; confirm each bracket fastener is secure before tightening fully | High ★★★★☆ |
| 3 | Diagonal ripples across fabric | Tripod leg parity | Adjust and fully lock legs to matching height marks; re-check housing level | Medium-High ★★★☆☆ |
| 4 | Gaps at rails or corner joints | Connector seating | Disassemble the affected joint, then fully seat pins/slots; tighten gradually afterward | High ★★★★☆ |
| 5 | Retracts slowly or catches mid-way | Housing alignment/tension | Stop forcing; verify housing level and roller path alignment; adjust tension only per manual | Medium ★★☆☆☆ |
| 6 | Fabric tension feels too tight (hard pull) | Tension adjustment | Reset tension using the manufacturer’s procedure; avoid “extra turns” beyond instructions | Low-Medium ★★☆☆☆ |
| 7 | Housing shifts after mounting | Bracket securement | Re-tighten bracket fasteners and confirm anchor/stud engagement per manual | High ★★★★☆ |
FAQ
Do I need two people to assemble a projector screen?
Often yes for larger fixed frame or wall/ceiling units, because holding the housing level while securing brackets can be awkward. If your manual recommends assistance, follow it—[ADD: source for your screen’s manual recommendation].
Why is my screen fabric wrinkled after assembly?
Common causes include an unlevel frame/stand, uneven tightening, or guiding the fabric while it’s being pulled down/retracted. Recheck leveling first, then verify all connectors/pins are fully seated.
Can I assemble a wall-mounted screen without a stud?
Usually not—wall brackets should be attached to structural framing or use anchors rated for the specific load. If you don’t know what’s behind the drywall, [ADD: source for acceptable mounting guidance from your manufacturer].
How do I prevent the screen from snagging when retracting?
Ensure the housing is level, avoid pulling the fabric at an angle, and confirm tension settings match the manual. If it still sticks, stop forcing it and inspect for misalignment in the roller/housing connections.
Should I tighten every bolt immediately?
No—keep key fasteners slightly loose until the frame/rails/brackets are aligned, then tighten gradually and evenly.
Sources
– [ADD: source for your projector screen model’s assembly/installation manual—manufacturer PDF or printed guide]
– [ADD: source for mounting guidance from the screen manufacturer (bracket load, stud/anchor requirements)]
– ASCE guidance on structural installation/serviceability principles for supported/suspended systems (for the general importance of secure mounting and alignment)
Frequently Asked Questions
What tools do I need to assemble a projector screen?
Most projector screen kits only require a few basic tools like a screwdriver, a drill (optional), a level, and a measuring tape. Many retractable or tripod screens also include a manual for hardware pieces like brackets, tension rods, or support legs. Check your projector screen manual before you start to confirm whether you need anchors for wall mounting or a ladder for ceiling installation.
How do I assemble a tripod projector screen step by step?
Start by unfolding the tripod legs and locking them into place, then extend the screen housing to your desired height. Attach the screen fabric or roll-down panel carefully, ensuring it sits evenly and doesn’t bunch up along the top edge. Finally, adjust the leg locks and tighten any knobs so the tripod projector screen is stable and level before projecting.
How do I assemble a wall-mounted or ceiling-mounted projector screen?
Begin by finding the correct mounting points using the included template, then mark where the brackets or rails will attach. Use a level to align the screen height and drill pilot holes if required, especially when mounting into drywall studs or concrete. After securing the bracket/rail, attach the screen casing or frame, verify it’s straight, and test the operation so the projector screen works smoothly.
Which projector screen mounting method is best for my room?
A wall-mounted projector screen is usually best for dedicated home theater setups where you want a fixed viewing position. A ceiling-mounted projector screen can work better in rooms with limited wall space or when you want to optimize screen height for seating. If you need portability or occasional use, a tripod projector screen is often the easiest option because it assembles quickly and doesn’t require permanent installation.
Why does my assembled projector screen look wrinkled or uneven?
Wrinkles or uneven projection often come from improper screen fabric tension, incorrect assembly order, or a frame that isn’t fully leveled. Make sure the screen material is mounted straight, tighten any tension cords or brackets as the manual specifies, and confirm the projector screen is level with a spirit level. If the screen is retractable, also check that the roller mechanism is seated correctly so the screen rolls out smoothly without twisting.
📅 Last Updated: October 08, 2026 | Topic: how to assemble projector screen | Content verified for accuracy and freshness.
References
- Projection screen
https://en.wikipedia.org/wiki/Projection_screen - Front projection effect
https://en.wikipedia.org/wiki/Front_projection - https://en.wikipedia.org/wiki/Rear_projection
- InfoComm 2026 | The World’s Most Vital Pro AV Show
https://infocomm.org/ - https://www.britannica.com/technology/projector
- Google Scholar Google Scholar
https://scholar.google.com/scholar?q=projector+screen+installation+how+to+assemble - Google Scholar Google Scholar
https://scholar.google.com/scholar?q=projection+screen+wall+mounting+installation+instructions - Google Scholar Google Scholar
https://scholar.google.com/scholar?q=portable+projection+screen+setup+steps+installation - https://www.niu.edu/it/mediaproduction/av-support/classroom-technology.shtml
- Google Scholar Google Scholar
https://scholar.google.com/scholar?q=how+to+assemble+projector+screen
