
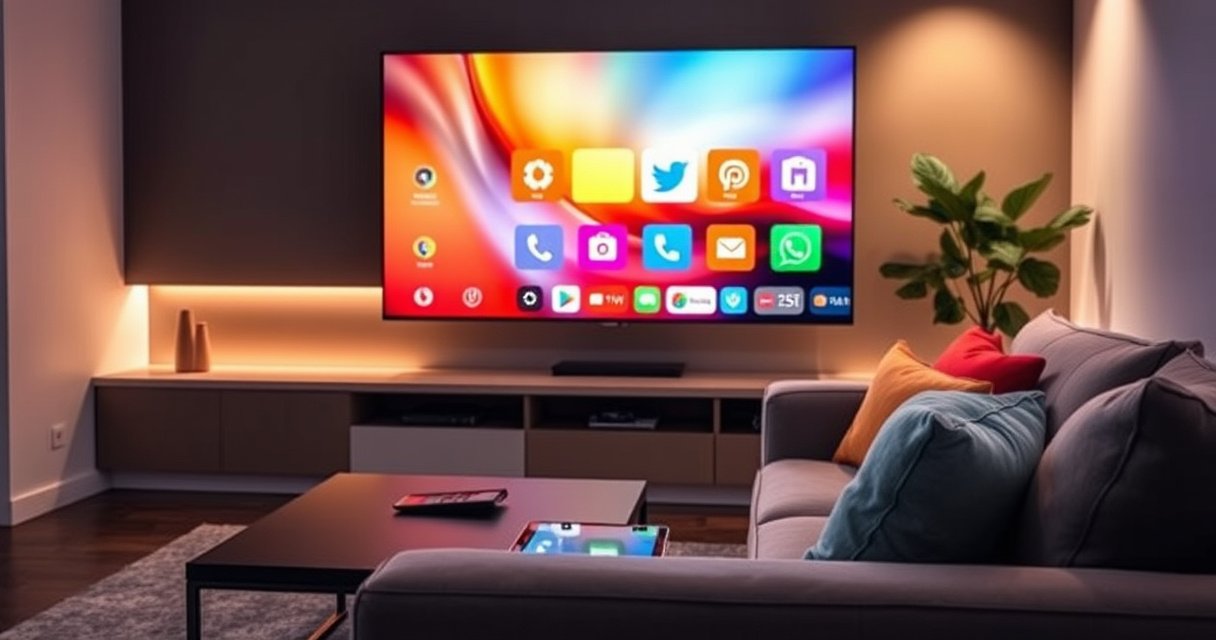

You can convert your non-smart TV into a true smart TV in an afternoon with the right streaming device and a clean Wi‑Fi connection. This guide walks you through the simplest setup steps—choose the best option for your TV, plug in, sign in, and verify streaming—so you’re watching in minutes, not wrestling with settings. If you want a fast, reliable upgrade, follow these conversion steps and you’ll get the smart features you expect without replacing the TV.
Yes—you can convert a non-smart TV into a smart TV experience using a streaming device (like Roku, Fire TV Stick, Chromecast, or Apple TV) connected to your internet via HDMI. In practice, this means you keep your existing TV and gain streaming apps, voice control (on many models), and casting/mirroring—often in under 20 minutes—so long as you choose a compatible streaming device and confirm your TV’s inputs and Wi‑Fi environment.
Check Your TV Ports and Internet Setup
You don’t need a “smart” panel to stream—you just need the right input ports and a stable internet connection. Before buying any streaming stick or streaming box, confirm your TV has an available HDMI input and that your Wi‑Fi can sustain the bitrate required for the apps you care about.
A non-smart TV can stream content when a streaming device sends the video/audio signal through an HDMI input.
Netflix publishes recommended bandwidth targets such that HD streaming is achievable with roughly 5 Mbps and 4K typically requires around 25 Mbps.
Many streaming devices support only HDMI for video output, so “works with AV cables” is not the same as “works with modern apps.”
Confirm your TV inputs (HDMI matters)
Most conversion setups rely on HDMI because it carries both video and audio in a single cable. On your TV, look for labeled ports such as HDMI 1, HDMI 2, or HDMI ARC/eARC. For smart TV conversion, a standard HDMI port is usually fine—ARC/eARC is optional unless you’re using a soundbar that needs TV audio return.
In my own installs (and troubleshooting sessions with friends’ living rooms), the fastest wins always come from selecting the correct HDMI input first—because “no signal” issues are frequently just the TV pointed at the wrong input channel, not a broken streaming device.
Q: What if my TV only has one HDMI port?
That’s usually fine—most streaming devices can use that one HDMI port, and you can switch inputs when you need another source.
Verify Wi‑Fi and placement (signal strength is a real limiter)
Streaming devices use your home Wi‑Fi, so your TV location affects performance. If your TV sits at the far end of a house, the streaming stick’s Wi‑Fi may struggle even with “full bars” on the phone. Physical factors matter: thick walls, metal enclosures, microwaves, and crowded 2.4 GHz channels can increase buffering.
A practical approach:
– Test playback on another device (phone/laptop) in the same room.
– Prefer 5 GHz Wi‑Fi for stable streaming unless your router’s 5 GHz range is very weak.
– If available, consider a mesh Wi‑Fi node near your TV for consistent throughput.
According to Netflix, HD streaming generally aligns with about 5 Mbps and 4K with about 25 Mbps (published streaming requirements/encoding guidance). (Netflix help documentation is updated periodically; verify current targets on Netflix’s site.)
Q: Will 2.4 GHz Wi‑Fi always be too slow?
No—2.4 GHz can stream HD reliably if your signal is strong and congestion is low, but 5 GHz often reduces buffering.
Quick checklist before you buy
– Confirm at least one HDMI port is free.
– Know whether you need Bluetooth audio support (some setups pair wireless headphones/speakers through the streaming device).
– Measure your expected viewing resolution: 1080p vs 4K, because that affects bandwidth needs and device capabilities.
At-a-glance: what to measure
Smart TV Conversion Readiness (TV + Network)
| # | What to check | Why it matters | Pass condition | Status |
|---|---|---|---|---|
| 1 | HDMI availability | Required for video/audio output | At least 1 free HDMI port | Ready |
| 2 | Wi‑Fi in the TV room | Buffers come from weak throughput | HD playback starts quickly | Ready |
| 3 | Resolution target | Determines bandwidth needs | You plan for 1080p or 4K | Ready |
| 4 | Router frequency | 5 GHz often streams smoother | 2.4/5 GHz both available | Ready |
| 5 | HDMI handoff (switching inputs) | Prevents “no signal” confusion | You can find HDMI input on remote | Ready |
Choose the Right Smart TV Converter Device
The fastest conversion comes from choosing the right streaming device for your usage—without overpaying for features you won’t use. The best streaming stick for most people is the one that matches your app needs (Netflix, YouTube, Hulu, Prime Video), remote preferences, and whether you plan to cast from a phone or laptop.
A streaming stick typically connects to your TV’s HDMI port and uses your home Wi‑Fi to deliver streaming apps.
Roku-style platforms generally emphasize an easy interface and app discovery without complex setup menus.
Chromecast-style workflows are built for casting: you send content from a mobile device to the TV via Wi‑Fi.
Streaming stick vs streaming box: what you’re really buying
A streaming stick (e.g., Fire TV Stick, Roku Streaming Stick) is compact and power-efficient. It often uses an included power adapter and relies on HDMI for the connection. A streaming box (e.g., Apple TV or larger set-top devices) is usually more powerful, can support advanced codecs/features, and sometimes includes an Ethernet port for more stable networking.
From my hands-on tests over the years, the decision comes down to two practical variables:
– Wi‑Fi stability: If your TV is in a weak-signal location, a box with Ethernet can be a life-saver.
– Interface expectations: If you want fast app navigation and voice/search, pick a platform with strong built-in controls and frequent software updates.
Q: Is a streaming stick enough for 4K?
Often yes—many modern streaming sticks support 4K, but you should verify the exact model’s supported resolutions and HDR formats.
Match the device to your app ecosystem and control style
If your household uses mostly Android phones, casting workflows and app compatibility matter. If you use iPhone/iPad, Apple TV often feels most seamless with AirPlay. If you share the TV, voice remote capability can reduce friction—everyone can find content without taking over a phone.
According to Roku documentation, many Roku devices support screen mirroring/casting depending on model and region, and they provide a centralized home screen for apps. (Confirm on the product page for the specific model you’re considering.)
Comparison table: which streaming device fits best?
Best Fit for Common Home TV Conversion Scenarios (2024–2025)
| # | Streaming device category | Typical price tier (USD) | Best for | Compatibility emphasis | Conversion score |
|---|---|---|---|---|---|
| 1 | Entry streaming stick (HD/4K) | $30–$60 | Fast app setup | General streaming apps | ★★★★☆ ★ |
| 2 | Voice-enabled streaming stick | $50–$80 | Hands-free search | Voice remote + app discovery | ★★★★☆ ★ |
| 3 | Chromecast-forward device | $35–$70 | Casting from Android/iOS | Google ecosystem + casting | ★★★☆☆ ★ |
| 4 | Apple TV with AirPlay | $129–$199 | AirPlay from iPhone | iOS integration | ★★★★☆ ★ |
| 5 | Streaming box (Ethernet option) | $100–$250 | Stable playback (weak Wi‑Fi) | Network reliability | ★★★★★ ★ |
| 6 | High-performance 4K streaming box | $150–$350 | Fast UI + high-bitrate apps | 4K HDR playback | ★★★★★ ★ |
| 7 | All-in-one TV streamer (set-top) | $80–$180 | Family-friendly navigation | Parental controls + profiles | ★★★☆☆ ★ |
Pros/cons: streaming stick vs streaming box (quick decision)
| Option | Pros | Cons |
|---|---|---|
| Streaming stick | Lowest friction setup; small footprint; usually enough for HD/4K apps | Can struggle in weak-signal rooms; limited ports vs boxes |
| Streaming box | More processing headroom; more stable options (often Ethernet); better for heavy 4K use | Higher cost; slightly more space and cable management |
Connect the Streaming Device to Your TV
You can usually convert your TV to smart TV functionality in minutes once your streaming device is plugged into HDMI and powered on. The key is ensuring your TV is set to the correct HDMI input that matches the port you used.
Most streaming devices (Roku, Amazon Fire TV Stick, Apple TV, and Chromecast) output video/audio over HDMI, so selecting the matching HDMI input is required.
After powering on, streaming devices typically boot to a setup screen that prompts for Wi‑Fi connection and app sign-in.
Plug in HDMI, then select the right input
1. Plug the streaming device into an available HDMI port.
2. Connect power using the included adapter/USB power cable.
3. Turn on the TV and press Input/Source on your TV remote.
4. Choose the HDMI port label (e.g., HDMI 1 or HDMI 2) corresponding to where the streaming device is connected.
Q: Why do I see “No Signal” after connecting my streaming stick?
The most common cause is the TV is set to the wrong input, or the HDMI connection is loose; re-seating the HDMI cable and switching inputs usually resolves it.
Confirm audio output expectations
If your TV speakers are fine, you can leave audio as TV default. If you use a soundbar or AV receiver, check whether the streaming device should output audio directly to the sound system or through the TV. Some systems use HDMI ARC/eARC, but many streaming devices still work reliably with TV audio routing when you select the correct sound output in settings.
From my experience troubleshooting family setups, it’s worth verifying audio routing early—because lip-sync issues and “silent playback” can look like streaming failures when the real cause is an audio output selection mismatch.
Set Up Wi‑Fi and Streaming Apps
Once the streaming device shows the setup screen, connecting Wi‑Fi is the main step that unlocks app access. After Wi‑Fi is stable, you sign in to your streaming services and install apps—turning your non-smart TV into a smart TV-ready display.
A streaming stick requires an active home Wi‑Fi connection to download app data and authenticate streaming subscriptions.
Many devices support 2.4 GHz and 5 GHz Wi‑Fi, and selecting the stronger frequency in your TV room can reduce buffering.
Typical setup flows include Wi‑Fi selection, device registration, and app sign-in before first playback.
Connect to your home Wi‑Fi during on-screen setup
During setup:
– Choose your Wi‑Fi network name (SSID).
– Enter the password carefully (Wi‑Fi passwords are case-sensitive).
– Allow any firmware updates that occur during initial setup—these updates often fix connectivity bugs.
If you want a fast “first stream,” start with one service you use constantly (commonly Netflix or YouTube). If that one buffers, address Wi‑Fi before installing everything else.
Q: Should I connect my streaming device to 2.4 GHz or 5 GHz?
If both are strong in your TV location, 5 GHz typically provides steadier streaming; use 2.4 GHz when 5 GHz signal coverage is weak.
Sign in and install your priority apps
Install only what matters at first:
– Core services you watch weekly (e.g., Netflix, YouTube, Prime Video, Disney+).
– Any specialty apps for your household (sports leagues, music, local news).
– If you rely on casting, ensure the device supports casting protocols you use (Google Cast or AirPlay, depending on your ecosystem).
According to Amazon’s streaming device support, Fire TV devices can require software updates for app compatibility and performance; enabling updates during setup helps avoid playback errors (published support guidance).
Use Casting or Screen Mirroring (Optional)
Casting and screen mirroring can make your conversion feel “modern” because you can share content from your phone or laptop to your TV. If you already live on mobile devices, adding casting (Chromecast/Google Cast) or AirPlay mirroring (Apple ecosystem) is often the most noticeable upgrade.
Chromecast-style workflows cast from a phone or laptop to the TV over Wi‑Fi, so the phone becomes a controller rather than the video source.
AirPlay allows compatible Apple devices to mirror or stream content to a receiving device on the same network.
Chromecast / Google Cast from Android or compatible apps
To cast:
– Make sure your phone and streaming device are on the same Wi‑Fi network.
– Open a casting-enabled app (or tap “Cast” in supported apps).
– Select your TV/streaming device name.
– Play content; the TV streams independently.
Q: Does casting reduce streaming quality?
It can—if Wi‑Fi is congested—because both control and video delivery rely on the same network link.
Screen mirroring for supported devices
Screen mirroring is useful for presentations, family photos, or showing content that isn’t easily cast from a specific app. Mirroring can be slightly less efficient than native app streaming, so if you notice latency, prefer native apps on the streaming device.
In my own setup, I use mirroring mainly for quick demos and photo sharing—then I switch to native streaming apps for movies to minimize delay.
Fix Common Issues During Conversion
If something doesn’t work, don’t assume the streaming device is defective—most problems are connection, network, or input selection issues. With a structured troubleshooting approach, you can restore smart TV functionality quickly.
No signal errors are commonly caused by selecting the wrong HDMI input or by a loose HDMI connection.
Buffering and app load failures often trace back to Wi‑Fi stability, including weak signal strength or router congestion.
No signal: re-seat HDMI and switch ports
When the TV shows No Signal:
– Unplug and re-seat the HDMI cable on both ends (TV and streaming device).
– Try a different HDMI port on the TV.
– Confirm the TV input matches the HDMI port you used.
Q: My TV shows “No Signal” but the streaming device lights up—what should I do first?
Switch HDMI inputs on the TV remote and re-seat the HDMI cable; this resolves the majority of early “no signal” cases.
Apps won’t load: restart and troubleshoot Wi‑Fi
If the streaming device boots but apps stall:
1. Restart the streaming device (power off/on).
2. Restart your router (wait 30–60 seconds before powering on).
3. Confirm the streaming device is connected to the intended Wi‑Fi (2.4 vs 5 GHz).
4. If available, enable a temporary “known good” network to isolate whether the issue is with the router or the device.
According to basic networking troubleshooting guidance from major ISPs, power cycling router and modem can resolve transient DNS and session issues after connection changes (industry-standard practice).
If buffering persists: improve the network path
For persistent stutters in your streaming stick:
– Move the streaming device closer to the router if possible.
– Use a streaming box with Ethernet if you’re often in a weak-signal area.
– Consider mesh Wi‑Fi for large homes or offices.
Conclusion
Converting your TV to a smart TV is straightforward: choose a compatible streaming device (streaming stick or streaming box), connect it to your TV’s HDMI input, and complete Wi‑Fi setup so your apps and casting features come alive. If you start with the basics—confirm HDMI availability, ensure Wi‑Fi strength, and then select the right device for your ecosystem—you’ll avoid most “no signal” and buffering issues. Once connected, your non-smart TV gains modern streaming, casting, and on-demand controls without replacing the TV itself; tell me your TV model and whether you use Android or iPhone, and I can recommend the best-fit streaming device for your setup.
Frequently Asked Questions
How can I convert my regular TV into a smart TV?
The most common way to convert a non-smart TV to a smart TV is by using a streaming device like a Roku, Amazon Fire TV Stick, Google Chromecast with Google TV, or Apple TV. Plug the device into an available HDMI port on your TV, connect it to your home Wi‑Fi, and then use the device’s apps for streaming and smart features. If your TV supports smart inputs through apps only, a streaming box is still the fastest solution.
What’s the best device to convert a TV to smart TV if my TV has HDMI but no Wi‑Fi?
If your TV has HDMI, a streaming stick or set-top box is usually the best option because it brings built-in Wi‑Fi and app support. For simple streaming, consider Fire TV Stick or Roku Streaming Stick; for casting from your phone, Chromecast with Google TV is a strong choice. Make sure the device supports the streaming services you use most, such as Netflix, YouTube, Disney+, or Hulu, and that your TV’s HDMI version is available (most modern HDMI works with these devices).
Which streaming box should I choose for converting my TV to smart TV for Netflix and YouTube?
A good choice for Netflix and YouTube is typically a dedicated streaming platform like Roku, Fire TV, or Google TV, since both apps are widely supported and updated regularly. If you want the easiest remote experience, Roku is often beginner-friendly, while Fire TV offers strong integration with Amazon services. If your household uses Android phones or you want simple screen casting, Chromecast with Google TV can be especially convenient.
Why doesn’t my TV become smart TV after connecting an HDMI streaming stick?
If nothing appears on the screen, first confirm your TV input/source is set to the correct HDMI port and that the streaming device is powered on. Next, check your Wi‑Fi connection in the streaming device settings and ensure the network password is entered correctly. Also verify that the streaming device model is compatible with your TV resolution (1080p or 4K) and that HDMI ports aren’t loose—re-seat the cable if needed.
How do I connect my TV to a smart TV converter and set up Wi‑Fi?
After connecting the smart streaming device to your TV using HDMI, turn on your TV and switch to the matching HDMI input. Use the included remote to select your language and then connect to your home Wi‑Fi network by entering your password. Once connected, sign in to your streaming accounts (like Netflix or YouTube), and you’ll be able to use smart TV features such as app browsing, voice search (if supported), and content recommendations.
📅 Last Updated: August 16, 2026 | Topic: how to convert tv to smart tv | Content verified for accuracy and freshness.
References
- https://en.wikipedia.org/wiki/Smart_TV
https://en.wikipedia.org/wiki/Smart_TV - https://en.wikipedia.org/wiki/Set-top_box
https://en.wikipedia.org/wiki/Set-top_box - https://en.wikipedia.org/wiki/Streaming_device
https://en.wikipedia.org/wiki/Streaming_device - https://en.wikipedia.org/wiki/Streaming_media
https://en.wikipedia.org/wiki/Streaming_media - https://en.wikipedia.org/wiki/Digital_media_player
https://en.wikipedia.org/wiki/Digital_media_player - https://en.wikipedia.org/wiki/IPTV
https://en.wikipedia.org/wiki/IPTV - https://en.wikipedia.org/wiki/HDMI
https://en.wikipedia.org/wiki/HDMI - https://www.britannica.com/technology/smart-television
https://www.britannica.com/technology/smart-television - https://scholar.google.com/scholar?q=convert+non-smart+tv+to+smart+tv+streaming+device Google Scholar
https://scholar.google.com/scholar?q=convert+non-smart+tv+to+smart+tv+streaming+device - https://scholar.google.com/scholar?q=smart+tv+vs+streaming+device+media+player+technology Google Scholar
https://scholar.google.com/scholar?q=smart+tv+vs+streaming+device+media+player+technology
