Banana plugs are cylindrical-shaped electric connectors with metal leaves on them that are extremely useful for merging different wires with a device. Lately, the importance of banana plugs has been on its peak because no one wants to see their room look all messy and disorganized with hundreds of wires lying around, scattered here and there in an unprotected state.
Therefore using banana plugs for your electronic devices such as a speaker is a much safer and efficient choice. However, it’s also very important to ensure that the plug size is compatible with your speaker input.
If you have never used banana plugs at all before, don’t worry! We’re going to teach you how to connect banana plugs to speakers by following our simple and easy guidelines. Let’s begin!
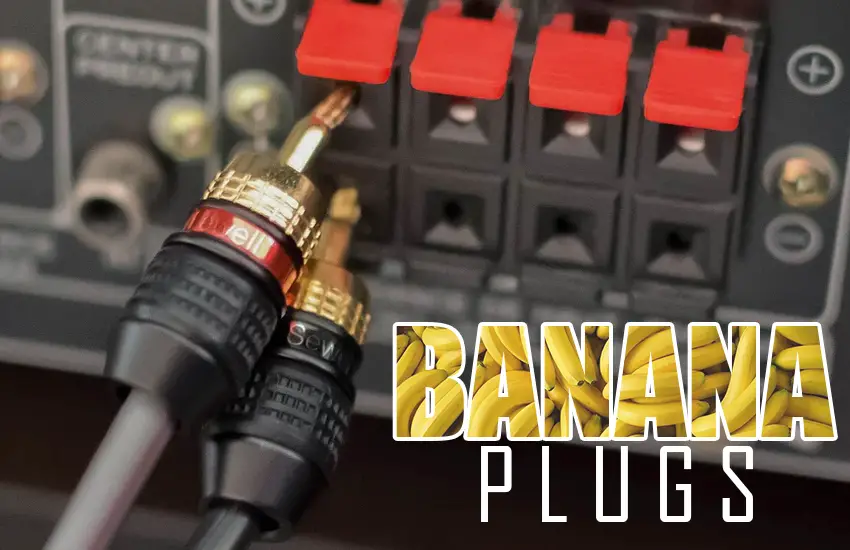
How to Use Banana Plugs For Speakers
With banana plugs, you can stay at ease because the wires of your speaker will never get tangled with each other and you don’t have to change the speaker wires constantly either. Not to mention – you get to enjoy better sound quality when playing music and your cables stay all protected.
Before we show you the steps on how to connect them to your speaker, take a break, quickly grab these necessary tools and come back. You’ll need:
1. Banana plugs (Duh! But remember you’ll require 2 plugs for every wire edge)
2. A wirecutter (We’ll need to cut the wire at one point, so this will come in handy.)
3. Soldering Gun
4. Lengthy Speaker Wire (Make sure it has an extra length of 3-4 feet than required)
5. A torch light
6. Precision Screwdriver (For tightening and loosening small screws)
7. A pair of pliers (to peel wires)
Step-by-step guide to Connect Banana Plugs to Speakers:
Once you have all the tools with you present, follow these steps one by one to connect banana plugs to your speaker wire:
Step 1: Turn Off The Speaker
It’s better that you disconnect all the devices that were connected to the speaker via Bluetooth or any other way. Then hit the power button to turn off the speaker. The tiny LED bulb will blink a few times before going down – indicating that your speaker has been switched off
Step 2: Take Measurements
Now this is the step you need to be extra careful with. If your measurements aren’t accurate and you end up cutting the wire at the wrong point, you’ll need to re-do the measurements from scratch.
Firstly, using a retractable measuring tape, measure the distance between the speaker and the AC receiver. Now it’s time to cut the wire accordingly. Let’s say if the distance came 6 feet, then your wire should be a few inches lengthier, let’s say the ideal wire length here will be 7-8 feet. This is because a lengthy wire can prevent pressure buildup and is less prone to getting damaged.
Step 3: Separate The Wires
After you’ve cut the wire based on your measurements using a wire stripper, you need to now use pliers to peel this wire at a length of 0.5 inches from both the ends. Next, you’ll see that there are multiple thin thread-like metal wires inside – you need to isolate those one by one.
Step 4: Twist The Wire Edges
Now that the mesh of wires have been isolated into single copper wire strands – it’s time to twist the edges on both ends of each wire either using your fingers or pliers to make them more secure and durable. But be careful with those pliers, if you use a greater force, you may end up breaking off and cracking up the edges and damaging the wire. Therefore, we recommend using one’s fingers instead.
Step 5: Unscrew The Banana Plugs
Using a precision screwdriver, you need to unscrew the bottoms of the banana plugs to split them into holes where you can put in the wires.
Step 6: Connect The Banana Plugs
After you’ve isolated the cables at both ends, now it’s finally time to connect the banana flags. The rule is to use two banana plugs for every twisted edge of the copper wire strands. Be very careful and attentive when doing this since there are both – positive and negative wires that need to be correctly connected to the banana plugs based on their polarity.
Step 7: Tighten Back The Screws
Now that all the bare wires have been successfully inserted into the banana plugs, you should tighten the screws which you previously loosened on the bottom of the banana plugs with a screwdriver. This will make the cables more sturdy and secured. Take your time and complete one banana plug and then move onto the next one, you’ll be done in no time.
Step 8: Connect Banana Plugs to Your Speaker
Now you’ve come very close to enjoying loud music quality on your speakers. What you gotta do now is do some color matching to correctly connect the banana plugs to your speakers. Take the red banana plug and insert into the red cable port of your speaker. Now, take the black banana plug and insert into the black port
Step 9: Connect The Banana Plugs Into The AC Receiver.
Follow the exact same method to insert the banana plugs to the receiver just like how you inserted the plugs to your speaker. Don’t mess up while color-matching!
Step 10: Enjoy!
Pat yourself on your back for having come so far all by yourself. Good job! Do a quick test to see if the connection was successful. Simply turn your speaker back on and also turn on the receiver and then play your favorite song to check the speaker’s audio sound quality.
Final Thoughts
Hope we could explain to you what banana plugs are, why they are useful and how you can connect them to your speakers. Pairing banana plugs to your speaker gives you a lot of benefits – your speaker works more efficiently, better sound quality, organized and secured wires and so much more. Just be careful and pay attention while following the steps we have instructed, and you’ll be good to go.
Frequently Asked Questions
Can you use banana plugs on speakers?
Yes, you can use banana plugs to connect to wired sound systems such as a speaker.
How do banana plugs connect to the receiver?
You need to match up the polarity and insert the banana plugs into your receiver’s port/jacks by following the color codes. The black banana plug goes into the black receiver port and the red plug should be inserted into the red port.
How many banana plugs per speaker?
You’ll need approximately 4 banana plugs per speaker – out of them, 2 plugs should be connected to the amp/receiver side and 2 plugs to the speaker’s jacks.
Are banana plugs safe?
Yes, banana plugs are very safe, they add more security and stability to a wiring system and keep your cables organized and tidy.
